By: Scott Murray | Comments | Related: > Reporting Services Report Builder
Problem
What is this new feature to enter data directly into a Report Builder RDL file and how would I use it?
Solution
Some have said that SQL Server Reporting Services (SSRS) and the quick report development tool Report Builder have languished and not kept up with the times. I would say with the advent of Power BI, some even thought SSRS was headed for the decommission shelf. However, Microsoft has been reinvigorating SSRS and, appropriately so, integrating it with Power BI. Furthermore, some features from Power BI are making their way into SSRS. One of these features is the ability to add an embedded data set manually in Report Builder; this process allows for direct entry of data into column and rows.
Although maybe not as handy as a data set that is based on, say for instance, a database query, several main uses could be sourced from a manually entered data source. First, it easily could be used for setting several core values that may be used by report, similar to variables. Furthermore, it could be used to populate a parameter list. Finally, I could see it being utilized in situations where maybe access is restricted to a data source / data set, but a Report Developer needs to develop a report based on that restricted data set.
First to get started you will need the latest version of Report Builder. Additionally, a functioning version SQL Server Reporting Service 2016 or higher is needed to publish the report online. SQL 2017 Report Server can be downloaded from here.
SQL Server Reporting Services Report Builder 2016
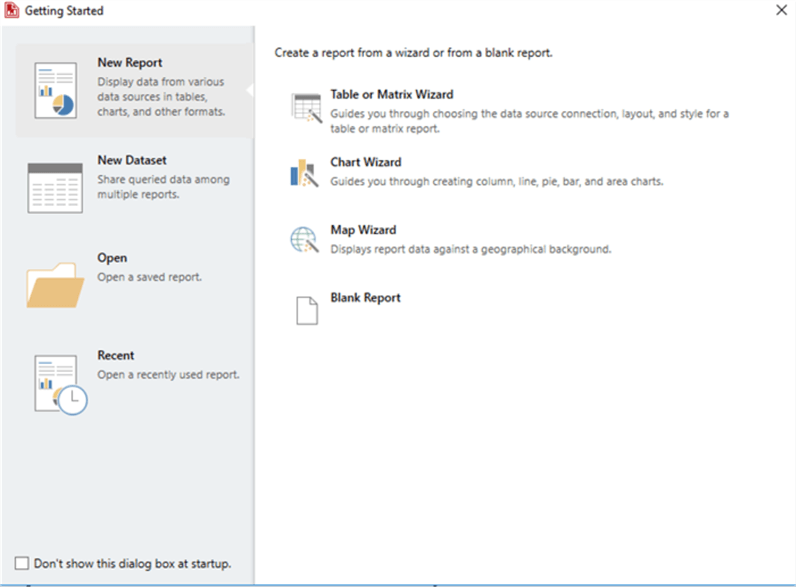
To begin the development process, we first must open Report Builder and create a new report by clicking on the Blank Report option.
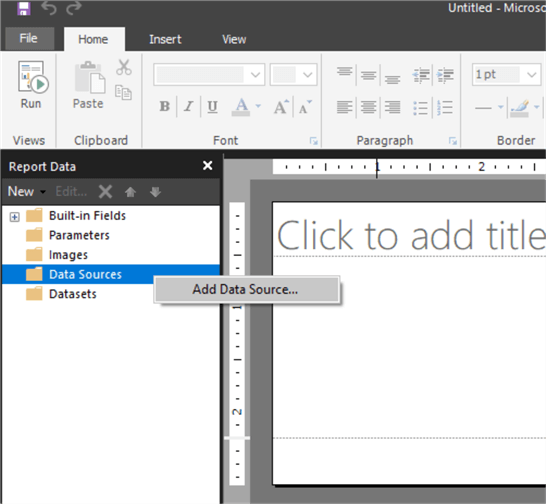
Once a new report is created, the next step is to create a new data source. Remember for this feature, you must actually create a data source within the report, and it will be only available to this report.
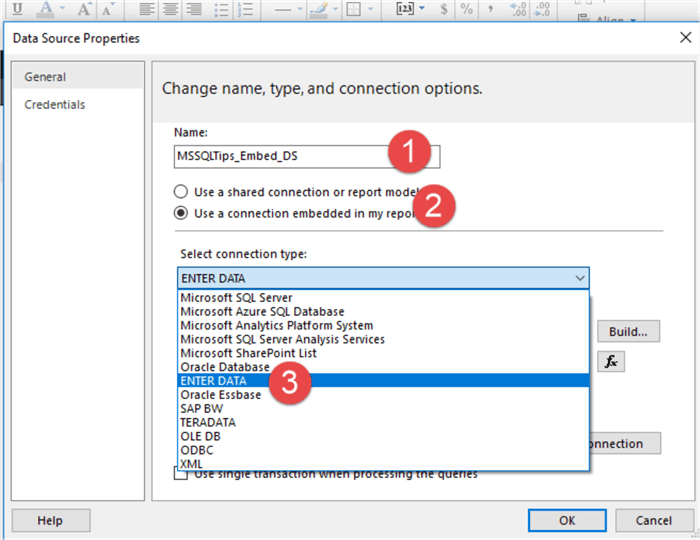
The data source must be assigned a name and we must select "Use a connection embedded in my report" as shown below. Finally, from the Connection Type List, ENTER DATA should be selected and then you click OK.
Now, we must create a data set based on this newly created data source.
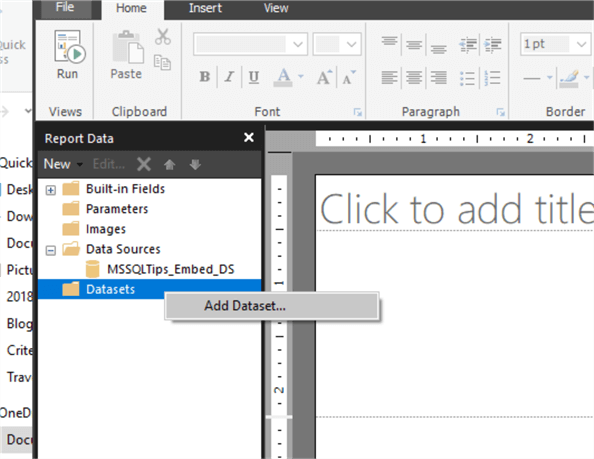
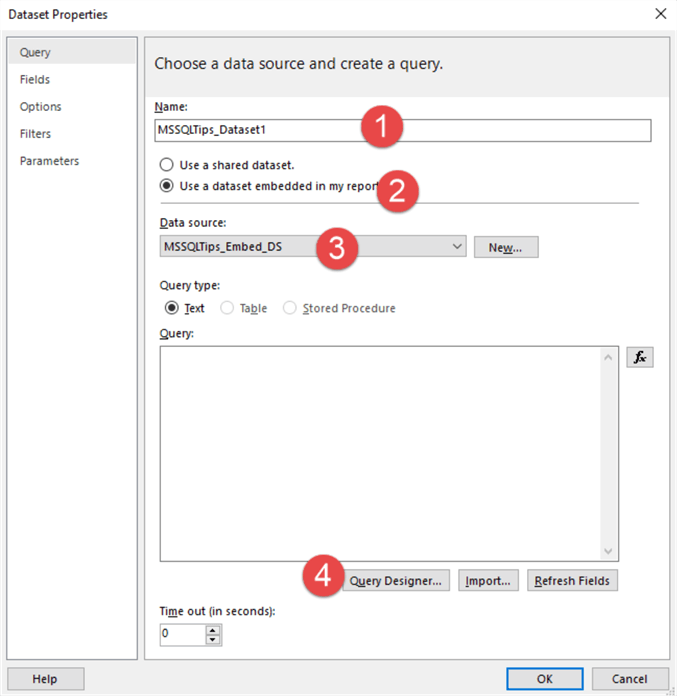
Similar to the data source, we must define the data set name, select "Use a dataset embedded in my report", and then select the Data Source we just created with the ENTER DATA type. Finally, we can "design" or enter our manual data by selecting the Query Designer option.
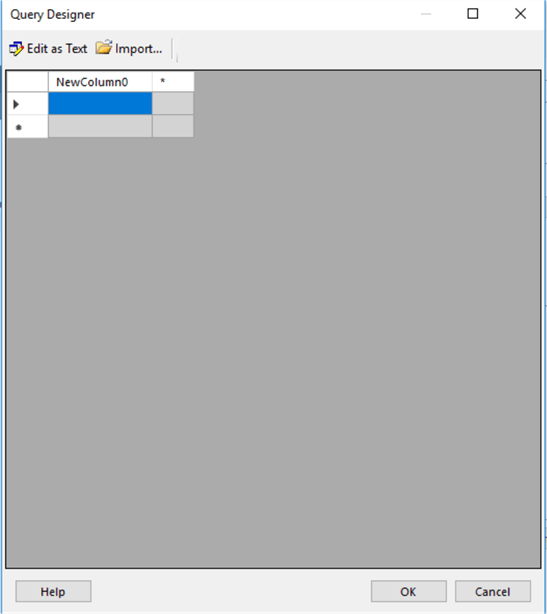
Upon selecting Query Designer, the data entry window opens, similar the below screen print.
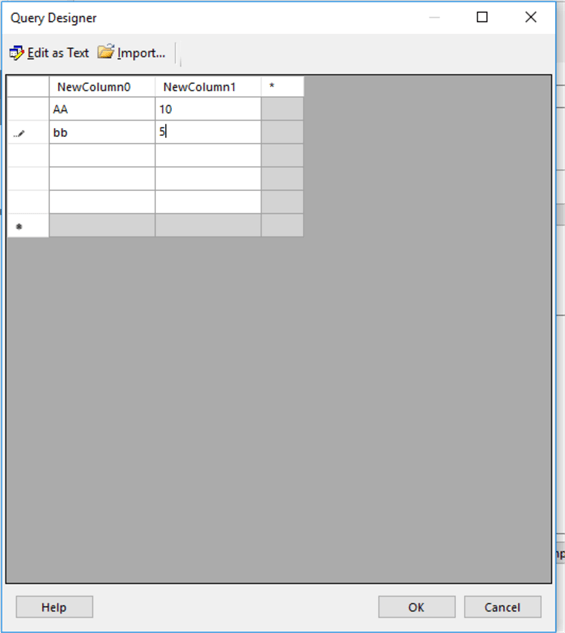
We can just start entering data, using the tab button or mouse to navigate and add new values and rows.
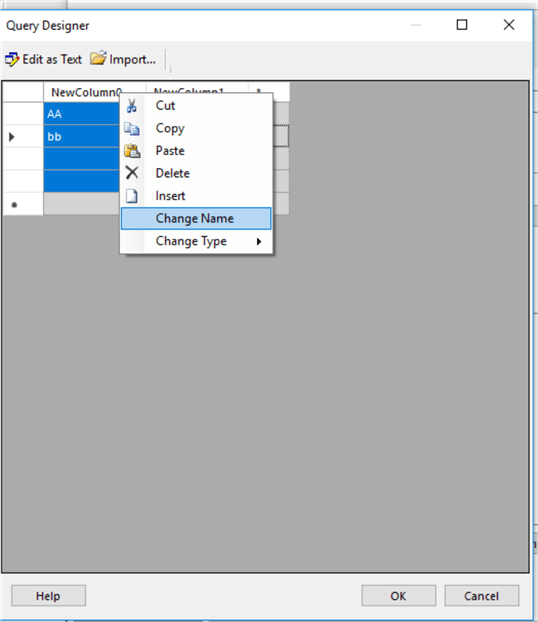
The column names can easily be changed by right clicking on the column header and selecting Change Name. Likewise, double clicking on the column header to allows the report designer to change the field name. Note that spaces and many special characters are not allowed.
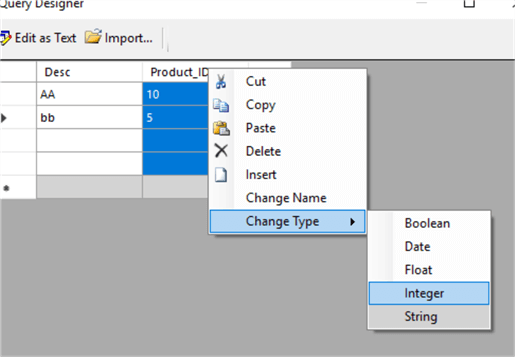
Report Builder sets a default data type based on the data in the column; however as shown below, we can also assign a data type to a field. The various types include:
- Boolean
- Date
- Float
- Integer
- String
Of course, assigning data types is important if this data will be used as a source for such things as parameters or potentially utilized in a lookup capacity.
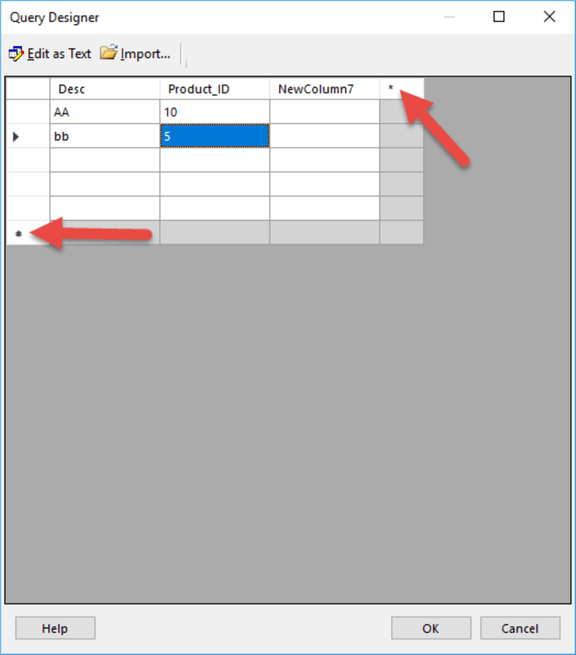
To add new rows, you can click on the * in the bottom left of the data entry window. Correspondingly, to add a new column, you would click on the * in the upper right corner of the data entry window.
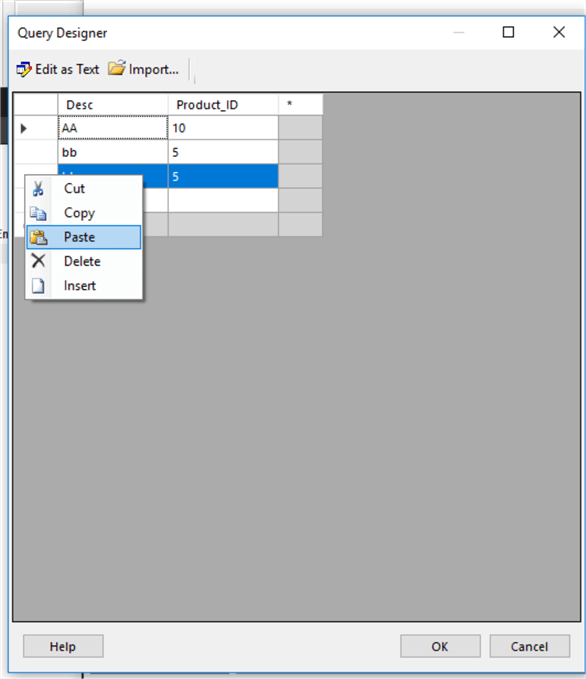
Rows and columns can easily be deleted or cut/copy/pasted by right clicking either the row header or column header. Please note that there is NO confirmation that you want to delete the data.
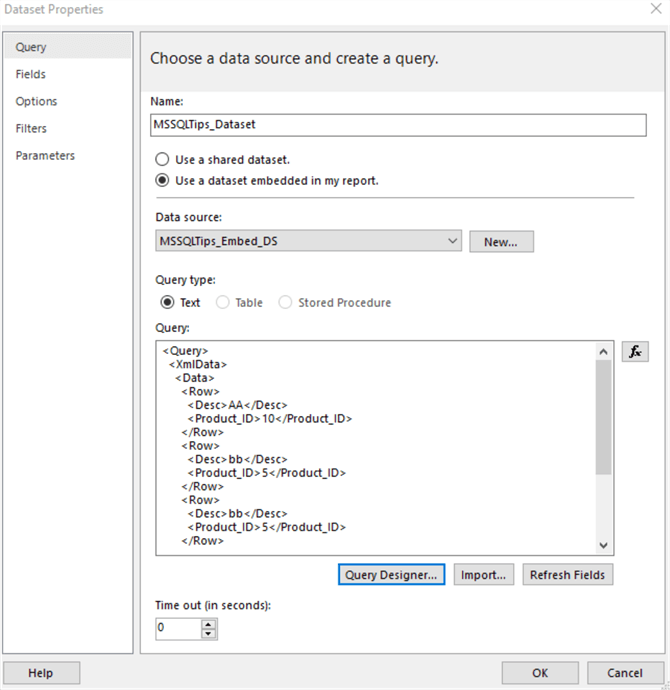
When you are done entering data, you would simply click OK. On the data set properties screen, you will notice the data is XML embedded in the Query text, as illustrated below.
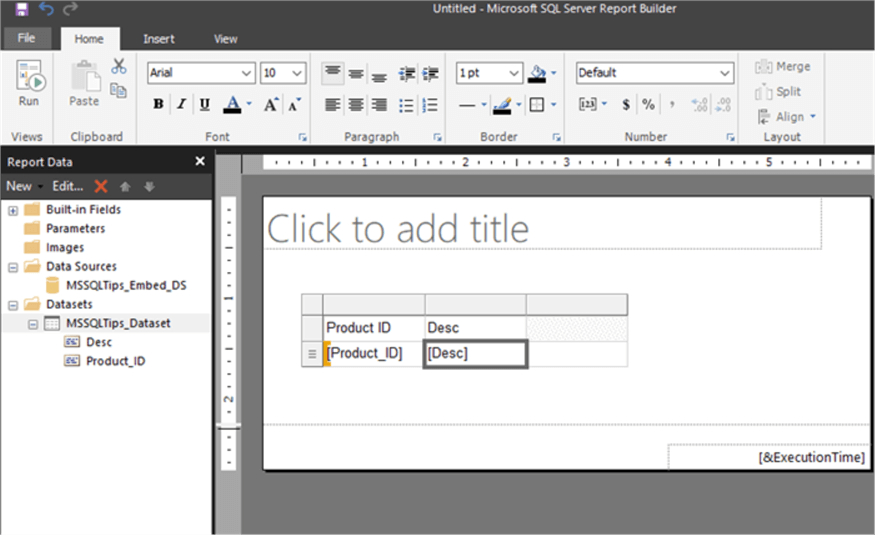
From this step, you can now use the data set as you would any other data set within your report, such as adding the fields to table object on the design grid.
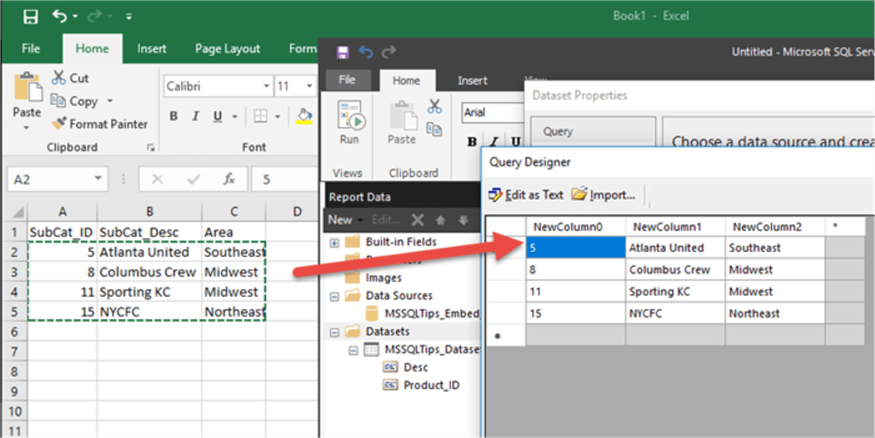
In addition to the manual entry, data can also be easily cut and pasted from Excel. As illustrated in the next screen print, rows and columns from Excel can be copied and then using a right mouse click, the same rows and columns can be pasted into the Query Designer window. Report Builder maintains the rows and columns, but the column headers must be adjusted (note: if you copy the column headers, then will be copied into the Query Designer as the first row).
Once we are finished adding our manually entered data sets and would like to publish the report to a Report Server, you will need to make one modification to the rsreportserver.config file which generally would reside with a default install in: C:\Program Files\Microsoft SQL Server Reporting Services\SSRS\ReportServer. If you installed SSRS to a different location, you will have to determine the exact directory location for the config file. As of right now, the following lines must be added to the <DATA> <EXTENSION> portion of the config file:
<Extension Name="ENTERDATA" Type="Microsoft.ReportingServices.DataExtensions.XmlDPConnection,Microsoft.ReportingServices.DataExtensions">
<Configuration>
   <ConfigName>ENTERDATA</ConfigName>
</Configuration>
GO
Furthermore, I have found a restart of the SSRS Service is required for this change to take effect. If the noted change is not made to the reportserver.config file, the following error will result.
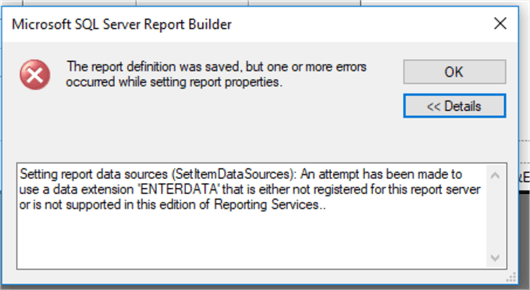
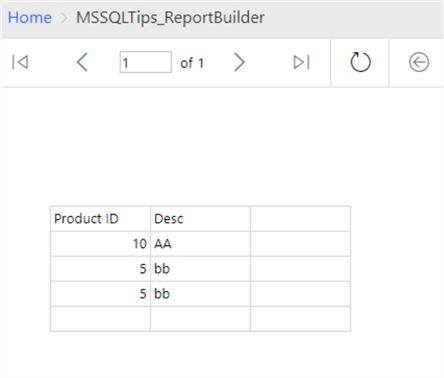
However, once the extension is added and the SSRS service is restarted, the Report Builder report can easily be published to Report Server.
Finally, you may be asking, just as I have, when will this functionality be available in SSDT for Visual Studio. Microsoft has stated that it should be available in one of the upcoming releases, but a certain time has not been specified.
Next Steps
- Check out these resources:
About the author
 Scott Murray has a passion for crafting BI Solutions with SharePoint, SSAS, OLAP and SSRS.
This author pledges the content of this article is based on professional experience and not AI generated.
View all my tips


