Problem
As a SQL Server Business Intelligence (BI) developer, you have just deployed a Data Model on Azure Analysis Services along with sourcing your Tabular Data Model through Azure SQL Database and your organization has now asked you to help them in data discovery assuming there are several data models to be deployed which is going to make it difficult to understand what data lies in which model. This is particularly important when your organization has heavily invested in a business intelligence solution and also looking for speedy discovery of its enterprise data assets apart from BI powered analysis and reporting.
Solution
The solution is to register your Azure SQL database(s) and Analysis Services database(s) (data models) with Azure Data Catalog to make data understandable, discoverable and quickly consumable.
Let’s have a quick review of the first two parts of the tip:
Part 1 Overview and Introduction
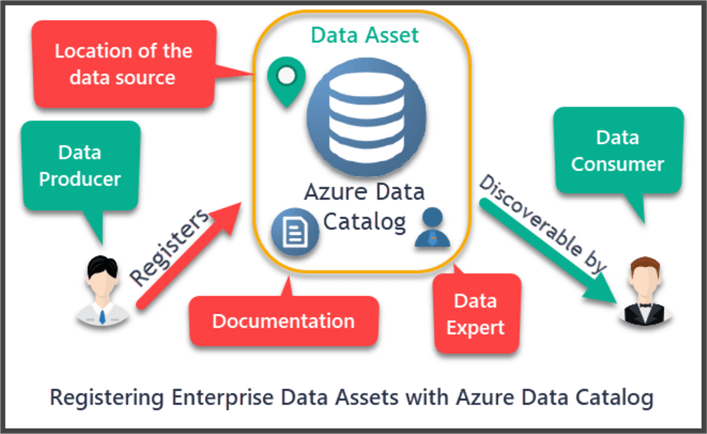
In the first part of this tip series, we discussed in detail the basic concepts of enterprise data assets and why it is so important for the data assets to be discoverable, understandable and consumable.
We also mentioned that by data assets we typically mean data sources which get registered by an enterprise in the form of Azure Data Catalog data source registration to maintain the information about their location, usage and resource person.
Types of Users
We also mentioned the following two types of data users for the data assets:
- Data Producers
- Data procedures as the name indicates, are mainly responsible for making data about data sources available so they typically register the data assets along with adding relevant information to it.
- Data Consumers
- Data consumers consume the data sources after discovering and understanding the data assets including the information to access the data source provided by data producer.
Free from Tribal Knowledge dependence
Registering your data sources with Azure Data Catalog does not require a new data user to spend months to get tribal knowledge (spending considerable time in gathering information from department to department about business domain and data assets) and finding the desired data source to consume the information.
Six Things to Note
The following challenges are being faced by the first-time data consumer who is keen to find out the required data asset (data source) to meet some business specification:
- Existence of the Data Source
- Location of the Data Source
- Intended use of the Data Source
- Locating Documentation
- Locating Data Expert
- Process to Access Data Source
Data Assets Documentation and Data Annotation
It was also mentioned that the best way to manage the documentation of data asset is to put it in Azure Data Catalog where you register your data asset plus data sources can be annotated by tags, description, documentation, adding data controller and access information in Azure Data Catalog.
Enterprise Data Assets and Database Lifecycle Management (DLM)
We further mentioned in the first part, that the data assets (data sources) are not restricted to analysis services databases only, in fact they belong to any database system which is part of the organization.
Finally, it is highly advisable to add Data Assets Registration with Azure Data Catalog after the deployment stage in the Database Lifecycle Management (DLM).
For further details please refer to the first part of the tip Azure Data Catalog Tutorial and Overview part-1
Part 2 Overview (Using Azure Data Catalog)
In the second part of the tip, the standard steps to register an Azure SQL database with Azure Data Catalog by creating manual entry were mentioned.
The following things were done:
- The first time using Azure Data Catalog requires you to sign up
- Signing up and choosing Free Edition pricing model
- Creating (setup) Catalog
- Registering Azure SQL Database by creating manual entry
- Adding data expert to the registered data source
- Adding tags to the registered data source
- Viewing the recently registered data asset (data source)
- Pinning the data asset
Registering Azure SQL Database through Application
This tip has some pre-requisites which must be met before you start following the steps to register an Azure Analysis Services database with Azure Data Catalog in order to get the full benefits from the walkthrough.
In the previous part of this tip we registered Azure SQL database by creating manual entry, but now we will register Azure SQL database (OfficeSuppliesSampleV5) and its related objects through application.
Pre-Requisites
This tip assumes that the readers have basic knowledge of working with Azure SQL database and also familiar with basic data warehouse concepts including analysis services tabular projects.
This tip also assumes the following requirements are already met if you are interested in following the steps in this walkthrough:
- You have an active Azure subscription to create Azure SQL Database(s) and Azure Analysis Services in-memory database (Tabular Data Model).
- A Resource Group has already been setup for Azure SQL Database and Azure Analysis Services server Please
- Azure SQL database OfficeSuppliesSampleV4 has been created. Please refer to my previous tip Microsoft Azure Analysis Services Web Development Tools to follow the detailed steps to create the desired Azure SQL database.
- You have already registered Azure SQL Database OfficeSuppliesSampleV4 with Azure Data Catalog if not then please follow the previous part of this tip Azure Data Catalog Tutorial and Overview Part-2 to perform this step.
Azure Data Catalog Quick Look
Sign in to your Azure Data Catalog (if you have signed up with it following the steps in the previous tip and registered Azure SQL Database) and click the database under My Assets and then click Explore Database at the bottom of the data source:

The data source is of type Azure SQL Database and it has been successfully registered with Azure Data Catalog.
Please see the previous parts of this tip for further details.
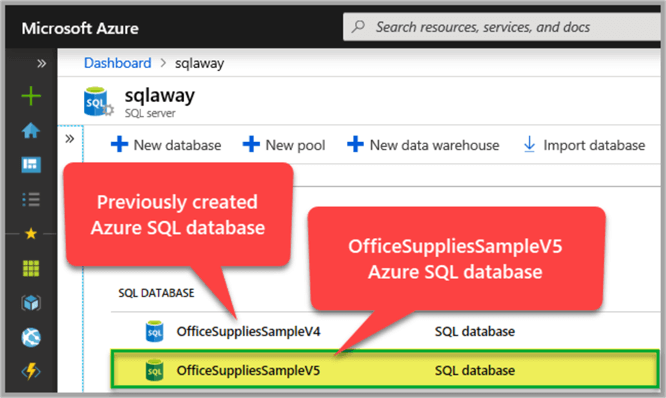
Create Azure SQL database (OfficeSuppliesSampleV5)
Create a new Azure SQL database called OfficeSuppliesSampleV5 and then create its objects and populate them using Query Editor in the Azure Portal by running the following scripts. You can download the scripts here.
- 01-Setup OfficeSuppliesSampleV5 Azure SQL Database.sql
- 02-Populate OfficeSuppliesSampleV5 Azure SQL Database.sql
Please refer to the following tip for further support: Microsoft Azure Analysis Services Web Development Tools
Once the scripts are run successfully OfficeSuppliesSampleV5 Azure SQL Database is ready.
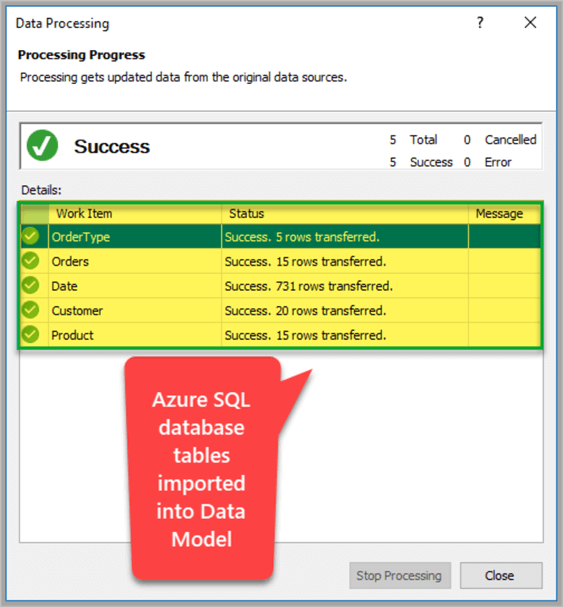
Create Tabular Data Model (OfficeSuppliesSampleV5)
Let’s now create a new analysis services tabular project called OfficeSuppliesSampleV5_Model and import OfficeSuppliesSampleV5 Azure SQL Database tables into it:
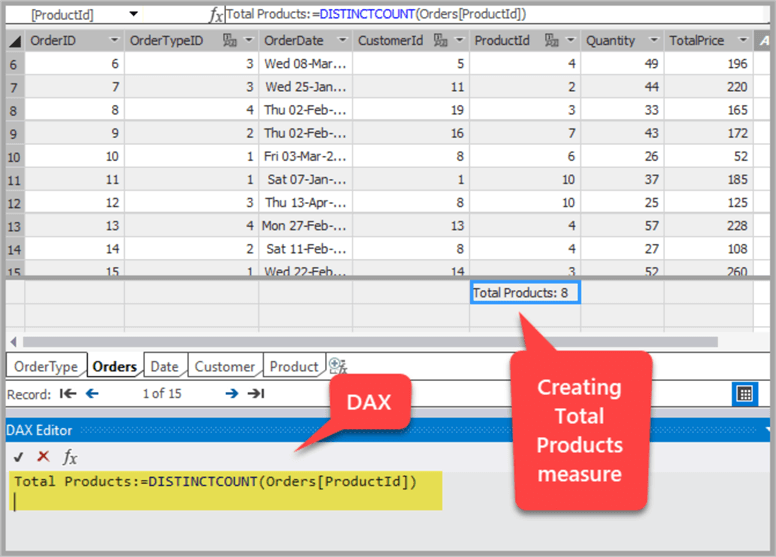
Create Total Products Measure
Next create a Total Products measure using the following DAX formula:
Total Products:=DISTINCTCOUNT(Orders[ProductId])
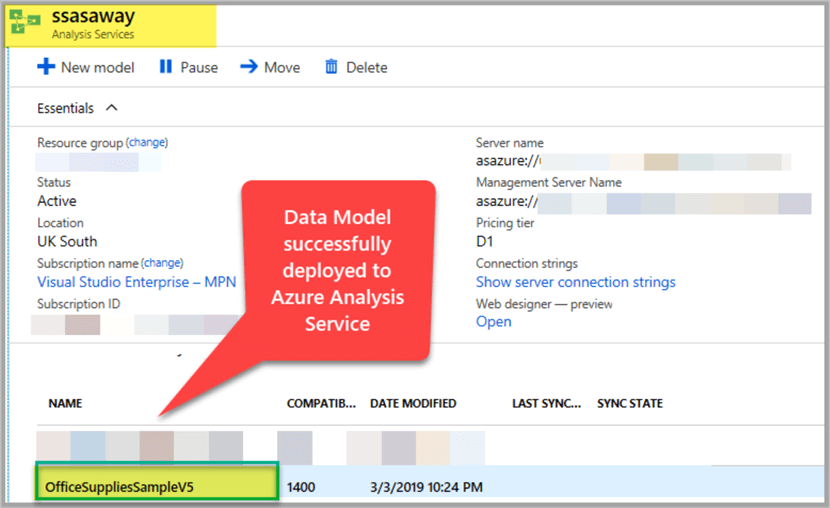
Deploy Data Model to Azure Analysis Services
Once the measure is added to the data model you need to deploy the Tabular Data Model to Azure Analysis Services server as OfficeSuppliesSampleV5:
Register Azure SQL database with Azure Data Catalog
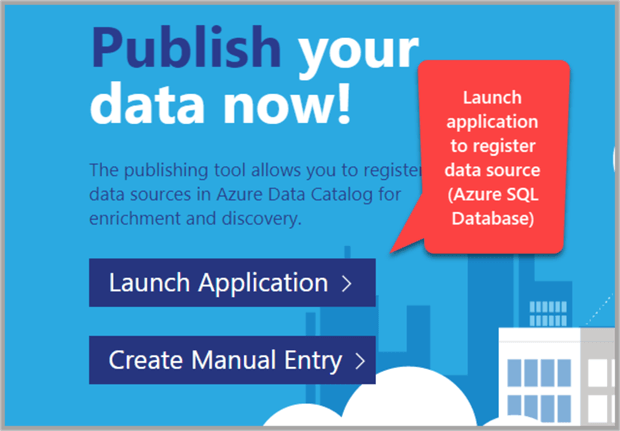
Let’s now first register Azure SQL Database OfficeSuppliesSampleV5 by signing in to the Azure Data Catalog on the Home Page and then click Publish Data:

Click Launch Application and allow the application to be installed onto your machine, if you wish to follow the steps of this walkthrough, and agree to the terms and conditions:
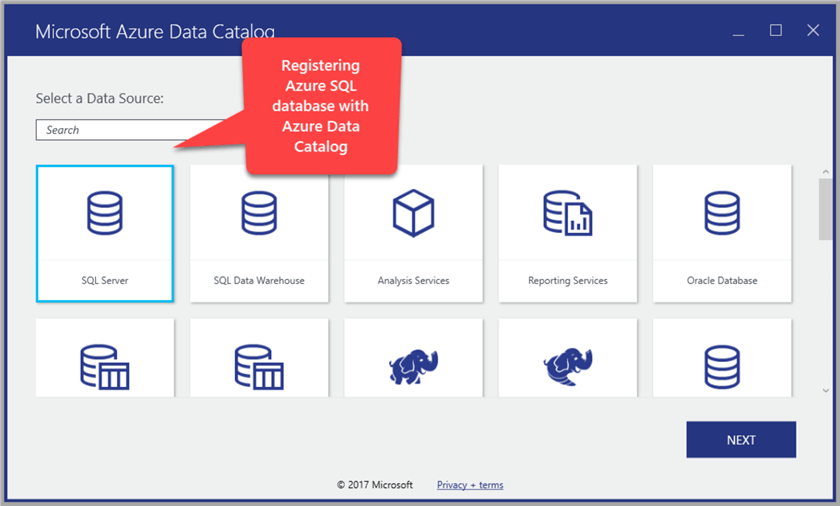
Sign in to the application and select SQL Server and click Next:
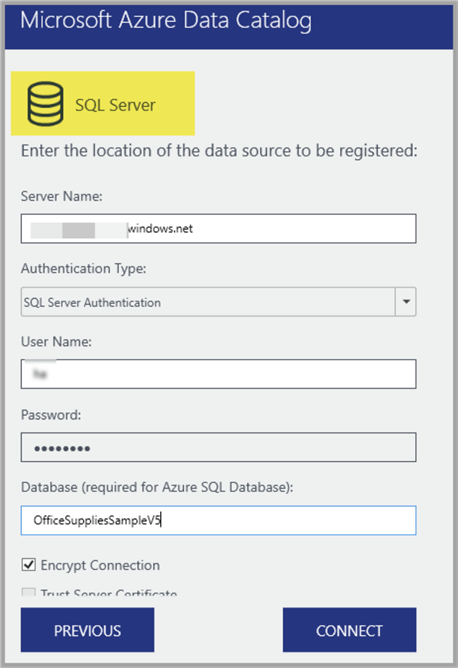
Next enter Server Name (based on your registered server resource), Authentication Type (based on your preference), User Name (you chose when setting up resource), Password (you chose when setting up resource) and Database name OfficeSuppliesSampleV5 as follows:
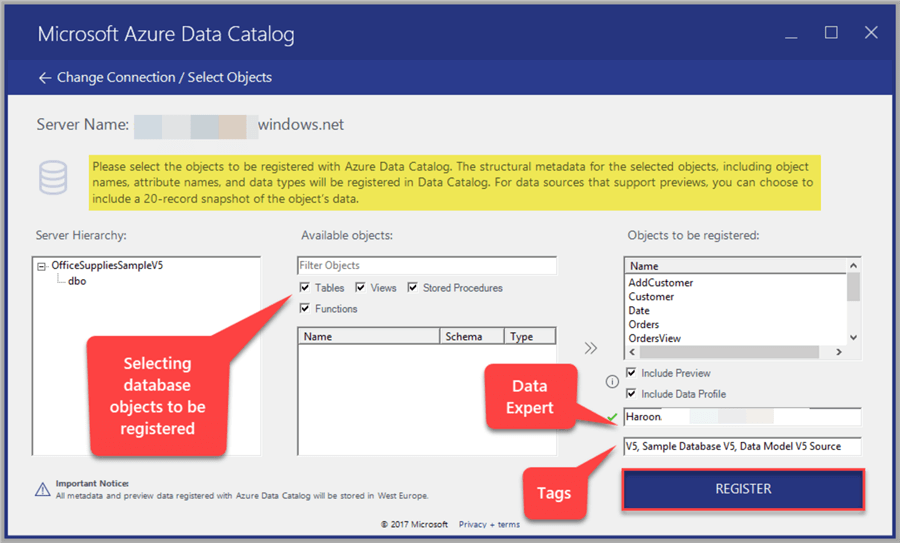
In the next step select all the objects to be registered with Azure Data Catalog along with adding the name of data expert and adding tags and checking include preview and include data profile as follows:
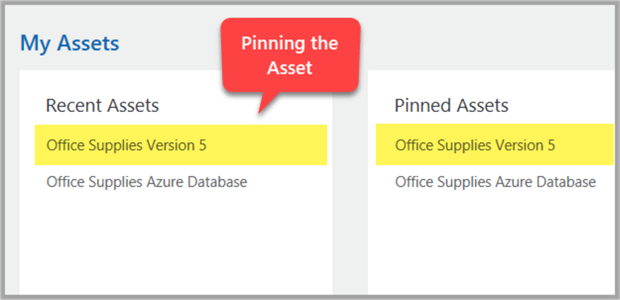
Pinning the Data Asset
Once the objects are registered please click View Portal and pin the asset as shown below:
Exploring the Data Assets (Manual vs. Application)
Now you have registered the following Azure SQL databases with Azure Data Catalog it is worth exploring them:
- OfficeSuppliesSampleV4 (data asset registered through manual entry)
- OfficeSuppliesSampleV5 (data asset registered via application)
The data asset which was registered through application has more options to be selected for the objects including data preview.
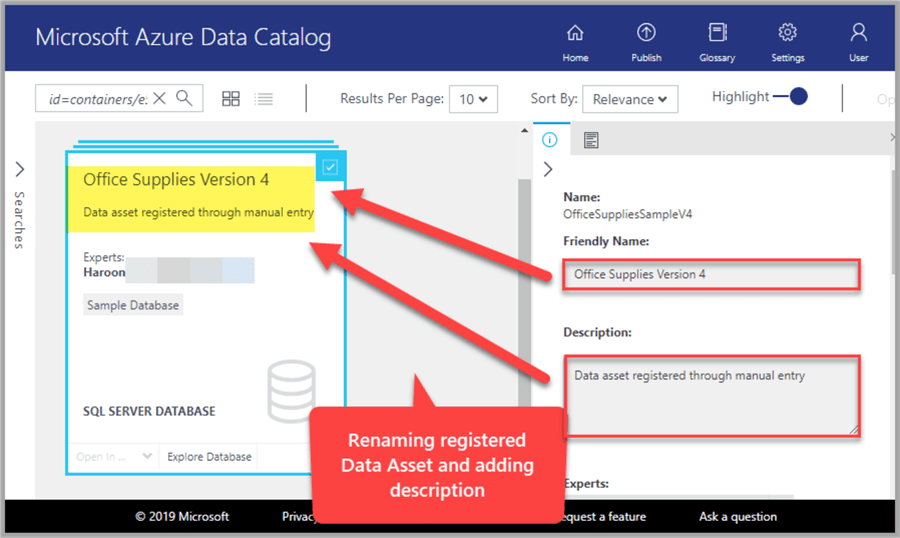
Rename Previous Data Source as Office Supplies Version 4
First rename the first Azure SQL Database registered through manual entry as Office Supplies Version 4 by clicking the data asset on the home page and then supplying the new name in the Friendly Name input box along with adding description “Data asset registered through manual entry”:
Explore Office Supplies Version 4
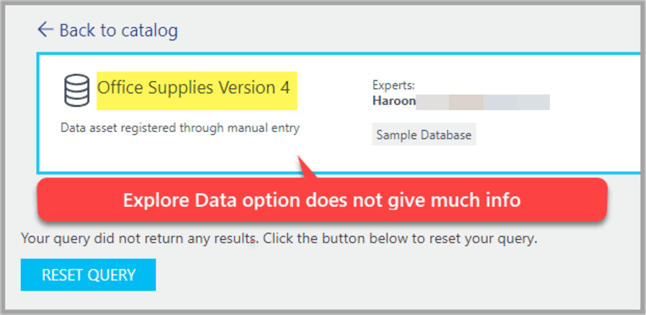
Now go to the Home Page and click Office Supplies Version 4 data asset:

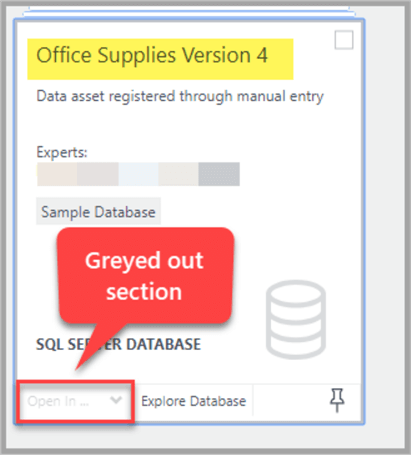
Watch out for the Greyed-Out section
If you see Office Supplies Version 4 Azure SQL Database which was registered with Azure Data Catalog through the manual entry procedure you can clearly observe that there are few options disabled for this data asset such as the Open In… section is greyed out:
While clicking Explore Database does not give us much information:
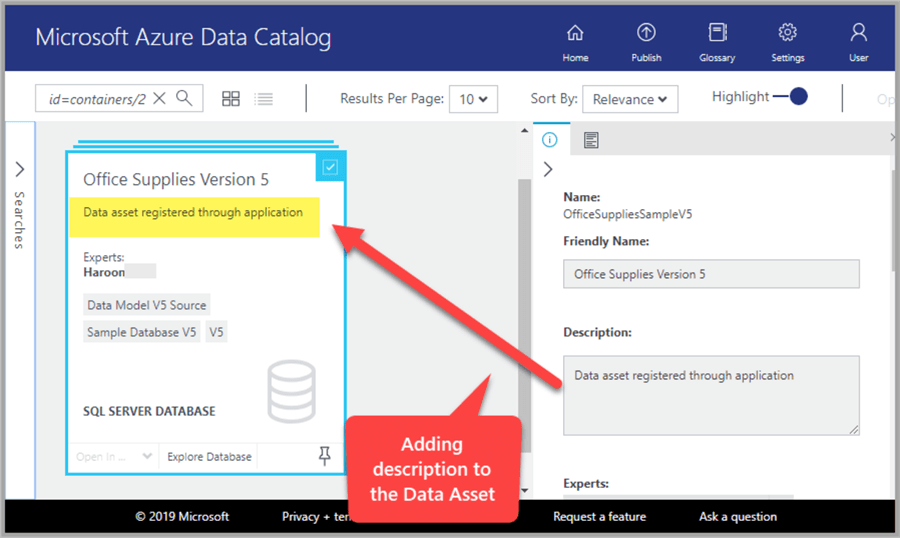
Open Office Supplies Version 5
Now click Office Supplies Database Version 5 data asset which was registered through application and add Description “Data asset registered through application”:
Explore Database
Now click Explore Database to see the number of items available now:

Please note that there are two types of views available:
- List View
- Grid View
The related objects shown below the data source are in list view which can be easily toggled by clicking Grid View as shown in the screenshot:
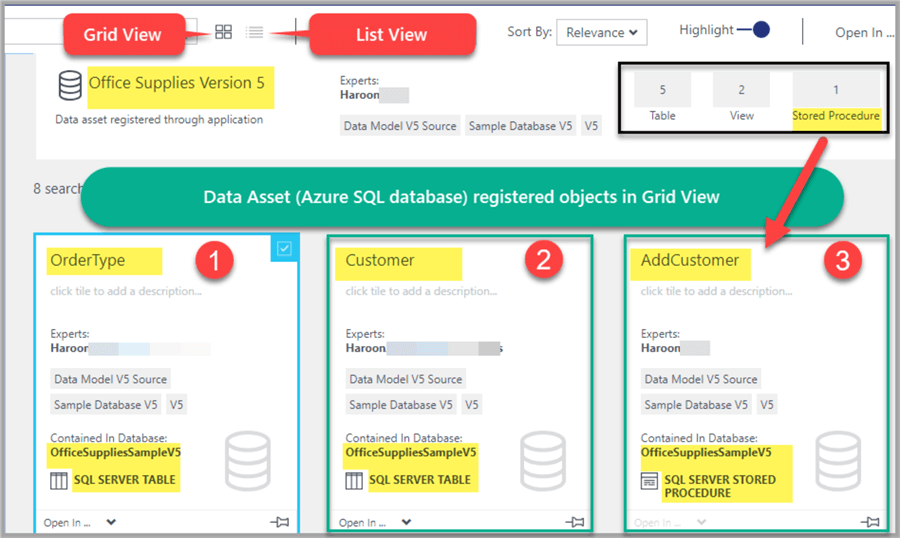
Clearly the amount of information available is much more than the previous data asset which was registered through manual entry.
At first glance it is obvious that this Azure SQL Database contains the following registered objects:
- Five Tables
- Two Views
- One Stored Procedure
Then below the main data asset the related data objects are available to be explored further.
Congratulations you have registered a data asset through application which has more richness in terms of metadata as compared to the data asset which was registered through manual entry.
In the next part of this tip series we are going to register one more data asset which is Azure Analysis Services database and we will enrich the registered data assets further.
Next Steps
This part of the article is based on comparing two data sources registered with Azure Data Catalog using two different methods.
Now that you know how to register Azure SQL Database through manual entry or by running the application on your machine could you please try the following:
- Please try creating the sample database on-premises as well and register it with Azure Data Catalog using the application method
- Please try creating the sample database on-premises and registering it with Azure Data Catalog using manual entry
- Please try to add special tags for on-premises databases and Azure SQL Database so that they can be easily recognized
- Please try to enrich your data assets further
Check out part 1 and part 2

Haroon Ashraf’s deep interest in logic and reasoning at an early age of his academic career paved his path to become a data professional.
He holds BSc (Gold Medal) and MSc Degrees in Computer Science and also received the OPF merit award.
His programming career began in 2006 working on his first data venture to migrate and rewrite a public sector database driven examination system from IBM AS400 (DB2) to SQL Server 2000 using VB 6.0 and Classic ASP along with developing reports and archiving many years of data.
His work and interest revolves around Business Intelligence and Database Centric Architectures and his expertise include database and reports design, development, testing, implementation and migration.
He has recently earned “Knowledge Management and Big Data in Business” certificate from The Polytechnic University of Hong Kong.
- MSSQLTips Awards: Trendsetter (25+ tips) – 2020 | Author of the Year Contender – 2018-2020


