By: Ron L'Esteve | Comments | Related: > Azure
Problem
In my previous articles Getting Started with Azure Blueprints and Managing Azure Blueprints with PowerShell, I demonstrated how to provision Azure resources using Azure Blueprints in the portal and then how to use PowerShell to manage Azure Blueprints. Now that we have an understanding of how to create, publish, and assign blueprints from the portal and PowerShell, what are some best practices for provisioning a Modern Data and Analytics Platform using PowerShell and Azure Blueprints?
Solution
Managing Azure Blueprints with PowerShell promotes the opportunity for a more neatly organized, more automated deployment, and better arm template management. In this article, I will cover some best practices for provisioning a Modern Data and Analytics Platform using the Az.Blueprint cmdlet in PowerShell. For this demo, I will provision the following Azure Resources:
- Azure Resource Group
- Azure Key Vault
- Azure Data Factory V2
- Azure Data Lake Storage Gen2
- Azure Databricks
- Azure SQL Server and SQL Database
- Role Assignments
- Policy Assignments
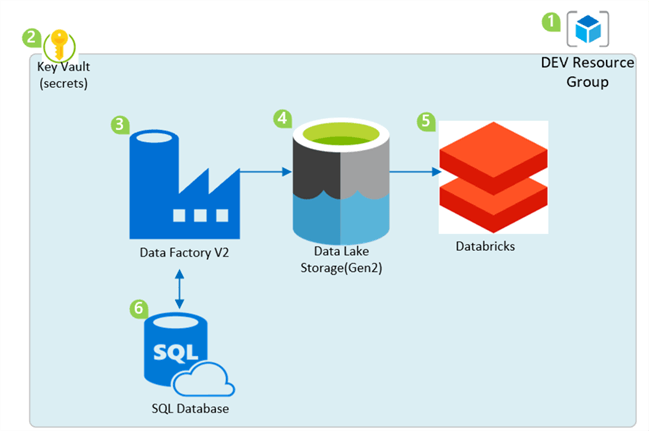
Create and Export Azure Blueprint from Azure Portal
Working with Blueprints in the Azure Portal provides a simple, seamless and easy to use process for provisioning Azure resources. That said, for this demo, I will create and publish blueprints in the Azure Portal and will then use the Az.blueprint Export cmdlet to export these blueprints to a blueprints folder in D:\blueprints.
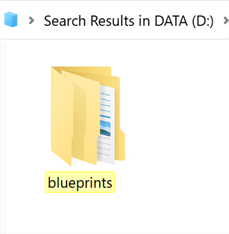
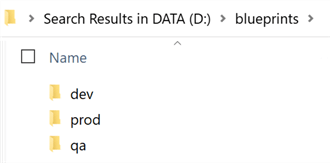
Note that we may have multiple blueprints that need to be provisioned for dev, prod and qa environments. By having a well-organized folder structure, we can sort the various blueprints into their environment specific folders.
So, for this demo I will export the dev blueprints to D:\blueprints\dev\
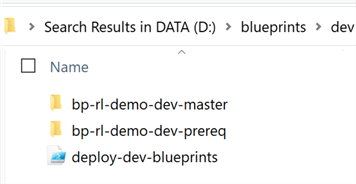
Note that I have two additional folders in the dev folder.
bp-rl-dev-prereq will contain any pre-requisite resources that are needed by the master blueprint. For my scenario, this blueprint folder will contain the blueprint to deploy the artifact for Azure Key Vault since it is a pre-requisite for storing secrets for the SQL Server Login and Password credentials. Additionally, this blueprint will also deploy a Resource Group.
bp-rl-dev-master will contain all of the other resources that have no other dependencies and can be provisioned either independently or based on bp-rl-dev-prereq.
There is also a deploy-dev-blueprints PowerShell that can be used to deploy both the bp-rl-dev-prereq and bp-rl-dev-master using one PowerShell script.
For this demo, I will deploy the two blueprints using two individual steps, but wanted to demonstrate that one blueprint could also be used if desired by combining multiple PowerShell scripts into one.
When the bp-rl-dev-prereq blueprint is exported to the D:\blueprints\dev\bp-rl-dev-prereq folder, it will contain a Blueprint.json file and an Artifacts folder. I also added an Assignments folder in case I want to design and keep tract of my assignments in this same folder structure.
Additionally, I have added a deploy-dev-prereq-blueprint PowerShell script that we will look at in greater detail in a later section.
This folder and file structure will help with organizing blueprints, assignments, artifacts, and PowerShell deployment scripts.

Within D:\blueprints\dev\bp-rl-dev-prereq\Artifacts\ there is one artifact for AzureKeyVault. Note that when exporting the blueprint, the artifacts might not be exported with their friendly names and may need to be re-named in this case.

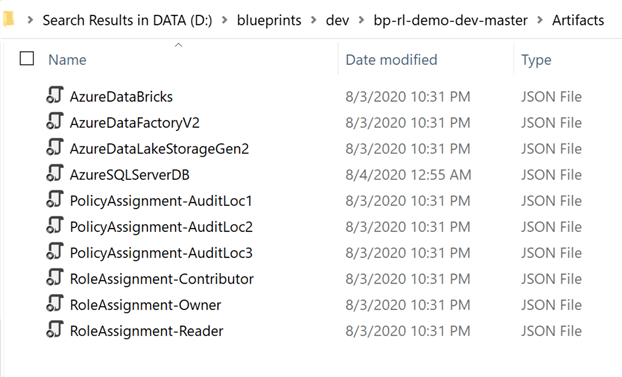
Similar to the previous prereq blueprint, the exported bp-rl-dev-master blueprint also contains the same folder and file structure.

The Artifacts folder lists all the resources that this master blueprint contains. Since these blueprints were created in the Azure Portal, they also contain the appropriate parameters for the blueprint's assignments. Note that these parameters can be managed through these json files.
Provision Pre-requisite Azure Blueprint
Now that we have all of the desired blueprints in D:\blueprints, we are ready to begin running the following PowerShell script to import, publish and assign the blueprints.
Remember to delete an existing resource groups before re-deploying to the same resource group.
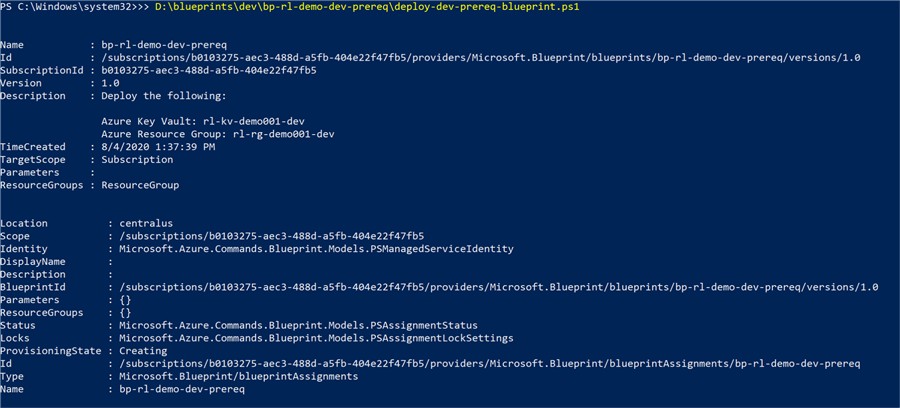
As we can see from the script, the blueprint will be imported, published, and assigned.
Set-ExecutionPolicy -Scope Process -ExecutionPolicy Bypass

Import-AzBlueprintWithArtifact -Name 'bp-rl-demo-dev-prereq' -SubscriptionId 'ENTER-SUBSCRIPTIONID-HERE' -InputPath D:\blueprints\dev\bp-rl-demo-dev-prereq

$bp = Get-AzBlueprint -Name bp-rl-demo-dev-prereq -SubscriptionId 'ENTER-SUBSCRIPTIONID-HERE'

Publish-AzBlueprint -Blueprint $bp -Version 1.0

New-AzBlueprintAssignment -Blueprint $bp -Name 'bp-rl-demo-dev-prereq' -Location 'centralus'
To confirm, when I head over to the Azure portal, I can see a new blueprint definition has been created and published.

As expected, the blueprint contains a Azure Key Vault artifact within a Resource Group.
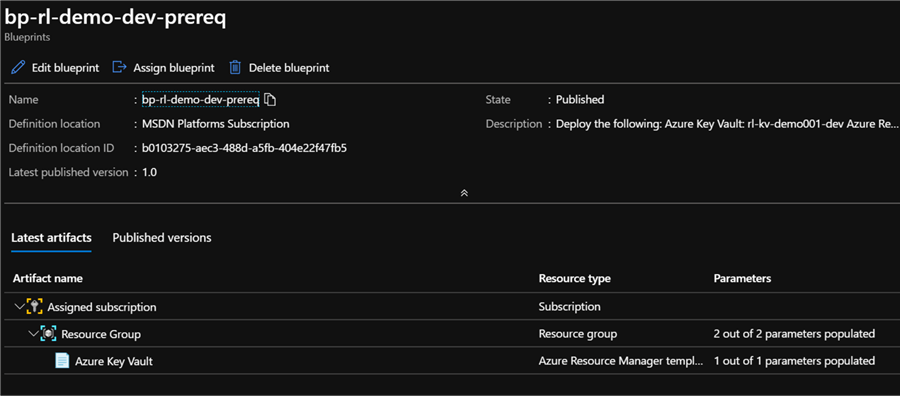
The blueprint has also been assigned.

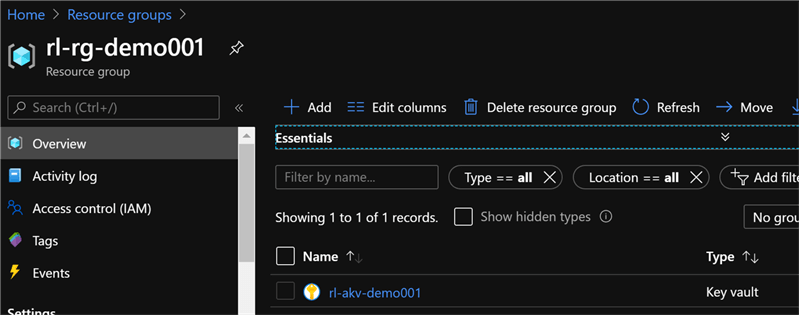
Sure enough, there is a newly created Azure Key Vault in a new Resource Group.
Provision Master Azure Blueprint
Now that the pre-requisite blueprint has been created, published and assigned in the steps above, we are ready to provision the remaining resources in bp-rl-dev-master.
Since we already have a Key Vault provisioned from the pre-requisite blueprint, we can create a secret either manually or through PowerShell.
For this demo, I have also added a create secret script to this master blueprint PowerShell deployment script.
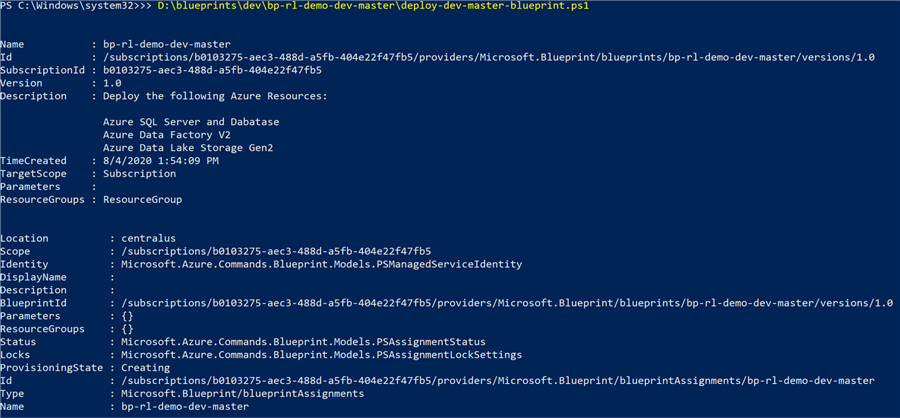
Additionally, similar to the pre-req blueprint, the script will import, publish, and assign the master blueprint with the following PowerShell script.
$secretvalue = ConvertTo-SecureString '321Demo!' -AsPlainText -Force
$secret = Set-AzKeyVaultSecret -VaultName 'rl-kv-demo001-dev' -Name 'adminPassword' -SecretValue $secretvalue

$secretvalue = ConvertTo-SecureString 'rladmin' -AsPlainText -Force
$secret = Set-AzKeyVaultSecret -VaultName 'rl-kv-demo001-dev' -Name 'adminLoginUser' -SecretValue $secretvalue

Import-AzBlueprintWithArtifact -Name 'bp-rl-demo-dev-master' -SubscriptionId 'ENTER-SUBSCRIPTIONID-HERE' -InputPath D:\blueprints\dev\bp-rl-demo-dev-master

$bp = Get-AzBlueprint -Name bp-rl-demo-dev-master -SubscriptionId 'ENTER-SUBSCRIPTIONID-HERE'

Publish-AzBlueprint -Blueprint $bp -Version 1.0

New-AzBlueprintAssignment -Blueprint $bp -Name 'bp-rl-demo-dev-master' -Location 'centralus'
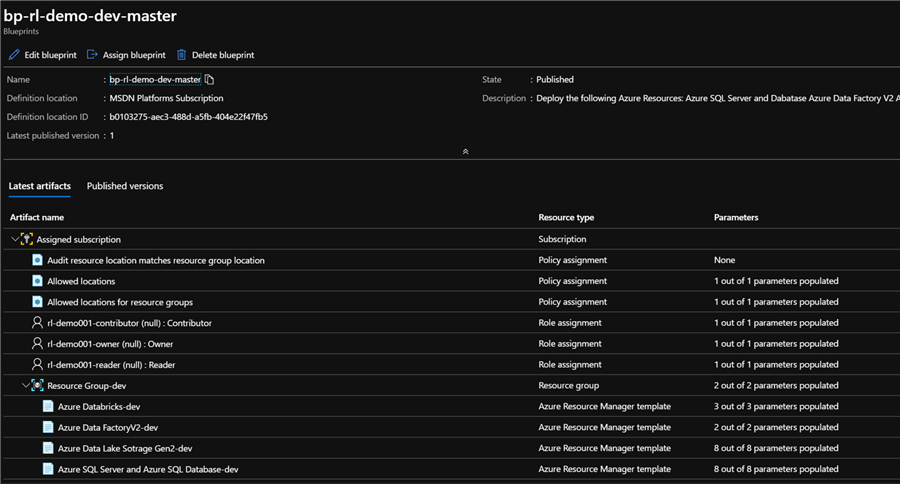
As expected, there is a new bp-rl-demo-master blueprint definition that has been published.

Additionally, the blueprint contains all the expected resources, role and policy assignments.
Sure enough, the blueprint has been successfully assigned by the PowerShell script.

Validate and Verify Provisioned Azure Resources
At this point, both the bp-rl-demo-prereq and bp-rl-demo-master blueprints have been imported from local folders/files, published, and assigned.
Let's validate that the resources along with policy and role assignments have been accurately provisioned.
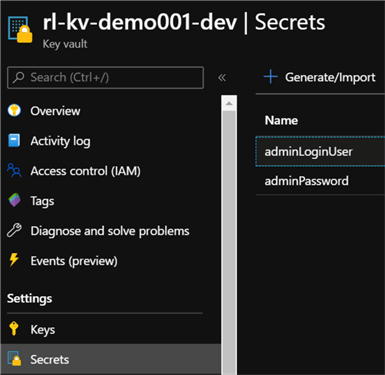
As expected, there are new AKV secrets as defined in the PowerShell script.
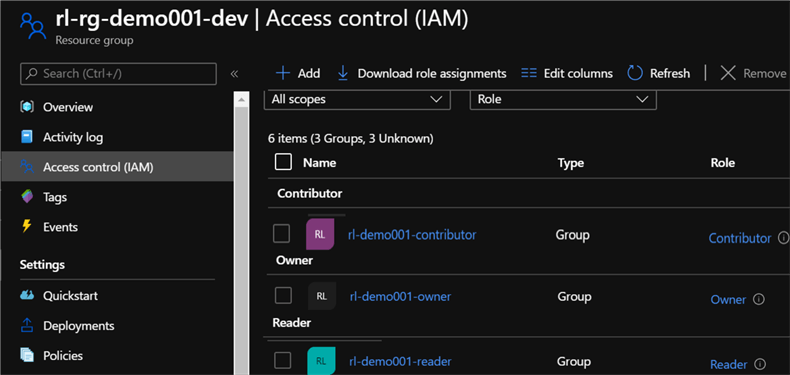
There are also three new roles that have been assigned to the resource group which confirms the validation of the Role assignments defined in the blueprints.
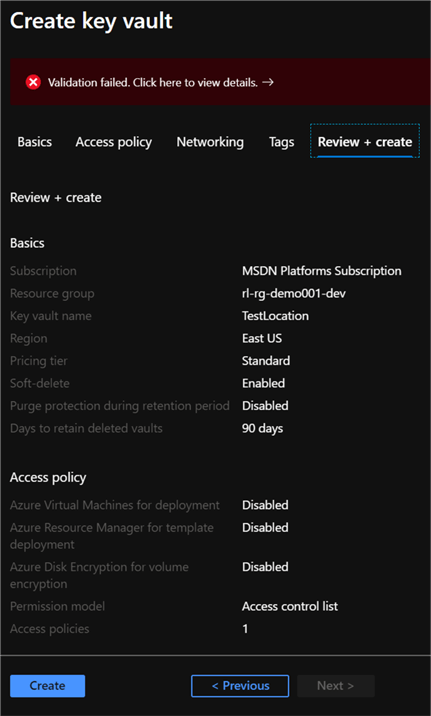
Since we added a Policy assignment to validate that any resource that is created must be within the same resource group location, we can see the validation fails when we attempt to manually add a resource in a different location (East US) rather than (Central US). This confirms that the Policy Assignment was successfully applied by the blueprint.
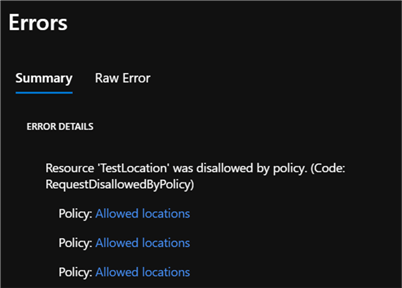
The policy validation error contains additional information for the user.
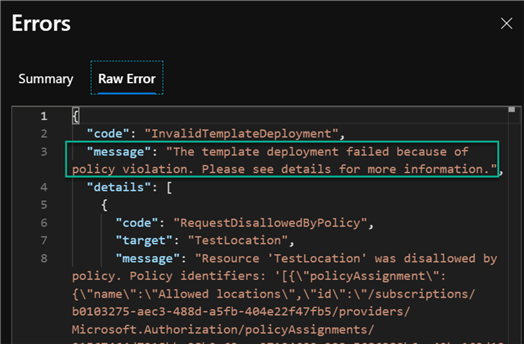
As expected, the raw error lists the reason for the error, which in this case is a policy violation of allowed locations for the resource.
Finally, we can verify that the dev resource group contains all of the resources that we defined, imported, published, and assigned in our blueprints: bp-rl-demo-prereq and bp-rl-demo-master.
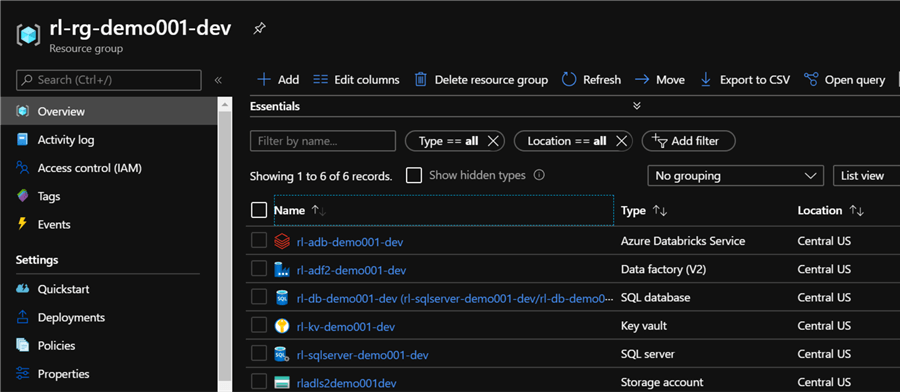
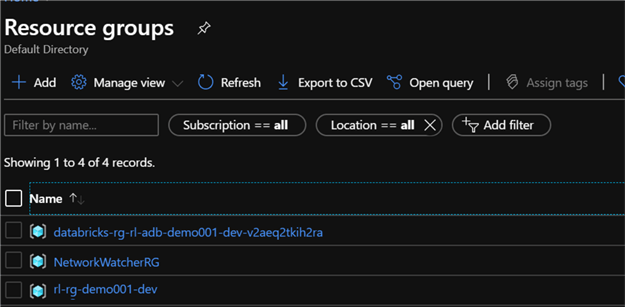
Additionally, the Databricks deployment service also creates a few additional resources and groups which have also been deployed as expected.
Next Steps
- Consider adding Azure Synapse Analytics, Azure Analysis Services and other resources to this base Modern Data and Analytics Platform using Azure PowerShell & Blueprints.
- See Modern Data Warehouse Architecture for more information on the architecture, components and data flow.
- For better Infrastructure as Code best practices, install and work with ARM Templates using Visual Studio Code and load up some helpful extensions: PowerShell, Azure Resource Manager Tools, Azure Resource Manager Snippets, Azure Account, ARM Template Viewer, ARM Template Helper.
About the author
 Ron L'Esteve is a trusted information technology thought leader and professional Author residing in Illinois. He brings over 20 years of IT experience and is well-known for his impactful books and article publications on Data & AI Architecture, Engineering, and Cloud Leadership. Ron completed his Masterís in Business Administration and Finance from Loyola University in Chicago. Ron brings deep tec
This author pledges the content of this article is based on professional experience and not AI generated.
View all my tips


