Problem
SQL Server has become one of the most popular RDBMS being used today. Microsoft SQL Server 2019 is the latest release by Microsoft under their RDBMS product vertical SQL Server. In this tutorial, I will explain how to install SQL Server 2019 on Windows Server 2016 running in a virtual machine.
Solution
SQL Server is a relational database management system (RDBMS) developed by Microsoft. This is an enterprise product that can be used for any critical application to serve a client’s business requirements. SQL Server has become the most popular RDBMS system for enterprise applications like SAP in the cloud as well as in on-premises data center deployments.
The latest available version for SQL Server is SQL Server 2019. I am going to go step-by-step to install the latest version of SQL Server on Windows Server 2016 running on VMware Workstation 14.
Note: If you are new and not sure how to configure virtual machines to install SQL Server or Windows Server 2016, I recommend you access the below attached articles to setup virtual machines and operating systems to install SQL Server 2019:
- Install VMware Workstation 14 on Windows
- How to Setup a Virtual Machine with VMware Workstation 14
- Install Windows Server 2016 Operating system in a Virtual Machine
Let’s start the installation of SQL Server 2019 on Windows server 2016.
Step by Step Process to Install SQL Server 2019 on Windows Server 2016
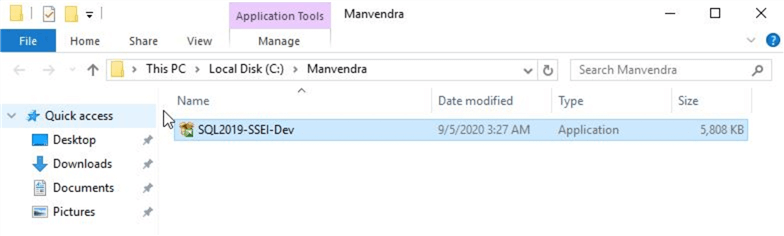
1 – The very first step to install SQL Server 2019 is to have the installer or an ISO image. If you don’t have the setup files, you can download free versions (Evaluation or Developer Editions) from the Microsoft website. I have downloaded the SQL Server 2019 Developer edition installer for this demonstration. You can see the downloaded installer in the below image. If you have bought the enterprise or standard editions, you can use that for the installation.
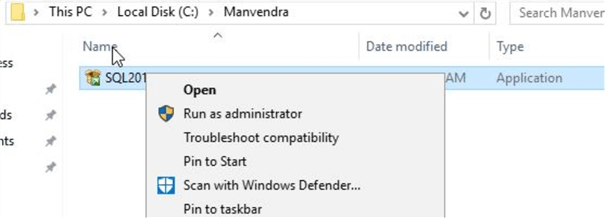
2 – The next step is to execute this installer to start the installation process. Right click the downloaded file and click "Run as administrator".
3 – You will see the below screen after clicking on the installer file. Here you need to choose one of the 3 options shown in the image below.
- Basic
- Custom
- Download media
The description about each type of installation is also given. Read it carefully and choose the appropriate option. I have chosen Custom.

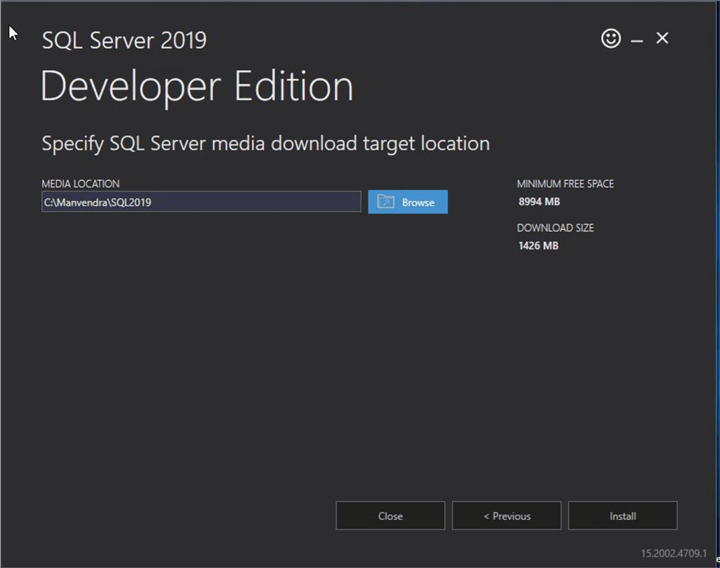
4 – After selecting your option, you will see the below screen to specify the location where the SQL Server media will be downloaded. Choose any location where you have enough space to save this file.

I have chosen another location than the default one. Click "Install" after this selection.
SQL Server setup will be downloaded at your given location and then installation will start.
5 – You can see the SQL Server setup download process has begun in the below screen. You can also see the download speed, total size of the file that is in download process, and the total downloaded size along with a progress bar.
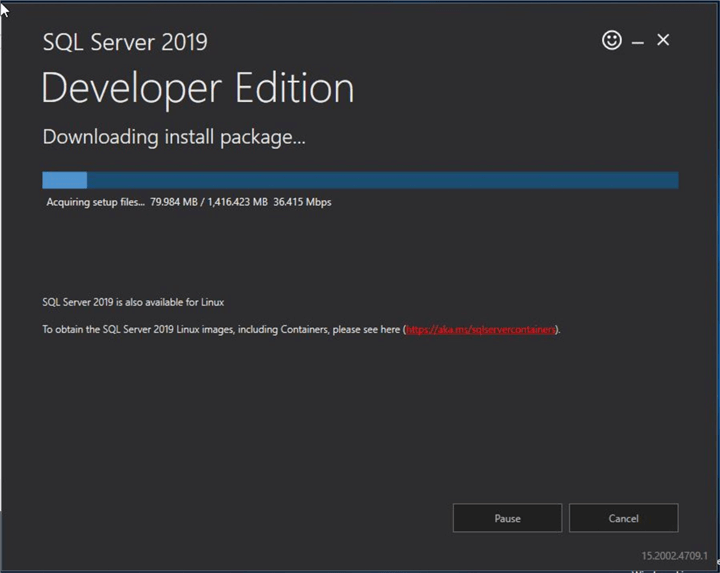
Below is another view of the download progress bar where you can learn about the file.

You can see that the SQL Server setup package has been downloaded successfully. The installer has started verifying the health of the downloaded file to ensure that there is no corruption in the file.

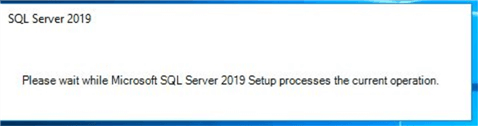
Once integrity validation is successfully completed, another window named SQL Server 2019 will appear mentioning "Please wait while Microsoft SQL Server 2019 Setup processes the current operation."
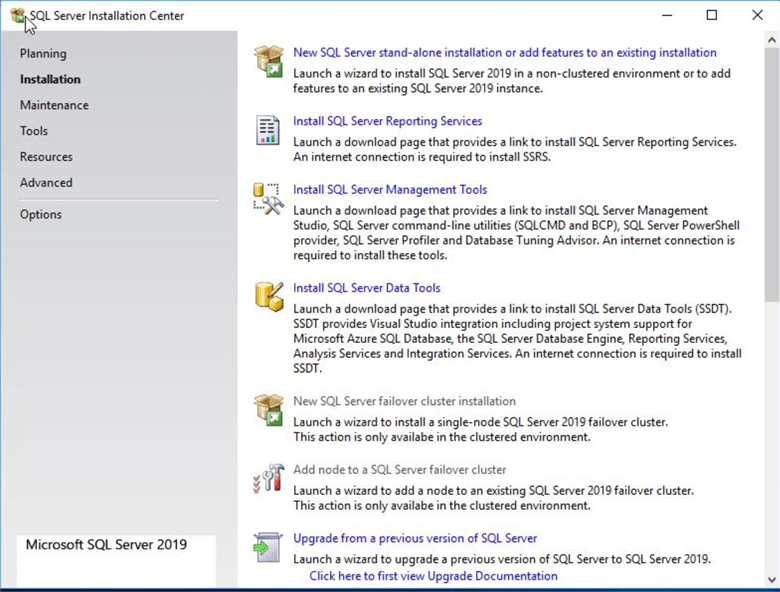
6 – You will then see the SQL Server Installation Center once the above pop-up window disappears. This screen is the same as the installation center of older versions of SQL Server.
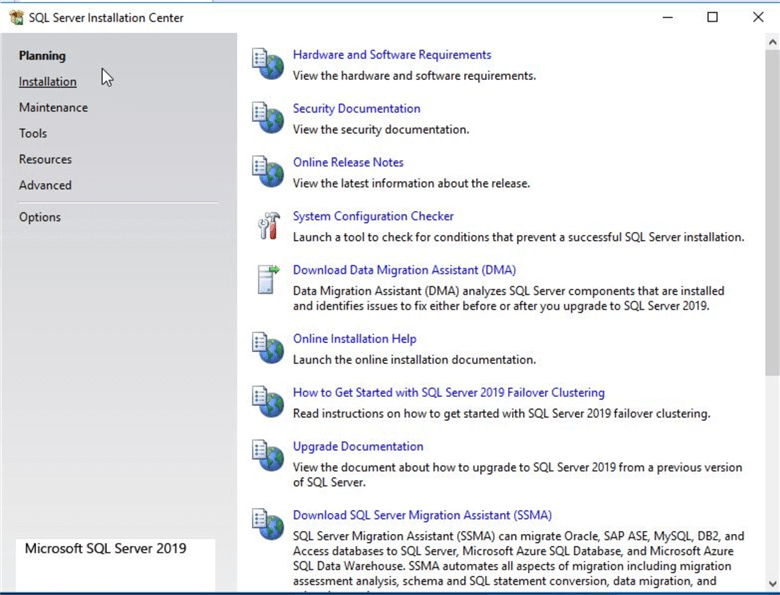
Click on the second tab "Installation" from the left pane to access all possible installation options for this version of SQL Server. You can see these options in the below image. We have to install SQL Server Database Engine. Select the first option shown in the below image to start the SQL Server 2019 setup wizard. If you want to install other modules, choose your options accordingly.
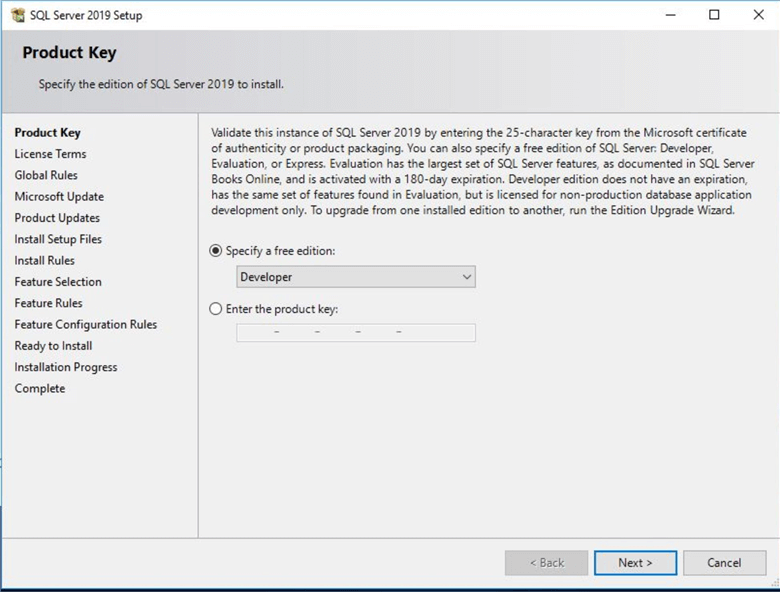
7 – Once we select the first option to start the installation of the SQL Server stand-alone instance, we will see the below screen to enter the product key of this software. Enter the product key if you have bought this product. As we are installing the developer edition, it’s already been selected in this window. Select "Next" to continue.
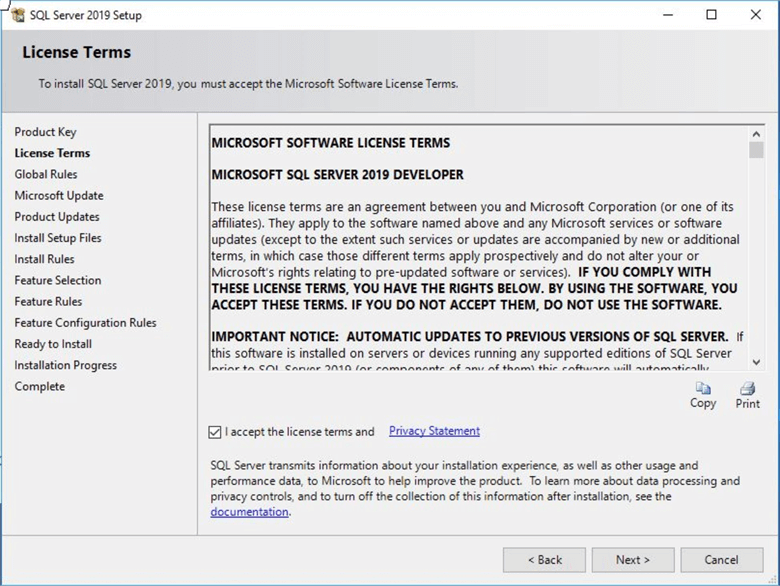
8 – The next screen will appear and ask you to accept the license terms. Click on the check box as shown in the below screen and select "Next" to continue.
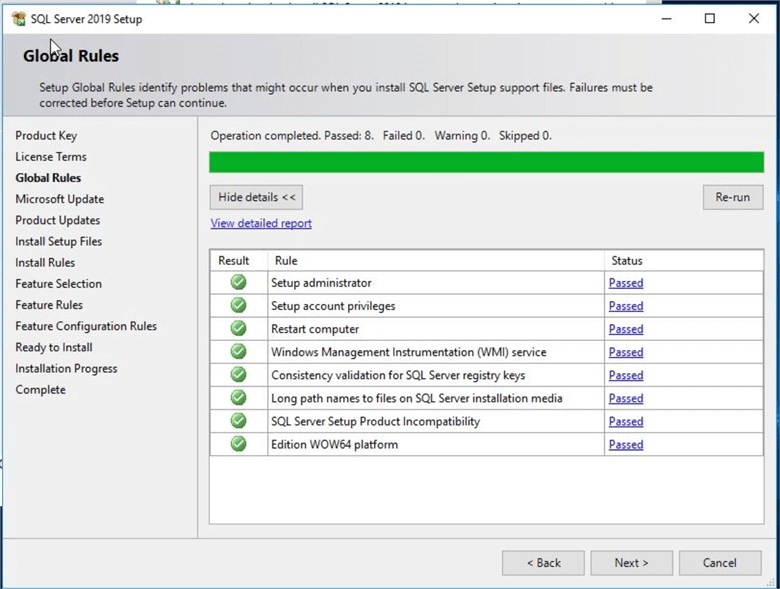
9 – The next screen will check the global rules as part of basic prerequisites for the installation. You can see all prerequisites have passed and shown with a green checkmark in the below image. If any rule has failed, it is recommended to first remediate those rules and then proceed with the installation. Click "Next" to go to the next window.
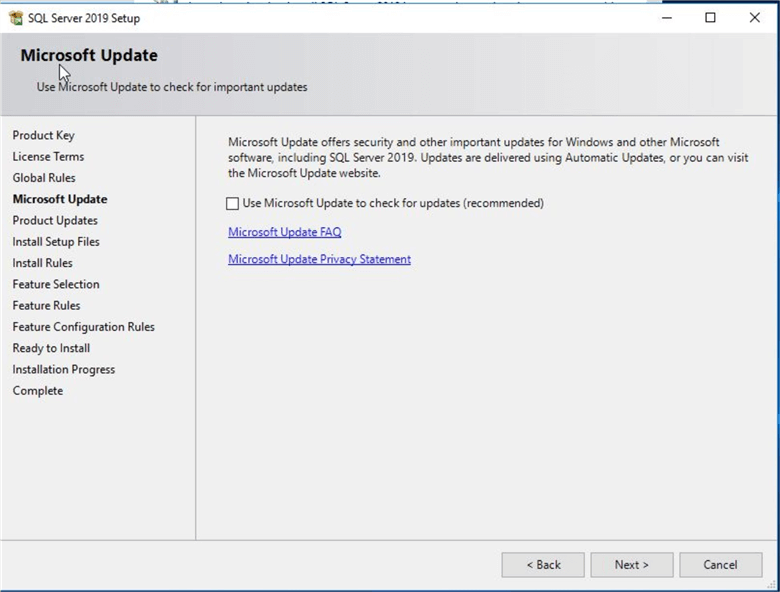
10 – The next screen will open to configure Microsoft updates for this software SQL Server. If you choose to configure Microsoft updates, they will automatically apply security updates for the operating systems as well as SQL Server.
I have not chosen this option as I believe in applying patches with proper planning during certain windows.
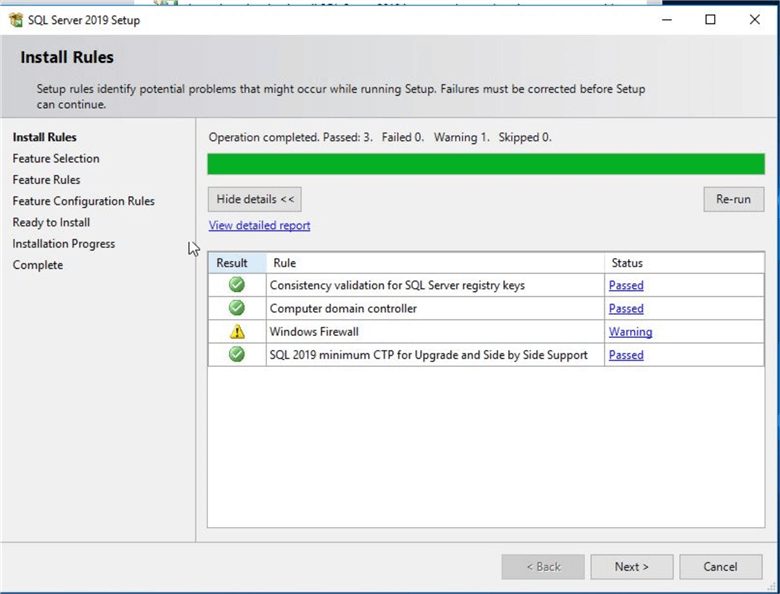
11 – The next screen will perform a validation of install rules as part of the prerequisites. If you get any errors in this rule check, first fix those rules for the installation and then start the installation otherwise your installation will fail.
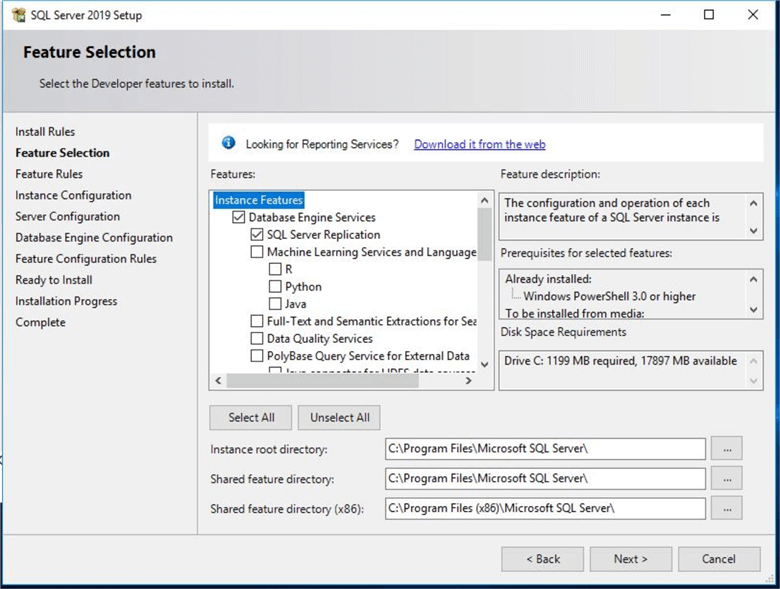
12 – After all install rules are passed, you can ignore warnings and fix them later, the next page will ask you to select the features that you want to install. You can see all components that are bundled with this product on the below screen. I have chosen the database engine as this is what I need. You can choose various components depending on your requirements. You can also enter the root directory and shared featured directory where you want to install SQL Server 2019. I left the default location as is for this installation but if you want to install it in a separate drive or location, make changes accordingly.
13 – Click "Next" after selecting your desired SQL Server features and installation directories. The next window will configure the SQL Server instance name. As this is the first installation of SQL Server on this machine, the default instance name MSSQLSERVER is automatically chosen. I left this name as is for a default instance installation. Click "Next" to proceed.

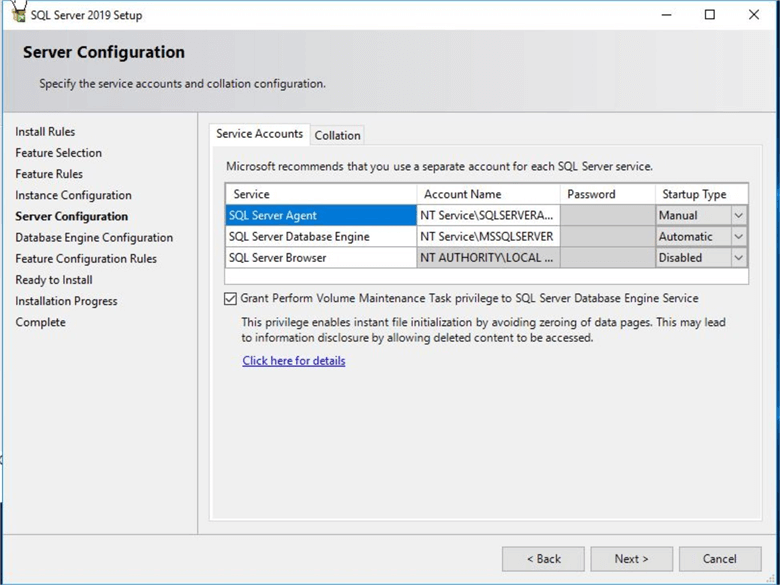
14 – After instance configuration, the next window will allow you to configure SQL Server service accounts that will be used to run various SQL Server services. If you are running your VM in a domain and want to use domain service accounts, you can make changes in the below screen. You can also leave all settings with default options.
SQL Server setup has given one more server level configuration as shown in the image below i.e. setting up instance file initialization configuration. Click the checkbox near "Grant Perform Volume Maintenance Task privilege to SQL Server Database Engine Service". You can also find the description of this configuration near the checkbox.
15 – Click "Next" after configuring the service accounts and instant file initialization. The Database Engine configuration page will come after the above image. This is a very important configuration for this installation. You can see that there are 6 tabs to configure under this screen.
- Server Configuration
- Data Directories
- TempDB
- MaxDOP
- Memory
- FILESTREAM
We will go through these one by one to configure or review the values.
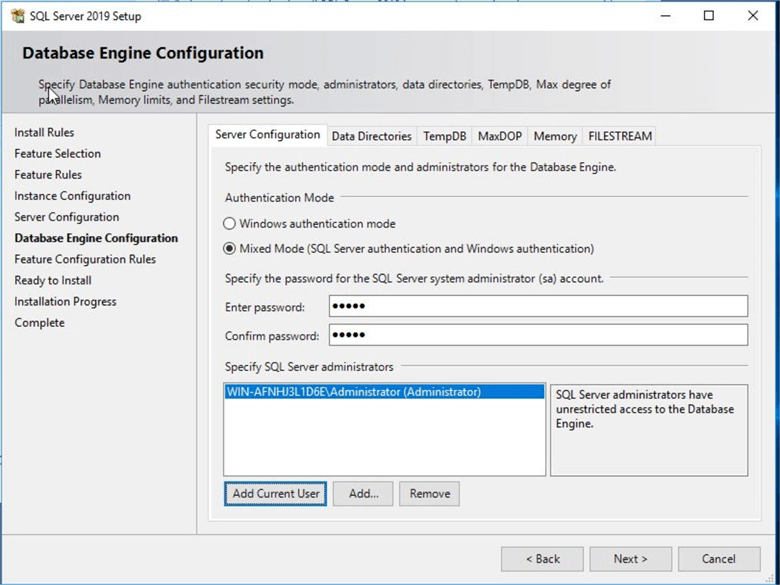
Server Configuration
This screen will allow us to set the authentication mode. There are 2 authentication modes available:
- Windows
- Mixed
I have chosen to use Mixed authentication mode to use Windows as well as SQL Server authentication.
Next, we need to set the password for the "sa" account. Choose a strong password in this section. Finally, we need to add a user as administrator on the SQL Server instance. I have added myself as SQL Server administration as shown in the below image.
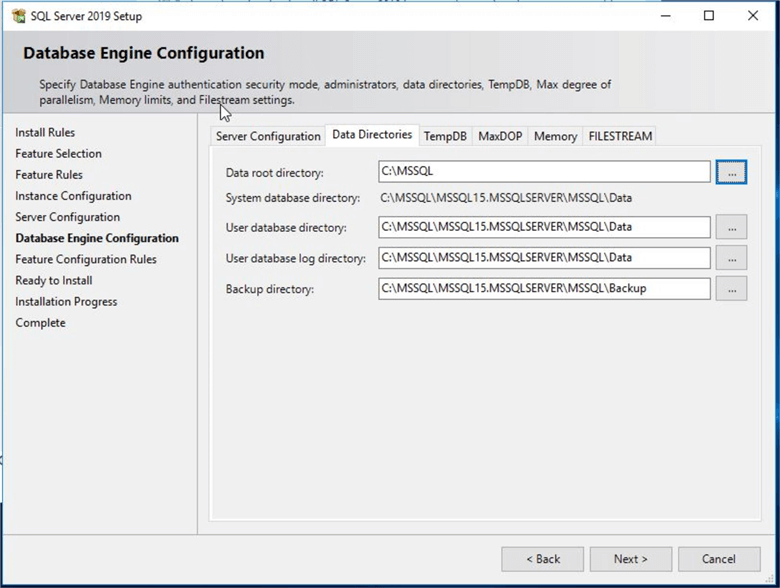
Data Directories
Click the next tab which is "Data Directories" to configure the database file location. You can see that I have chosen C:\MSSQL as data root directory where all database files will be stored. You can choose different file locations for data file, log files, and backup files to reduce the IO bottleneck and increase the database performance. You usually do not want to save your database files on the C drive, but I am doing this exercise in a lab environment, this is why I am choosing one drive to store all files. Putting all files in one location is not the best practice for a production environment.
TempDB Configuration
Click "Next" to configure tempdb. Tempdb is a system database that is used for all temporary transactions. There will be severe performance impact if you have poor configuration for this database.
There must be a separate directory for tempdb database files to increase IO performance. You can see all configuration options in the below screen. I have left it all as default. It’s also recommended to have the same number of data files compared to the number of CPU cores available on the server for tempdb database.
Keep in mind that while configuring this database, the size of this database is an important part. You can keep any size during installation, but it is recommended to have an optimum size for tempdb databases to get maximum performance. This is not as big a deal for dev and test environments but can be critical for production servers.

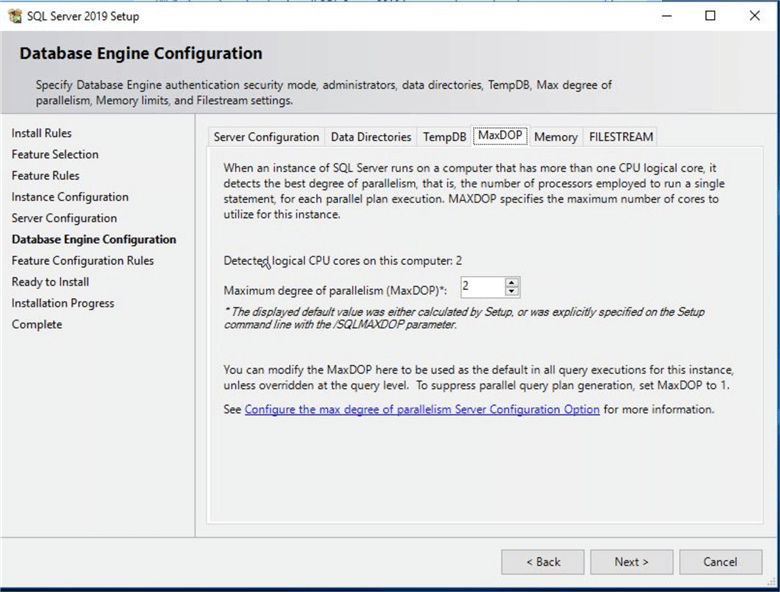
MaxDOP Configuration
MaxDOP is an instance level configuration that can be altered at any time even after installation as well. I left this value as the default. The description of this configuration can be read in the below screen.
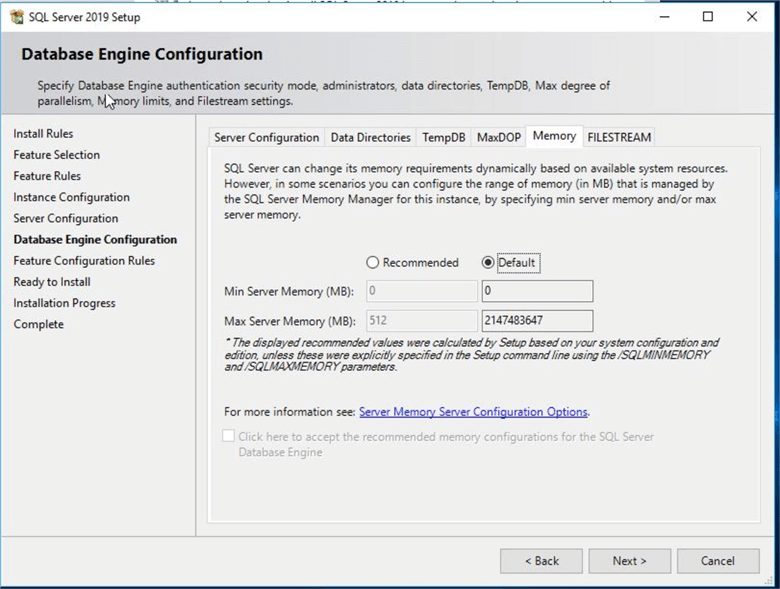
Memory Configuration
This is one very important configuration to handle SQL Server memory management. The rule of thumb is to assign 80% of memory to SQL Server and leave 20% for the operating systems if you are running a dedicated database server. You can change this value by clicking on the recommended radio button. Otherwise, you can go with the default value and change it post installation.
FILESTREAM
As I am not going to use this feature, I have left it with default settings. Now click "Next" to proceed with the installation.
16 – Now, click "Next" to see the next wizard. Ensure that you validate all these settings that you chose in step 15. Although, you can modify these configurations later.
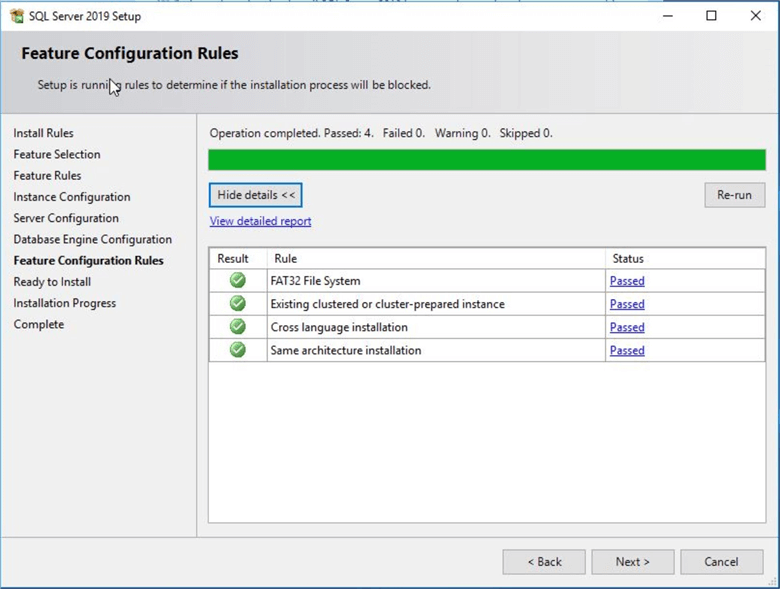
The feature configuration rules will be checked and must be passed to start the installation. As you can see, all rules are passed and showing in green as shown in the below image. Click "Next" to go to the final page of this installation.
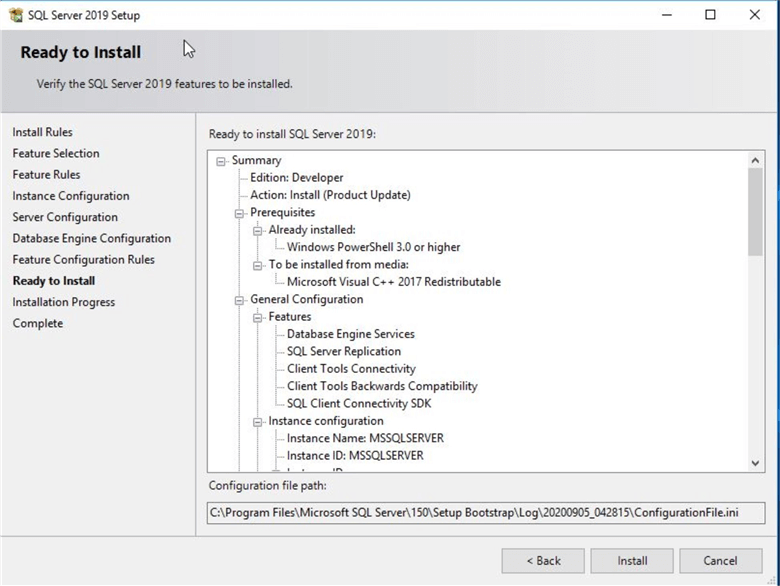
17 – This is the final window of this installation. This "Ready to Install" page is a screen where you can validate and verify all the settings and configurations you have used in previous steps. Recheck once to prevent unsuccessful installation.
Once you are okay with all values, click "Install" to start the installation.
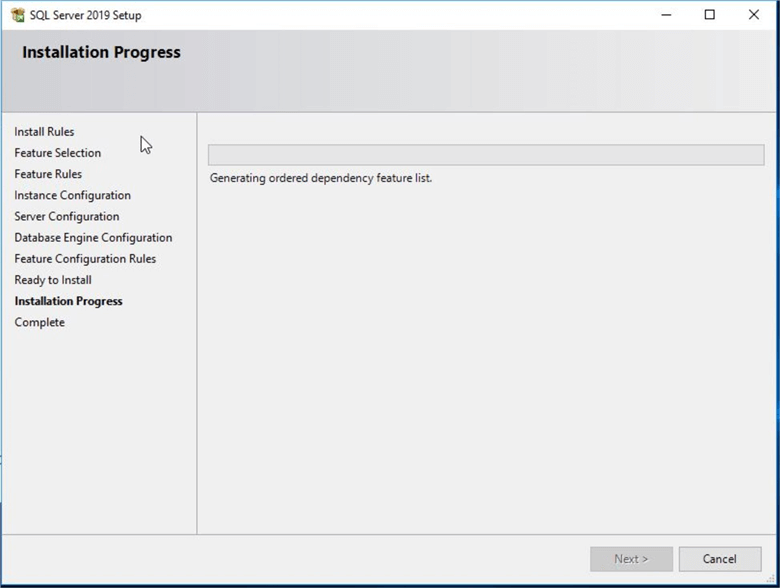
18 – Once you click "Install", you can see the below screen in which the installation progress bar appears.
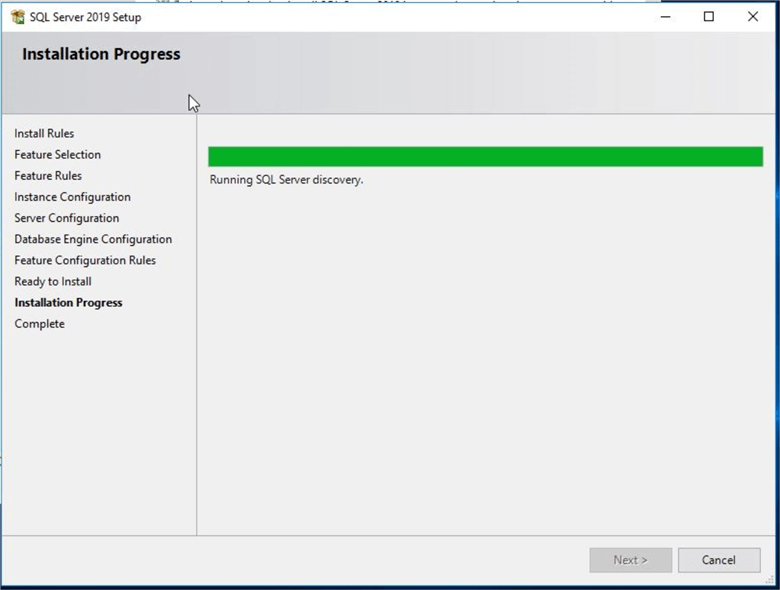
The completion percentage and progress bar are shown along with the components that are in process during this stage. You can see this in the below image.

Progress shows as 100% completed in the below screen.
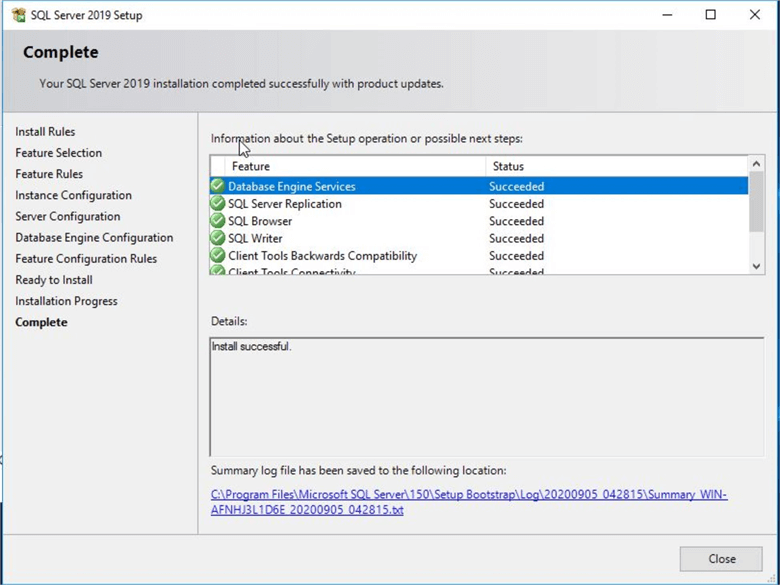
Once the above process is completed, you will see another window regarding the success or failure of each component that is being installed on this virtual machine. You can see all components have been installed successfully in the below screen.
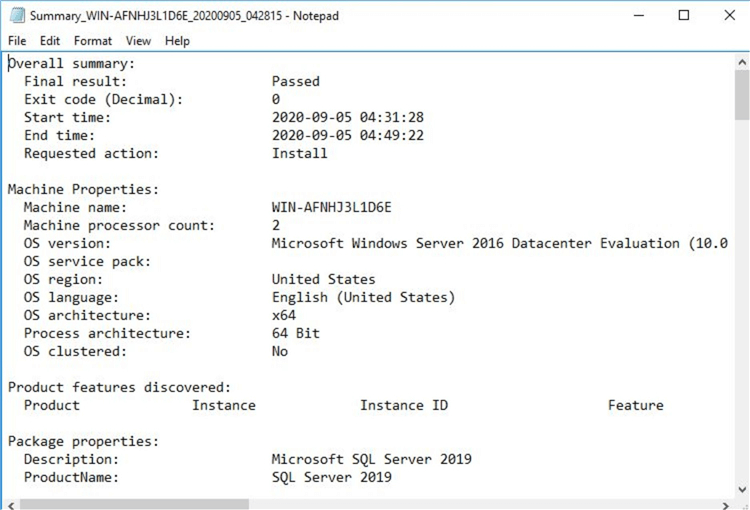
Below is a screenshot of the log file that shows as successful for all components and timelines.
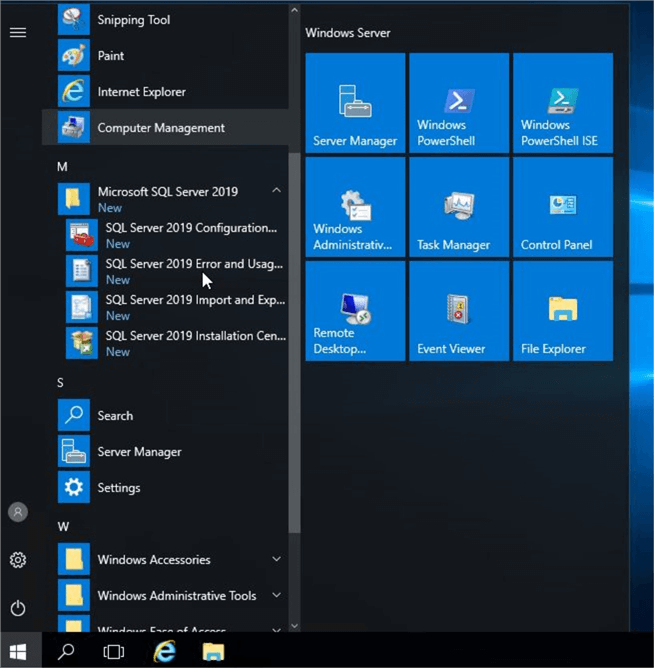
19 – Once installation is completed, you can validate the installation in multiple ways. First, check the start menu program and see if any SQL Server component is showing as a new installation. You can see all SQL Server 2019 components are showing in the start menu in the image below.
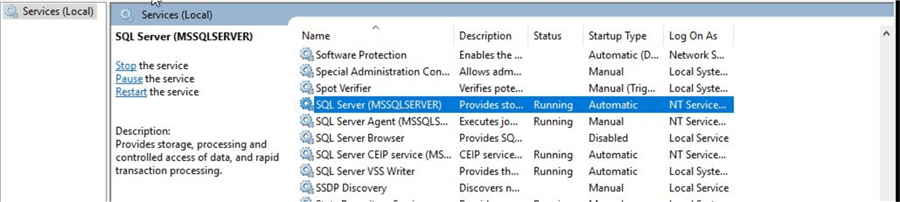
Another way to validate this installation is to check in Windows services whether the SQL Server service has been created. Here, we can see that SQL Server services have been created and are running.
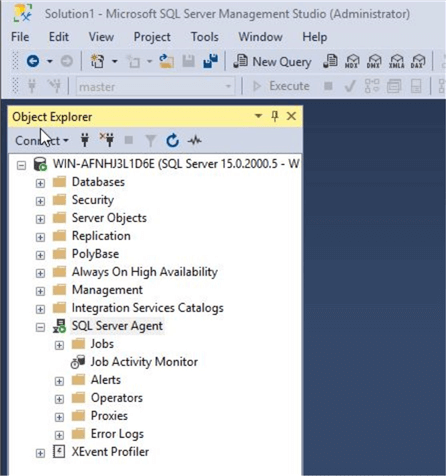
The final option is to validate and establish a database connection. You can use SQLCMD or SQL Server Management studio to make a database connection. If you have already installed SQL Server Management Studio, launch SSMS and connect to the newly installed SQL Server instance. You can see that we have connected to our newly installed SQL Server 2019 in the image below.
One thing to note is that SQL Server Management Studio is not installed as part of SQL Server 2019 installation. You need to install it separately. If you have installed it before then, go ahead and make connections. Otherwise, you can stay tuned for my next tip in which I will show you how to install SQL Server Management Studio for SQL Server 2019 instances.
We have installed SQL Server 2019 on Windows Server 2016 on a virtual machine. This SQL Server instance is ready for use. Go ahead and configure your application to use this instance for user transactions.
Next Steps
You learned how to install SQL Server 2019 on Windows Server 2016 operating system in a virtual machine. My next article will show you how to install the latest version of SQL Server Management Studio.
Read more articles on SQL Server:
- Read more articles on SQL Server Management Studio
- Explore more knowledge on SQL Server Database Administration Tips

Manvendra is a passionate database lover currently working as a Technical Architect at one of the top MNCs. He has extensive experience on all versions of SQL Server since 2000 and has built Big Data skills. He has lead projects on the following database features: Database Mirroring, Always ON, Replication, Log Shipping, Geo-Clustering and Performance Tuning and delivered many SQL Server projects on consolidation, upgrades, heterogeneous replication, HA / DR solutions, automation and major performance tuning projects. You can also follow Manvendra on his blog, Twitter, LinkedIn and Facebook.
- MSSQLTips Awards: Champion (100+ tips) – 2018 | Author Contender – 2015-2018, 2021-2022