Problem
For this tutorial, I will share how you can quickly and easily deploy a fully functioning SQL Server Always On configuration on the AWS platform using the AWS Launch Wizard.
Solution
Deployment of SQL Servers used to involve initiating a purchase order, approval of the purchase order, waiting for days for delivery of the physical server and then installing it in a server rack in your data center before you could even begin setting up the OS and SQL Server. For environments where servers are provisioned in virtual machines, the process can be much shorter; but still requires a service request to the virtualization team to provision the virtual machines so you can start building your highly available SQL Servers.
In this fast-paced world, the demand to quickly delivery a highly available environment for SQL Server can be overwhelming, but we will show how this can be quickly done on AWS.
AWS Launch Wizard for SQL Server
AWS offers an easy way of deploying, configuring and setting up SQL Servers Always On either for Availability Groups or a Failover Cluster without the long wait of provisioning servers, joining them to active directory, configuring the Windows Failover Cluster and finally configuring the availability groups and the listener. This can all be done via AWS Launch Wizard and in the example below we will setup SQL Servers for Always On Availability Groups.
If you need to use your own SQL Server license (BYOL), this is covered in the AWS Launch Wizard where you can select a prepared AMI of EC2 instance running OS and your licensed SQL Server. Make sure to prepare this AMI before going to the console for the AWS Launch Wizard.
AWS Launch Wizard is free and has no additional cost to your current AWS use, but you will have to pay for the resources provisioned after using the wizard. AWS Launch Wizard is available in most AWS regions, to check for the availability in your region you can visit the AWS Launch Wizard page here.
To get started with AWS Launch Wizard to deploy SQL Servers Always On Availability Groups, sign in to the AWS Console. If you do not have an AWS account yet, you create and activate an account here.
Prerequisites
- Coordinate with your Active Directory administrator to get the information for your organization’s AD domain settings. You will need to key in the DNS IP address, a domain username and password that has permission to create local objects to your active directory. This is for the failover cluster configuration that will be configured during the launch.
- Prepare the SQL computer name that is compliant to your organization’s standard naming convention for host names and SQL service accounts. You will also need to key in this information in the AWS Launch Wizard.
- Create an SNS topic for notifications regarding the deployment.
- Create a AWS key pair under the AWS EC2 dashboard. You will need this key pair to login via RDP into each of the SQL Server nodes later.
- If you plan to use your own SQL Server Enterprise or Standard license, prepare an AMI (image) of an existing EC2 where you have pre-installed your licensed SQL Server.
If you are just creating a test environment or a simple test a lot of the above items can be done much simpler and setup through the wizard.
So let’s get started!
Create SQL Server Always On via AWS Launch Wizard
Sign in to your AWS console.. From the AWS Management Console, navigate to AWS Launch Wizard by searching for it on the top search bar.
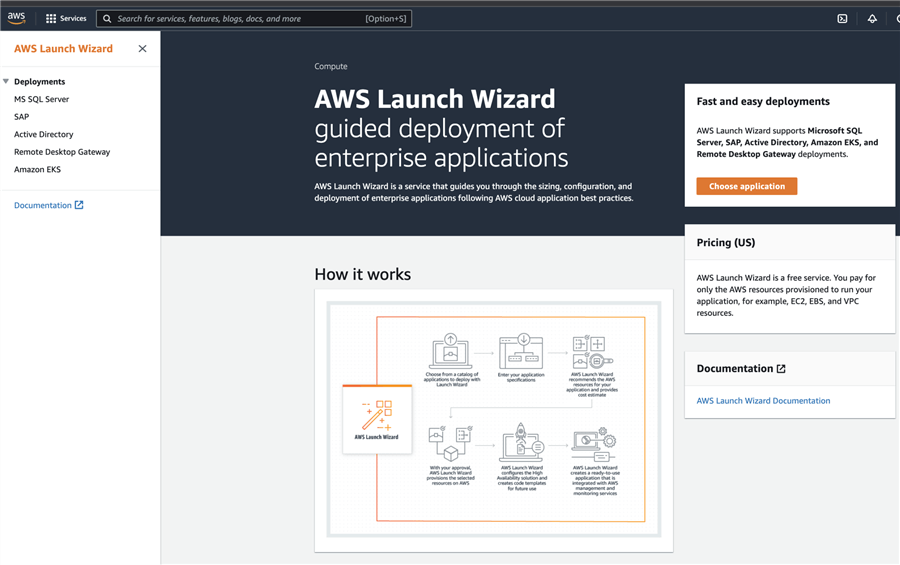
Step 1 Review Permissions
Select MS SQL Server from the Deployment options on the left pane menu. Click on button Create Deployment. This will open a new page as below. The steps 1 through 4 on the left pane are to guide you through the configuration.
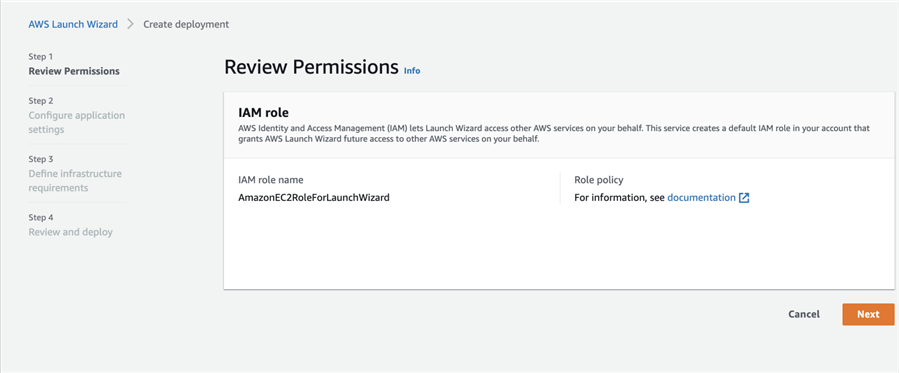
Click Next.
Step 2 Configure application settings
A new page will open for the configuration settings. Select ‘Windows’ from the operating system options and ‘Always On availability group’ for the deployment model.

In the ‘General’ section, enter your preferred deployment name. Enter the AWS resource name (ARN) for the SNS topic created in the pre-requisites section. You also have the option to create a new SNS topic from this wizard. Click on the checkbox for ‘Enable rollback for failed deployment’ to make sure the cleanup of provisioned resources before the deployment failed is successful.

In the ‘Connectivity’ section, select the previously keypair from the pre-requisite section. You will use this later on when connecting to the nodes via RDP. For the virtual private cloud (VPC), for test purposes you can go ahead and select ‘Create a new virtual private cloud (VPC)’. When selecting the option to use an existing VPC in your AWS account, make sure you have 2 subnets across 2 availability zones for high availability. AWS Launch Wizard will place each of the SQL Server nodes in each of these subnets.

In the ‘Active Directory’ section, you will need the active directory information that was mentioned in the pre-requisites section. It is important that the provided AD credentials should have permissions to create user and compute objects in the active directory. The AD credentials should also have permissions to join computer objects to the AD domain. Take note that this same AD credential will become a member of the computer local administrator group. This part is usually challenging as most teams that I have helped fail in this part of the deployment. t.
You will also have an option to create a new AWS managed Microsoft AD in this section. You can select this option for the purpose of testing. For this post, I opted for the option to create and connect to a new AWS Managed Microsoft AD. Remember to make sure these resources are deleted after you have completed your testing as these resources incur costs while running.

However, if you plan to connect to an existing active directory in your organization, the below screenshot should help you with the information that is required. Make sure to work with your system administrator to make sure these entries are valid.

In the ‘SQL Server’ section, enter the SQL Server service accounts to use. This same service account will also be used to connect to the SQL Server once the deployment is completed and you want to connect via the SQL Server availability group listener. Select the option for ‘AMI’ and to use an included license or your own license for SQL Server. As you can see in the screenshot below, the wizard has also provided an optional setting where you can key in the values for each of the SQL Server nodes, the Windows virtual cluster name, and the SQL Server virtual name. The information for the file share quorum witness node is included. There is no need to do this configuration manually. More information is displayed on the right side of the screen.
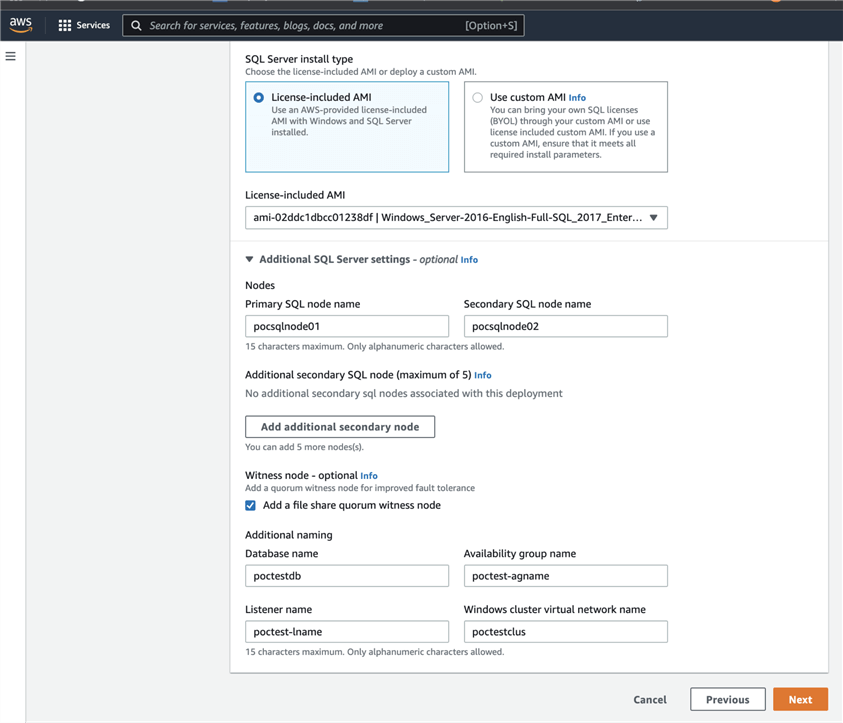
After you have completed the required entries, click the ‘Next’ button.
Step 3 Define infrastructure requirements
For step 3, on the Storage and Compute options, select the lowest instance type for testing purposes. For volume size, I also entered the lowest values.
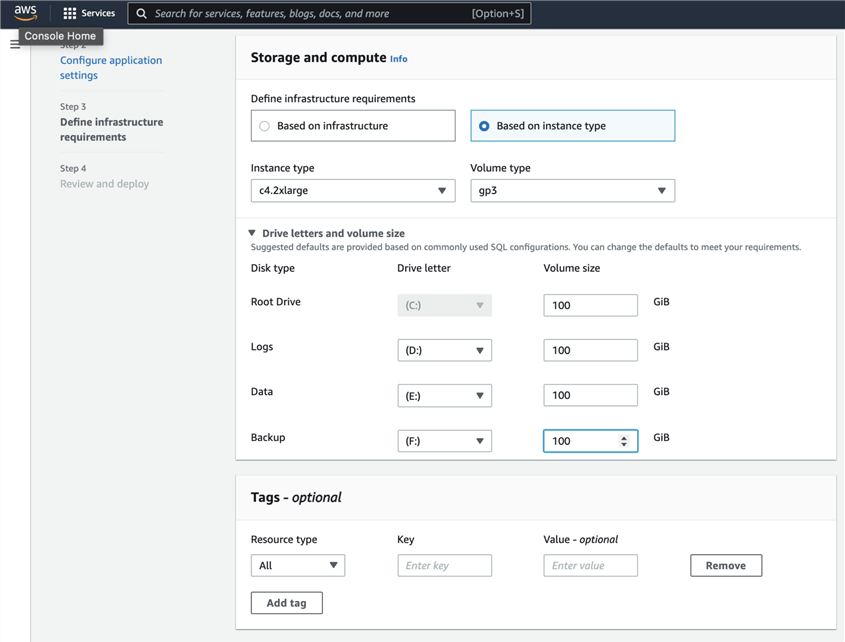
The AWS Launch Wizard also has a section for estimated on-demand costs for the resources that will be provisioned once the deployment completes. Click ‘Next’ for the review page.

Step 4 Review and deploy
If you have no changes to the settings, click ‘Deploy’ to proceed with the deployment.

Monitor Deployment Progress
To monitor the entire deployment process, navigate to Cloudformation by typing ‘Cloudformation’ from the AWS Services. The Cloudformation stacks should be creating as in the below screenshot. The entire deployment process should take no more than an hour to complete.
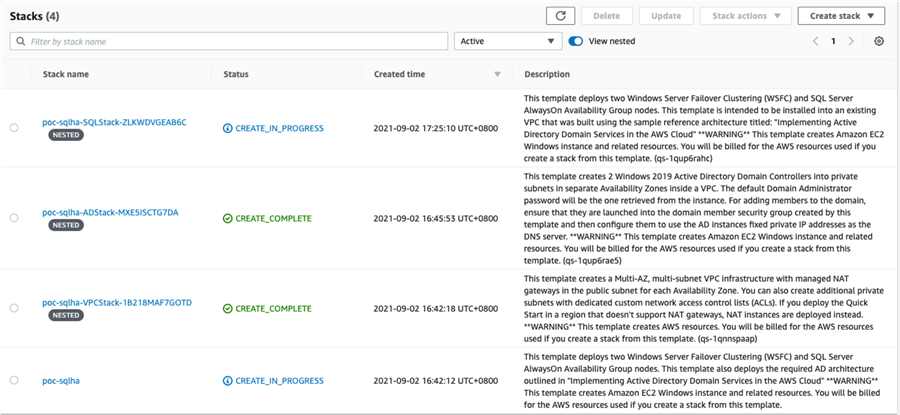
When the deployment has completed successfully, you should see all the provisioning status as ‘Completed’. Refer to screenshot below.

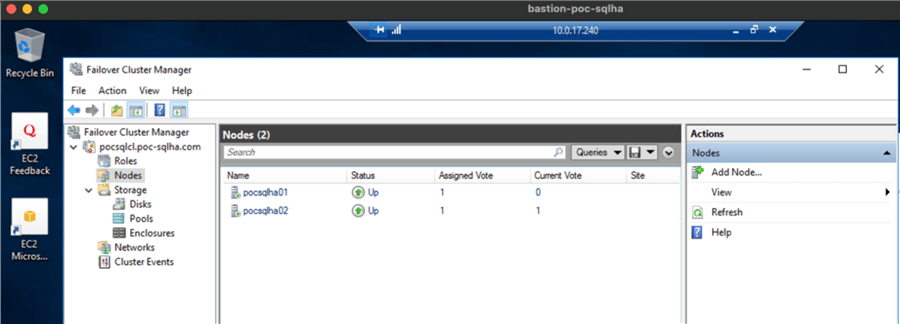
Connect to Windows Failover Cluster
With the keypair prepared earlier in the pre-requisite section, login into the SQL Server nodes via RDP to verify the Windows Cluster Failover settings and the SQL Server settings. For my testing, please see the below screenshots of the SQL Server nodes and the Windows Failover Cluster that was configured by the AWS Launch Wizard.

I also verified that SQL Server role is running and that I can connect to the SQL Server using SSMS. I also checked the properties for the availability group listener.

From the same connection via SSMS, I was also able to launch the availability group dashboard. I even created a sample database with a table and a few rows to test replication from the primary node to the secondary node.

Conclusion
With the AWS Launch Wizard, I was able to provision two SQL Server nodes joined to the domain, Windows Failover Cluster configured, SQL Server availability group listener setup and now ready for handover to the application team. All in a matter of minutes of walking through the wizard screens to configure and provision the servers.
For managing the resources provisioned by AWS Launch Wizard, you can manage these on the same page. Use the ‘Action’ button to manage the EC2 instance, the EBS volumes and connect to the SQL Servers nodes if you have setup the remote desktop gateway service. You can also use the AWS Launch Wizard to delete the entire deployment and it will perform a rollback on the Cloudformation stacks that were created in the AWS Cloudformation portal.
Next Steps
- For more articles on managing your SQL Server estate running on AWS platform, click here.
- For more help on getting started to manage and monitor your SQL Server Always On on the AWS platform, click here.
- For more help on understanding SQL Server Availability Groups, click here.

Carla Abanes is a certified Microsoft SQL Server Database Administrator with extensive experience in data architecture and supporting mission critical databases in production environments. She is based in Manila and wears 2 hats at work as a SQL Server Technical Lead and as a Cloud Architect.
She holds a certification in AWS Solutions Architect – Professional and Azure Administration. I am passionate about conceptualizing proof-of-concepts, turning ideas into real applications and overcoming challenges that come with the execution and delivery of solutions.


i received this Error
Validate credentials: Validation failed. Reason: Failed to receive 1 resource signal(s) within the specified duration,Validate connectivity for subnet – subnet-03a77c1c96d45ba66: Validation failed. Reason: Failed to receive 1 resource signal(s) within the specified duration,Validate connectivity for subnet – subnet-0dc73a85835a846c8: Validation failed. Reason: Failed to receive 1 resource signal(s) within the specified duration
In the “Next Steps” section ,the link that begins:
For more help on getting started to manage and monitor your SQL Server Always On on the AWS platform…
links to a page that makes no reference at all to Always On