Problem
In case you want to perform extra operations, such as describe, analyze, and visualize your data stored in SQL you need an extra tool. If you have the flexibility or requirement to not use Power BI, you can resort to scripting.
Solution
In this tutorial, we examine the scenario where you want to read SQL data, parse it directly into a dataframe and perform data analysis on it. When connecting to an analytical data store, this process will enable you to extract insights directly from your database, without having to export or sync the data to another system.
Getting Started
Please read my tip on How to Get Started Using Python Using Anaconda and VS Code, if you have not already. Then, open VS Code in your working directory. Create a new file with the .ipynbextension:

Next, open your file by double-clicking on it and select a kernel:

You will get a list of all your conda environments and any default interpreters (if installed). You can pick an existing one or create one from the conda interface or terminal prior. Assuming you do not have sqlalchemy installed, run pip install SQLAlchemy in the terminal of your target environment:

Repeat the same for the pandas package: pip install pandas.
Establishing a connection
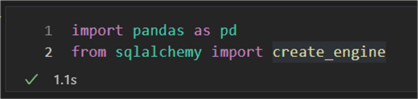
Having set up our development environment we are ready to connect to our local SQL server. First, import the packages needed and run the cell:
import pandas as pd
from sqlalchemy import create_engine
Next, we must establish a connection to our server. This is what a connection string for the local database looks like with inferred credentials (or the trusted connection under pyodbc):
engine = create_engine(
    'mssql+pyodbc://'
    '@./AdventureWorks2019?' # username:pwd@server:port/database
    'driver=ODBC+Driver+17+for+SQL+Server'
    )

Let us break it down:
- on line 2 the keywords are passed to the connection string
- on line 3 you have the credentials, server and database in the format username:pwd@server:port/database. Here both username and password are omitted as we are connecting to the local server. The server itself is denoted by . (dot) for localhost. The port is the default. In case you must specify a port and you don’t know it, check this helpful tip: Identify SQL Server TCP IP port being used.
- on line 4 we have the driver argument, which you may recognize from a previous tip on how to connect to SQL server via the pyodbc module alone.
Reading data with the Pandas Library
The read_sql pandas method allows to read the data directly into a pandas dataframe. In fact, that is the biggest benefit as compared to querying the data with pyodbc and converting the result set as an additional step.
Let us try out a simple query:
df = pd.read_sql(
      'SELECT [CustomerID]\
      ,[PersonID]\
      ,[StoreID]\
      ,[TerritoryID]\
      ,[AccountNumber]\
      ,[ModifiedDate]\
  FROM [Sales].[Customer]',
  engine,
  index_col='CustomerID')

The first argument (lines 2 – 8) is a string of the query we want to be executed. The second argument (line 9) is the engine object we previously built to connect to the server. Lastly (line10), we have an argument for the index column. Here it is the CustomerID and it is not required. However, if you have a bigger dataset, it can be very useful. For example, thousands of rows where each row has a timestamp column and numerical value column. There, it can be very useful to set the index to the timestamp of each row at query run time instead of post-processing later.
Explore the dataframe
Let us pause for a bit and focus on what a dataframe is and its benefits. The pandas dataframe is a tabular data structure, consisting of rows, columns, and data. It is like a two-dimensional array, however, data contained can also have one or multiple dimensions. Within the pandas module, the dataframe is a cornerstone object allowing quick (relatively, as they are technically quicker ways), straightforward and intuitive data selection, filtering, and ordering. Additionally, the dataframe can provide a good overview of an entire dataset by using additional pandas methods or additional modules to describe (profile) the dataset. Turning your SQL table to a pandas dataframe ‘on the fly’ enables you as the analyst to gain an overview of the data at hand. You can also process the data and prepare it for further analysis.
More complex example
Let us investigate defining a more complex query with a join and some parameters. Parametrizing your query can be a powerful approach if you want to use variables existing elsewhere in your code. For example:
start_date = '2012-01-01'
end_date = '2012-12-31'
product_name = '%shorts%'

df2 = pd.read_sql('SELECT AVG(sod.OrderQty) [Avg Order Qty],\
                p.Name,\
                FORMAT(soh.OrderDate,\'yyyy-MM\') [Year-Month]\
        FROM Sales.SalesOrderHeader soh\
        JOIN Sales.SalesOrderDetail sod ON sod.SalesOrderID = soh.SalesOrderID\
        JOIN Production.Product p ON sod.ProductID = p.ProductID\
        WHERE soh.OrderDate >= ?\
          AND soh.OrderDate <= ? \
          AND p.Name LIKE ?\
        GROUP BY p.Name, FORMAT(soh.OrderDate,\'yyyy-MM\') \
        ORDER BY FORMAT(soh.OrderDate,\'yyyy-MM\') DESC',
        engine,
        params=[start_date, end_date,product_name])

df2.head()

For this query, we have first defined three variables for our parameter values: start_date, end_date and product_name. Notice we use % in the product_name value itself as it will be passed as a literal string to the query. Inside the query itself, we use ? (question mark) as placeholder indicators. They denote all places where a parameter will be used and should be familiar to you from working with pyodbc. Then, we use the params parameter of the read_sql function, to which we pass a list containing the parameter variables we defined. It is important to place the variables in the list in the exact order they must be passed to the query.
Pivot
To take full advantage of this dataframe, I assume the end goal would be some visualization. In this case, we should pivot the data on the product type column to make it more suitable for a stacked bar chart visualization:
df_piv = df2.pivot(index=['Year-Month'],
                    columns=['Name'],
                    values=['Avg Order Qty'])

Visualize
Finally, we can use the pivoted dataframe to visualize it in a suitable way with this syntax:
import matplotlib.pyplot as plt

plt.rcParams['figure.figsize'] = (15,10)

ax = df_piv.plot(stacked=True, kind='bar')

for bar in ax.patches:
    height = bar.get_height()
    width = bar.get_width()
    x = bar.get_x()
    y = bar.get_y()
    label_text = height
    label_x = x + width / 2
    label_y = y + height / 2
    ax.text(label_x, label_y, label_text, ha='center',
            va='center')

ax.set_xticklabels(df_piv.index,rotation='horizontal')
First, we must import the matplotlib package. Then we set the figsize argument to 15×10 inches. Next, we set the ax variable to a plot based on the pivoted dataset. In the subsequent for loop, we calculate the position of each data label, so it is precisely aligned both horizontally and vertically. Finally, we set the tick labels of the x-axis. In this case, they are coming from the index of the pivoted dataframe, which is the Year-Month column. This is the result – a plot on which we can follow the evolution of products of type “shorts” over the predefined period:

Conclusion
In this tutorial, we examined how to connect to SQL Server and query data from one or many tables directly into a pandas dataframe. With this technique, we can take full advantage of additional Python packages such as pandas and matplotlib.
Next Steps
- Connecting to SQL Server with SQLAlchemy/pyodbc
- Identify SQL Server TCP IP port being used
- Pandas read_sql full documentation

Hristo Hristov is a seasoned data professional with 10+ years of experience spanning the intersection of data engineering and smart manufacturing solutions. Since 2017, he has specialized in implementing advanced analytics solutions for bridging the IT/OT gap.
A technical writer with over 80 published articles on data and AI technologies, Python development, and cloud solutions. Passionate about transforming complex data into business value through innovative applications of Azure Data Platform, Python, IoT solutions, databases, and other cloud technologies.
Currently applying Industry 4.0 best practices, focusing on IoT connectivity, and implementing data and AI systems in manufacturing. Hristo holds a degree in Data Science and several Microsoft certifications covering SQL Server, Power BI, and related technologies.
- MSSQLTips Awards
- Achiever Award (75+ tips) – 2026
- Rookie of the Year – 2021
- Author Contender – 2022/2023/2024/2025


Hi Jeff, after establishing a connection and instantiating a cursor object from it, you can use the callproc function, where “my_procedure” is the name of your stored procedure and x,y,z is a list of parameters:
cursor_obj.callproc(“my_procedure”, [‘x’, ‘y’, ‘z’])
For now, I can suggest checking out the documentation here:
https://docs.sqlalchemy.org/en/14/core/connections.html#calling-stored-procedures-and-user-defined-functions
I will probably look into making a new tip based on your question. Thanks for that.
Interesting. What’s the code for passing parameters to a stored procedure and returning that instead?