By: Vitor Montalvao | Comments (5) | Related: > Azure
Problem
This tip intends to help those Microsoft data professionals that are moving to SQL Azure for the first time. You should use this article as a tutorial and follow it step-by-step. I will also try to share my experiences on the differences that I have found when I was moving from SQL Server to SQL Azure for the first time.
In my first article of this SQL Azure series, I wrote about how to create a SQL Azure database. In this article I am writing about how to migrate regular SQL Server databases to a SQL Azure server.
Solution
SQL Azure does not support BACKUP and RESTORE commands and neither CREATE DATABASE FOR ATTACH, so we cannot use these methods to import a SQL Server database into Microsoft Azure. The Copy Database Wizard also does not work for migrating databases from SQL Server to SQL Azure.
There are some possible methods, but the simpler options use bacpac files. A bacpac file is a compressed file that contains the database schema and the respective data.
There are alternative methods that use migration tools or other SQL Server features such as Replication. If you want to know those methods, I added a link to the respective MSDN article at the end of this article as I will not explain them in this article.
Before continuing with this article, note that for a successful migration it is expected that everything is working properly after the migration, so be sure that the database that you are migrating is 100% compatible with SQL Azure. If you are not sure, before starting the migration, check in this MSDN article: T-SQL differences between SQL Server and SQL Azure. Also check the supported features in SQL Azure. And do not forget to perform as many tests as you can to assure a clean and error free migration process.
The migration process is basically an export and import of bacpac file. Let us see how to achieve those tasks.
Export to bacpac file in SQL Server Management Studio
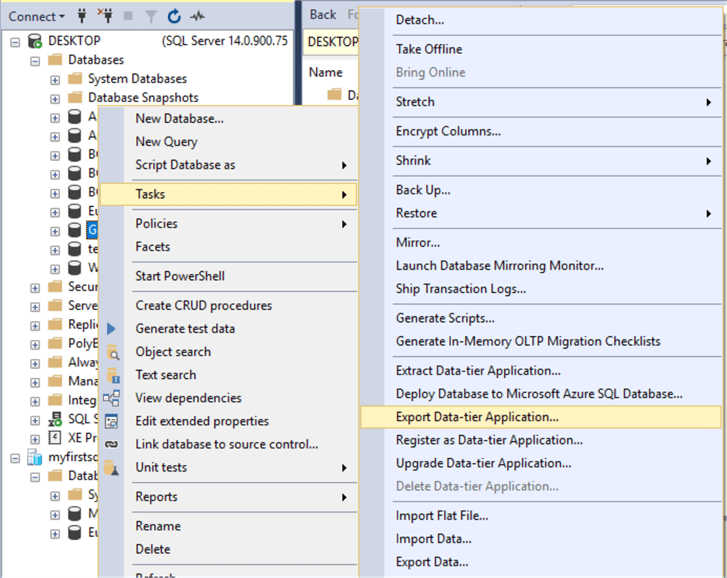
To export a database to a bacpac file in SQL Server Management Studio (SSMS), connect to the desired SQL Server instance and in the Object Explorer pane, right-click on the name of the desired database. In the context-menu select Tasks > Export Data-tier Application:
The above option will open the respective wizard:
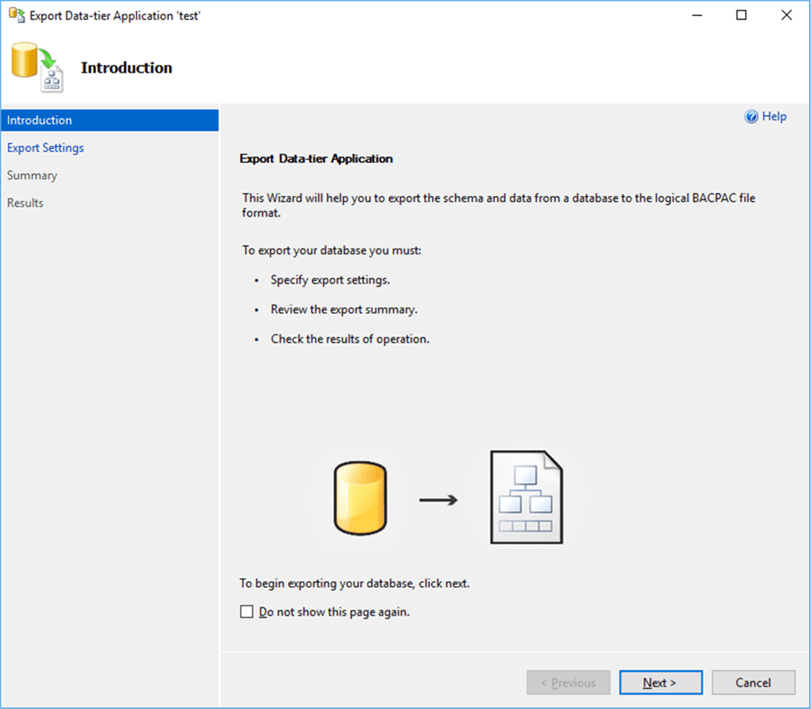
Click Next > in the Introduction page to go to the Export Settings:
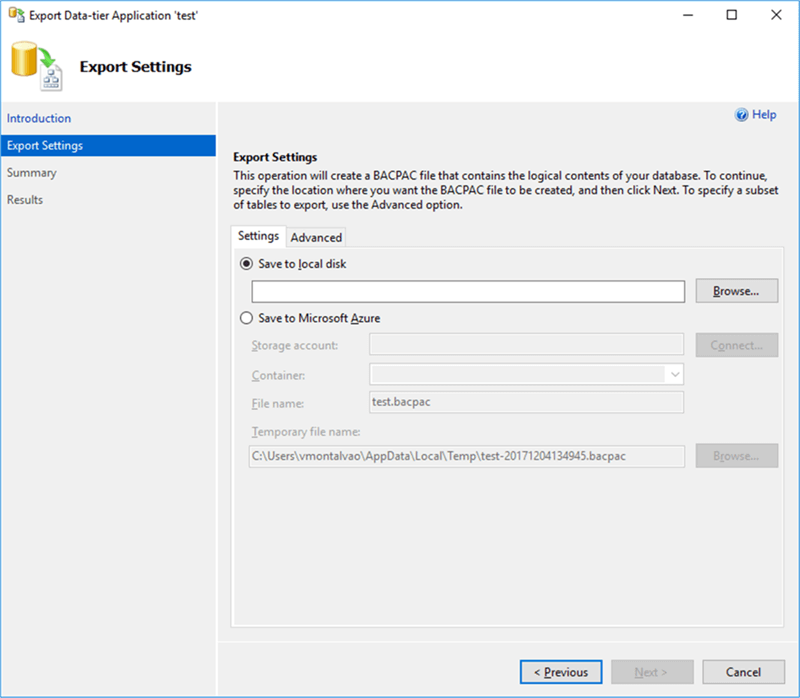
In the Export Settings you are requested to provide the location to save the bacpac file. You can save it to the local disk or to an Azure storage account. Since I do not have an Azure storage account I will save the bacpac file to my local disk.
In the Advanced tab you can select which objects will be exported. By default, all objects are selected. Since this is what I want (migrate full database), I will go with the default and have all objects selected.
After providing the location and the bacpac file name, the Next > button will be enabled and then you can click on it to proceed. This will present the Summary page, where you can verify and confirm the provided settings:
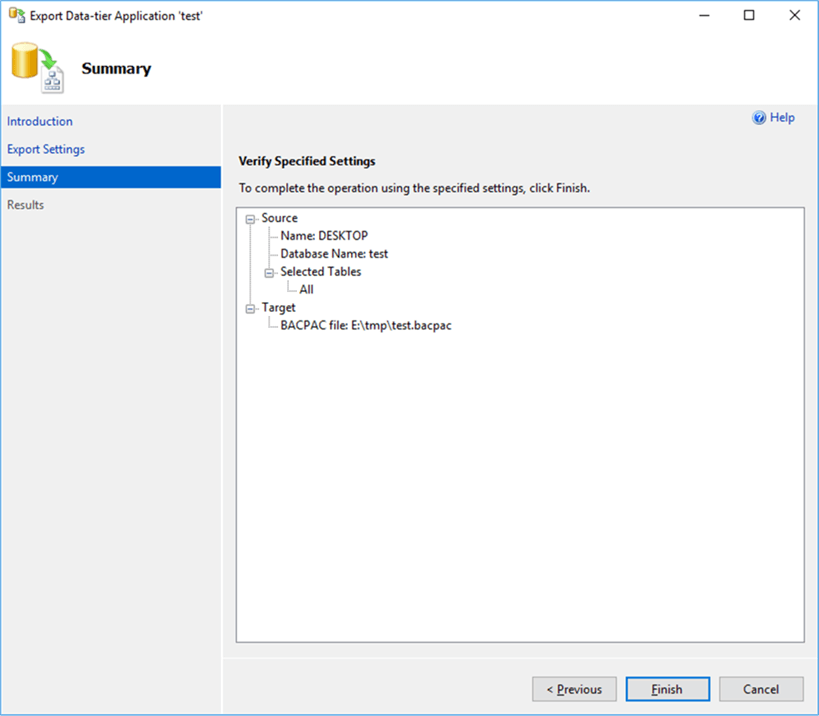
After confirming that all provided information is correct, click on the Finish button to start the Export.
Errors will be shown if the export is unsuccessful and you will need to click on the respective error to find out what went wrong (usually errors occurs when unsupported elements or external references try to be exported). The following screen shows what a successful export looks like:

Click on the Close button to exit the BACPAC export wizard.
Import a bacpac file to SQL Azure
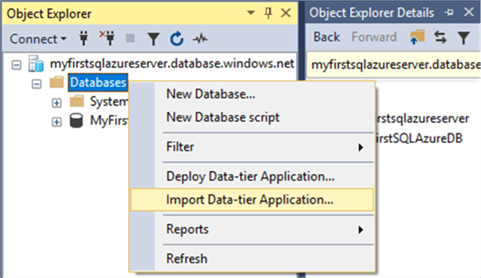
To create a SQL Azure database from a bacpac file in SQL Server Management Studio (SSMS), connect to the desired SQL Azure server and in the Object Explorer pane, right-click on the Databases folder. In the context-menu select Import Data-tier Application:
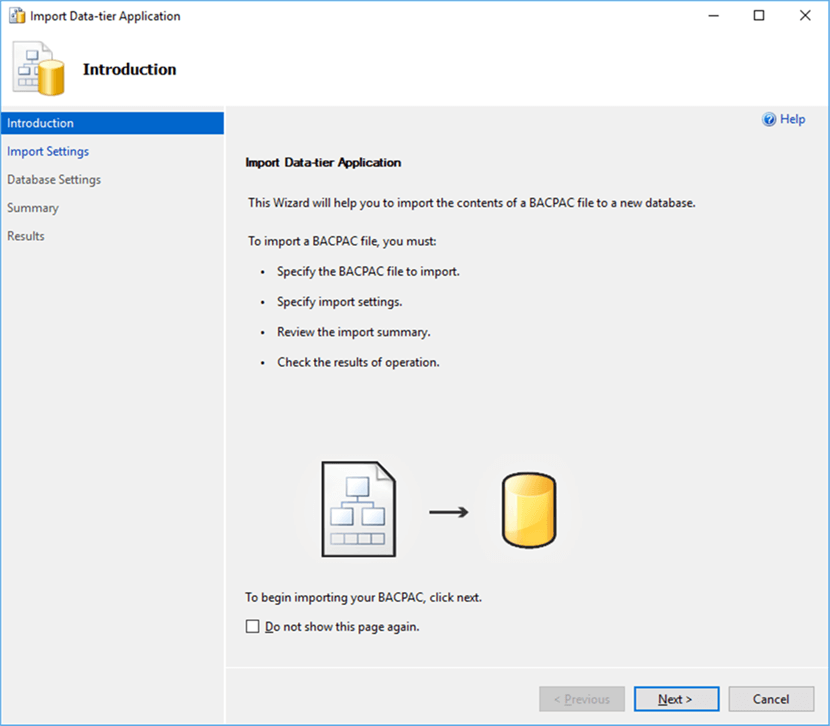
The above option will call the Import bacpac wizard and it will start by presenting the Introduction page:
Click on the Next > button to provide the Import Settings:
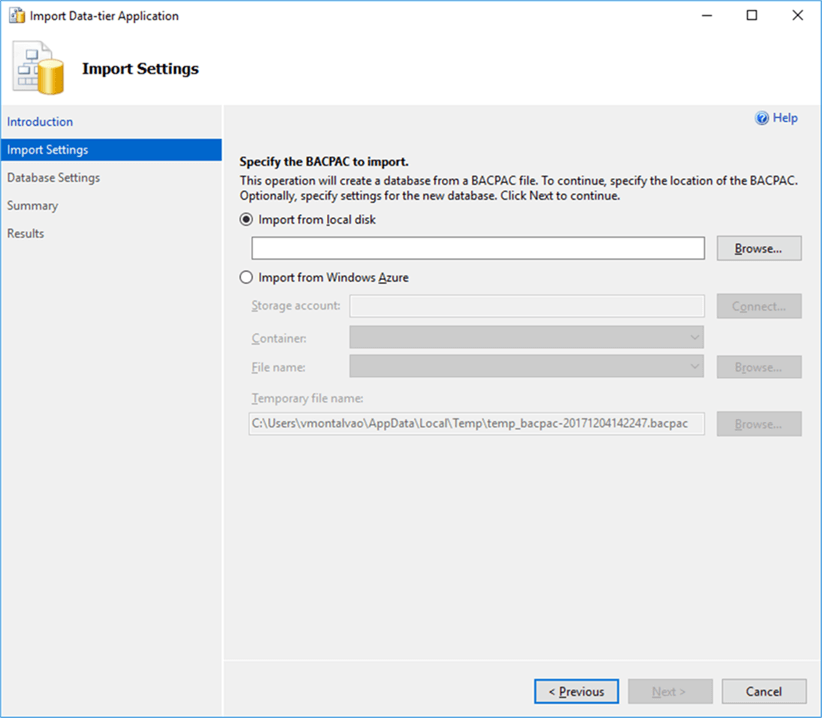
In the Import Settings you are requested to provide the location of the bacpac file to import from. You can import from an existing bacpac file from the local disk or from an Azure storage account. Since I have exported the bacpac file to my local disk, I will import it from there.
After providing the location and the bacpac file name, the Next > button will be enabled and then you can click on it to proceed. This will move to the Database settings screen:
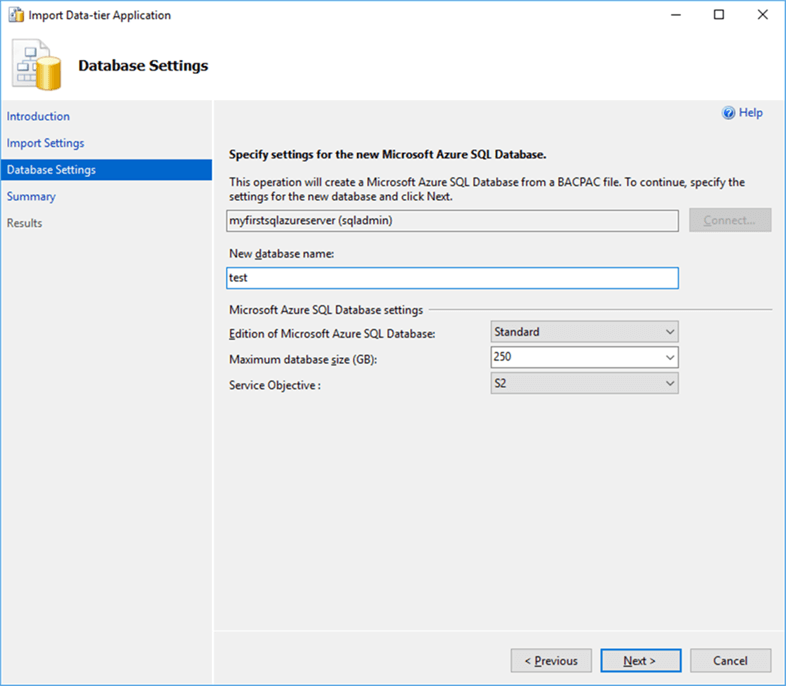
In the Database Settings page, you are requested to configure the new SQL Azure database by providing the new database name (by default it will present the source database name) and the maximum database size (by default it will be configured with the maximum allowed size for the selected edition).
For this case I will keep the original database name, but will change to the Basic edition since the database is very small and I do not need to go for a more expensive edition.
Click on the Next > button to proceed to the Summary page:

In the Summary page, confirm that you provided the correct information. As you can see by the above screenshot, I have changed the edition to Basic. After confirming, click on the Finish button to start the Import.
An error will be shown if there is an unsuccessful import and you will need to click on the respective error to find out what went wrong. The following screen shot shows how a successful import should look:
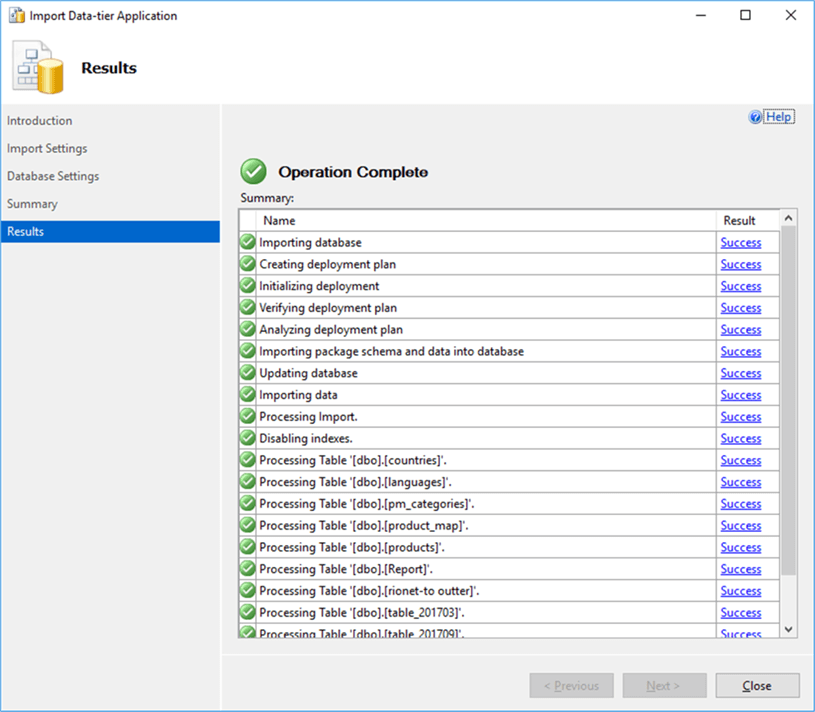
Click on the Close button to exit the BACPAC import wizard.
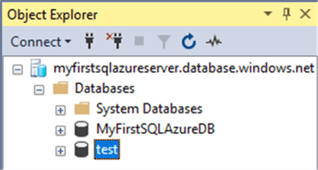
Validate SQL Azure Import
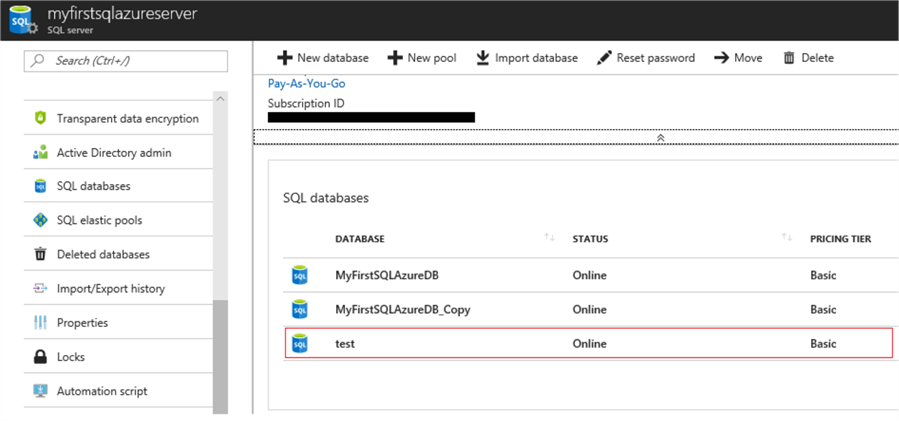
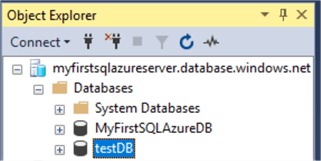
You can confirm that the new database has been created in the SQL Azure server.
In SSMS navigate to the instance:
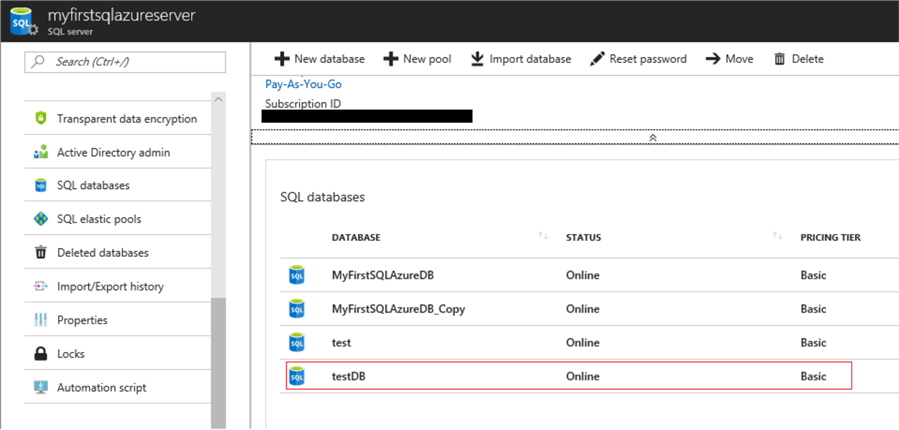
And in the Microsoft Azure Portal by checking in the respective SQL Azure server:
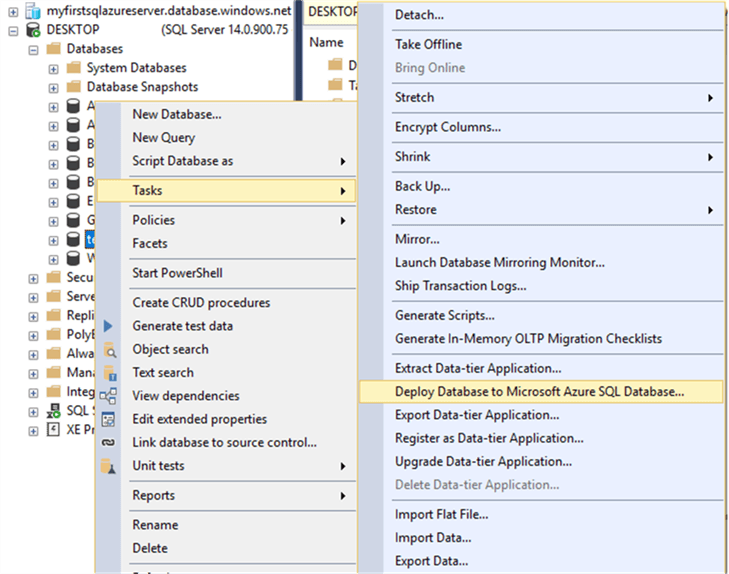
Deploy database to Azure
I have showed you how to migrate a SQL Server database to SQL Azure server by exporting and importing a bacpac file.
I want to show you each option isolated so you can understand them better and depending on what your needs are you can choose to go for a step-by-step process (for example for later import or to provide the bacpac file to another entity) or go for an immediate migration.
Now I will show you how to do the same but in a single run, i.e. the export and import will happen immediately one after another without human intervention.
Deploying a SQL Server database to a Microsoft Azure SQL database, can be achieved in SSMS by right-clicking in the database name that we want to migrate and then choose the following options from the context-menu: Tasks > Deploy Database to Microsoft Azure SQL Database.
This will start the Deployment wizard by presenting the Introduction page:
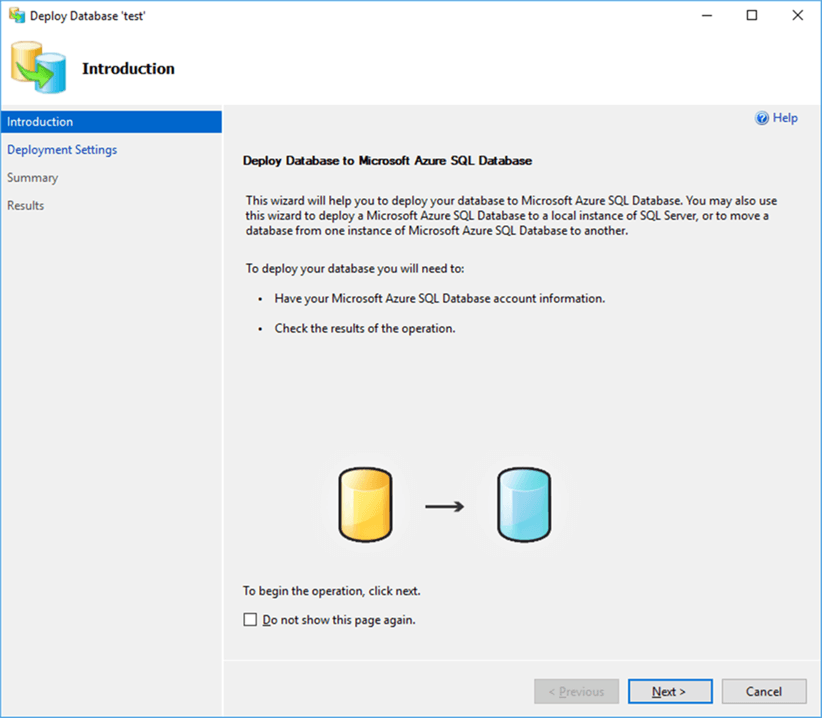
Click on the Next > button to provide the Deployment Settings:
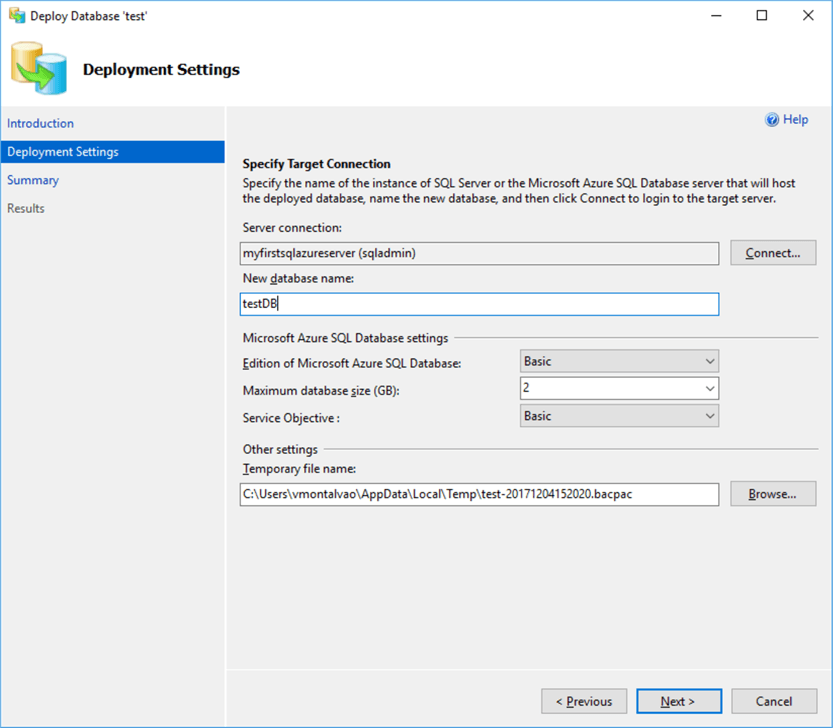
Click on the Connect button to provide the credentials to connect to your SQL Azure server. Then provide the new database name. I will use the same test database, but need to provide a new name since test was been used before during the previous import. I will call this new database testDB as I cannot use an existing database name.
You can use the suggested temporary file name and path or provide a new path and/or file name. In my case I will just accept the suggested one.
Click on the Next > button when you have provided all the necessary information for the deployment. Then confirm on the Summary page if the provided information is correct:
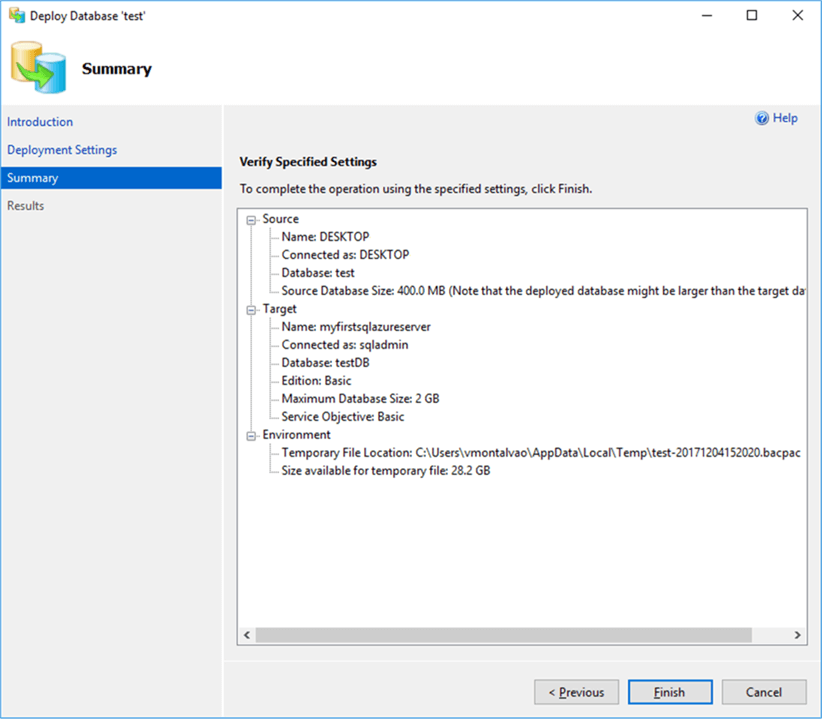
If it is all correct, click the Finish button to start the deployment of the database.
The deployment will show first the Export and then the Import processes. It will stop if any errors occur during these processes. When completed successfully, a screen similar to the following will be shown:
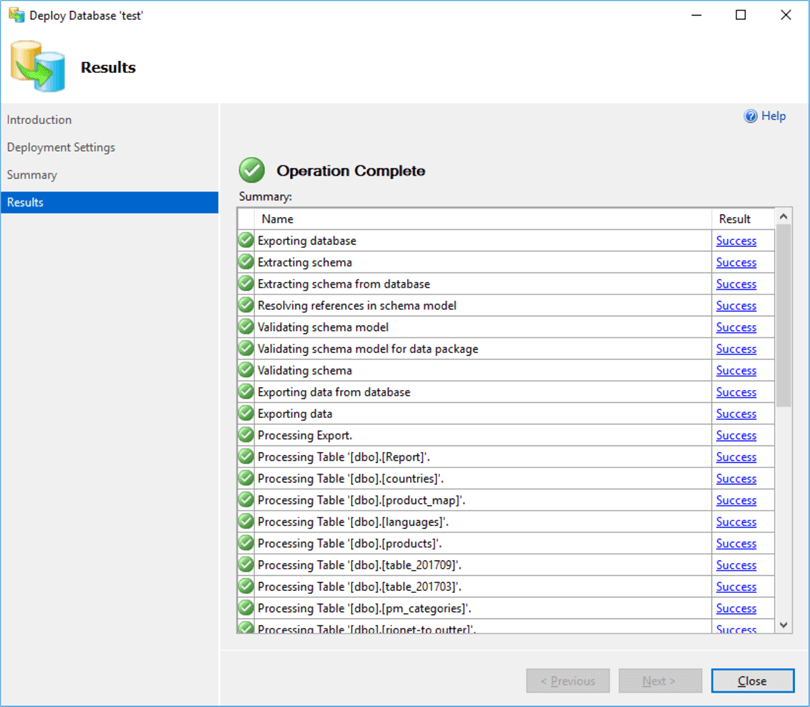
Click on the Close button to exit the Deploy database wizard.
Validate the New SQL Azure Database is Online
You can confirm now that the new database has been created in the SQL Azure server. In SSMS navigate to the SQL Azure instance:
And in the Microsoft Azure Portal validate by checking in the respective SQL Azure server:
Next Steps
- Stay tuned for my upcoming articles in this series.
- Check out these other articles:


About the author
 Vitor Montalvão is a SQL Server engineer with 20 years of experience in SQL Server, specializing in performance & tuning, data modelling, migration and security.
This author pledges the content of this article is based on professional experience and not AI generated.
View all my tips
