By: Ron L'Esteve | Comments (1) | Related: > Azure Databricks
Problem
Organizations and data science developers that are seeking to leverage the power of Machine Learning (ML) and AI algorithms spend a significant amount of time building ML models. They are seeking a method for streamlining their machine learning development lifecycle to track experiments, package code into reproducible runs, as well as share and deploy ML models while building machine learning models. What options are available to help with streamlining the end to end ML development lifecycle software development while building these ML models in Azure Databricks?
Solution
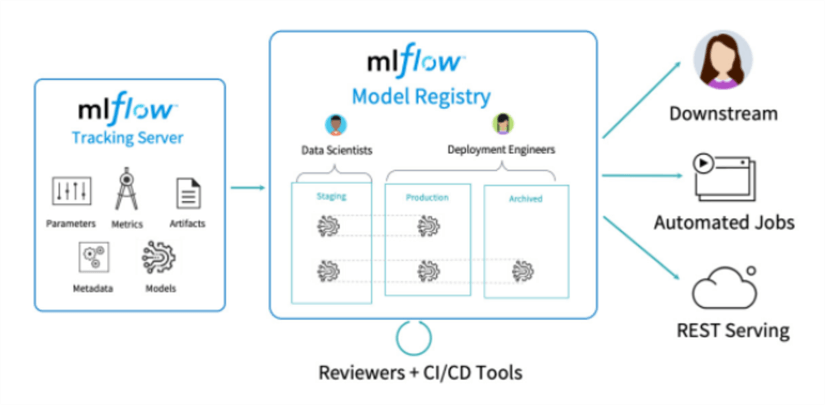
MLflow is an open source platform for managing the end-to-end machine learning lifecycle. MLflow Projects focus on four primary functions:
- Tracks experiments to compare and record parameters and results,
- Packages ML code to share with other Data Scientists or transfer to production,
- Manage and deploy ML models using a variety of available libraries, and
- Register models for easy model management and serve models to host them as REST endpoints.
In this article, we will go over how to get started with MLflow using Azure Databricks as the machine learning platform.
Create and MLflow Experiment
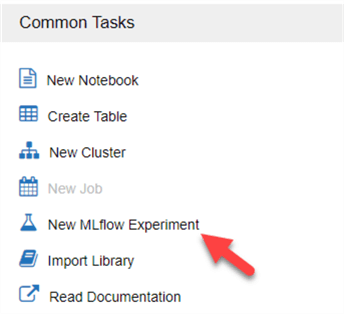
Let's being by creating an MLflow Experiment in Azure Databricks. This can be done by navigating to the Home menu and selecting 'New MLflow Experiment'.
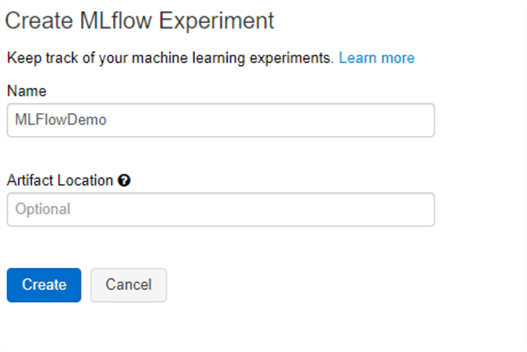
This will open a new 'Create MLflow Experiment' UI where we can populate the Name of the experiment and then create it.
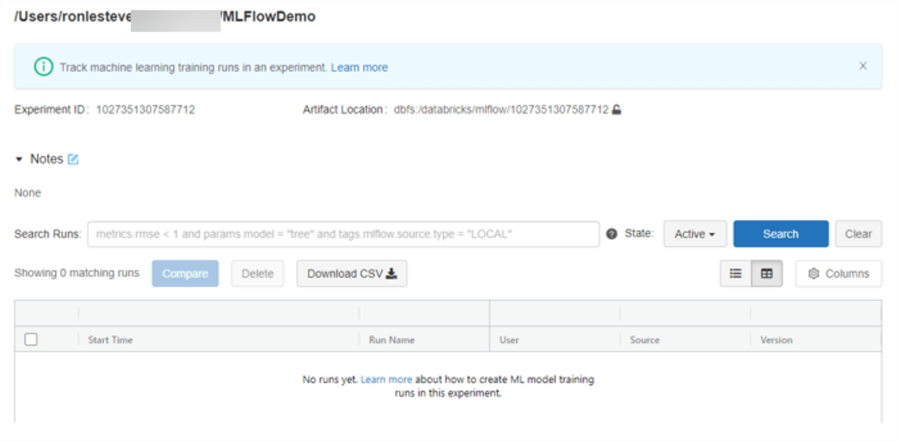
Once the experiment is created, it will have an Experiment ID associated with it that will be need when we configure our notebook containing the ML model code.
Notice the experiment UI contains options to compare multiple models, filter by model status, search by criteria, and download csv details.
Install the MLflow Library
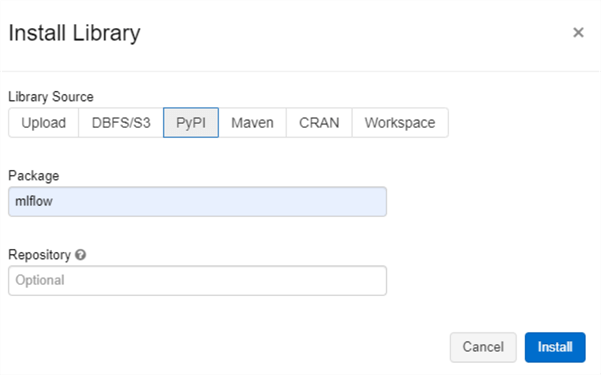
Now that we have created an MLflow Experiment, lets create a new cluster and install the mlflow PyPI library to it.
If you are running Databricks Runtime for Machine Learning, MLflow is already installed and no setup is required. If you are running Databricks Runtime, follow these steps to install the MLflow library.
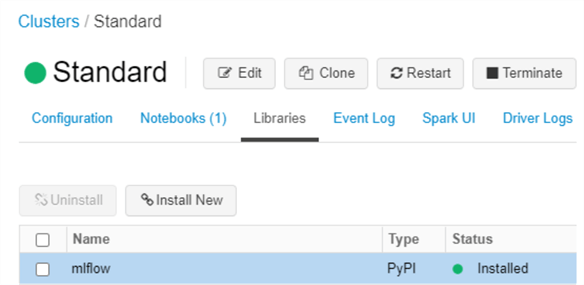
Once installed successfully, we will be able to see a status of Installed on the Cluster's library.
Create a Notebook
Now that we have an experiment, a cluster, and the mlflow library installed, lets create a new notebook that we can use to build the ML model and then associate it with the MLflow experiment.
Note that Databricks automatically creates a notebook experiment if there is no active experiment when you start a run using: mlflow.start_run(). Since we do have an experiment ID, we will use mlflow.start_run(experiment_id=1027351307587712).
Alternatively, we can define the experiment name as follows:
experiment_name = "/Demo/MLFlowDemo/"
mlflow.set_experiment(experiment_name)
Selective Logging
From a logging perspective, we have the option to auto log model-specific metrics, parameters, and model artifacts. Alternatively, we can define these metrics, parameters, or models by adding the following commands to the notebook code as desired:
- Numerical Metrics:
mlflow.log_metric("accuracy", 0.9) - Training Parameters:
mlflow.log_param("learning_rate", 0.001) - Models:
mlflow.sklearn.log_model(model, "myModel") - Other artifacts(files):
mlflow.log_artifact("/tmp/my-file", "myArtifactPath")
The following code imports a dataset from scikit-learn and creates the training and test datasets. Let's add this to a code block in the Databricks Notebook.
from sklearn.model_selection import train_test_split
from sklearn.datasets import load_diabetes

db = load_diabetes()
X = db.data
y = db.target
X_train, X_test, y_train, y_test = train_test_split(X, y)
Next, we will import mlflow and sklearn, start the experiment and log details in another code block in the Databricks Notebook.
import mlflow
import mlflow.sklearn
from sklearn.ensemble import RandomForestRegressor
from sklearn.metrics import mean_squared_error

# In this run, neither the experiment_id nor the experiment_name parameter is provided. MLflow automatically creates a notebook experiment and logs runs to it.
# Access these runs using the Experiment sidebar. Click Experiment at the upper right of this screen.
with mlflow.start_run(experiment_id=1027351307587712):
  n_estimators = 100
  max_depth = 6
  max_features = 3
  # Create and train model
  rf = RandomForestRegressor(n_estimators = n_estimators, max_depth = max_depth, max_features = max_features)
  rf.fit(X_train, y_train)
  # Make predictions
  predictions = rf.predict(X_test)

  # Log parameters
  mlflow.log_param("num_trees", n_estimators)
  mlflow.log_param("maxdepth", max_depth)
  mlflow.log_param("max_feat", max_features)

  # Log model
  mlflow.sklearn.log_model(rf, "random-forest-model")

  # Create metrics
  mse = mean_squared_error(y_test, predictions)

  # Log metrics
  mlflow.log_metric("mse", mse)
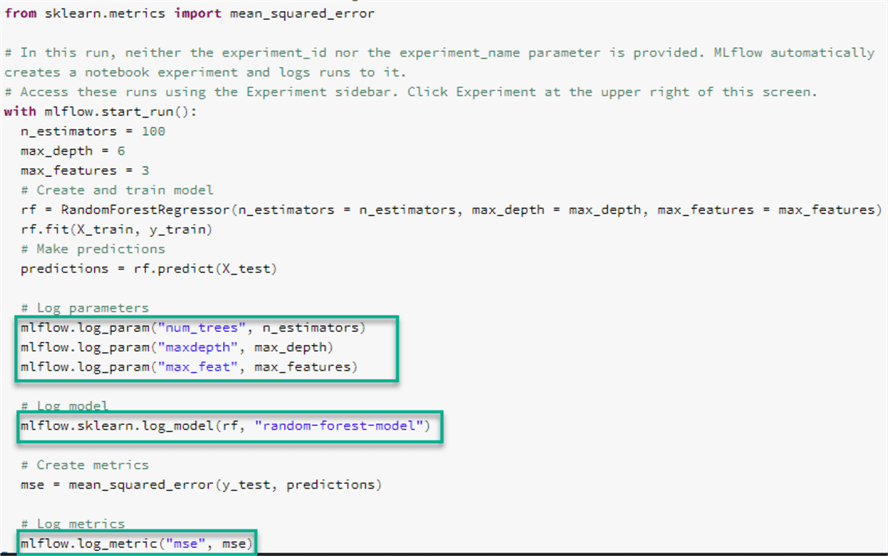
Notice that we are defining the parameters, metrics and model that needs to be logged.
By clicking on the following icon, we would be able to see the experiment run details. Additionally, we can click the Experiment UI on the bottom to open the UI. This is particularly useful if there is no experiment created and a new random experiment will be created for you.
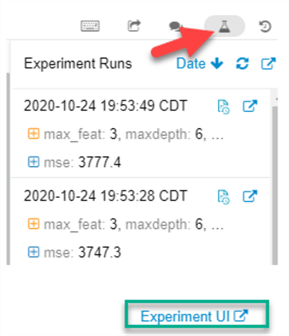
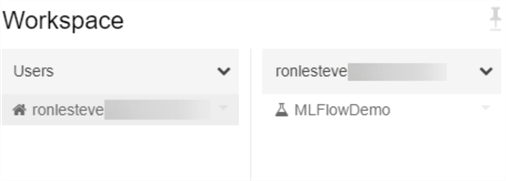
Since we already have an MLflow experiment that we created earlier, let's open it.
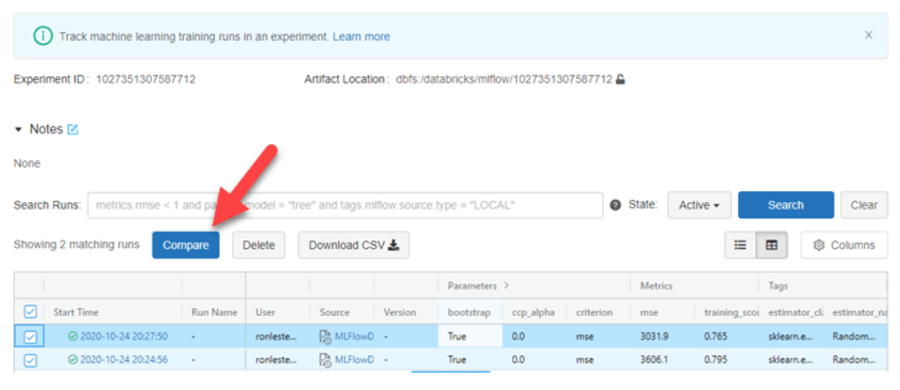
As we can see, I ran the experiment twice and can see the parameters and metrics associated with it. Additionally, I now have the option to compare the two runs.
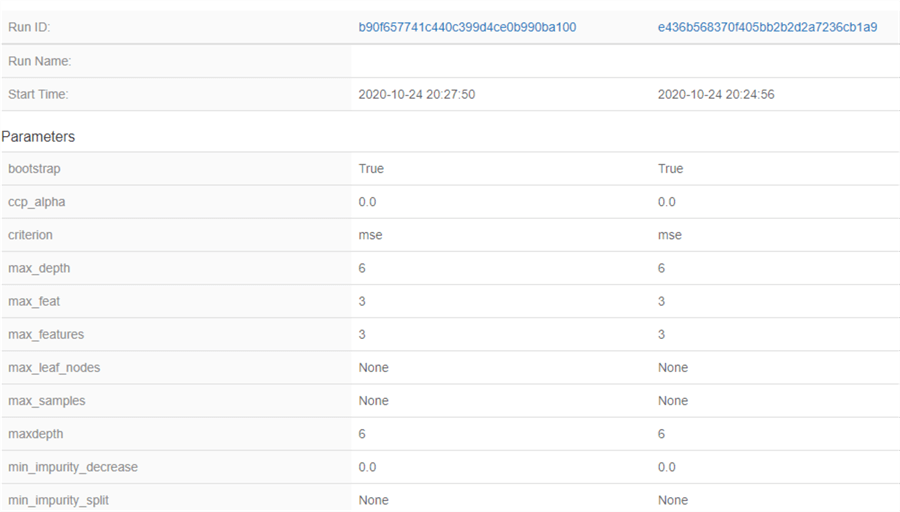
By clicking compare, I can see all the associated details between the two runs.
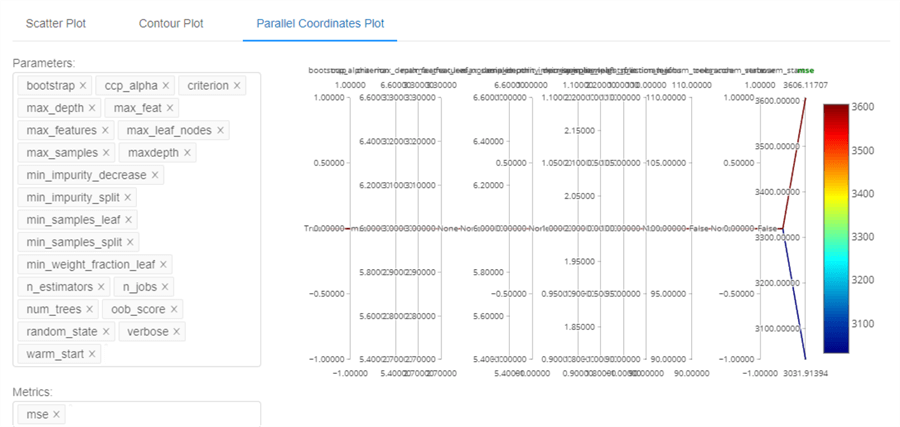
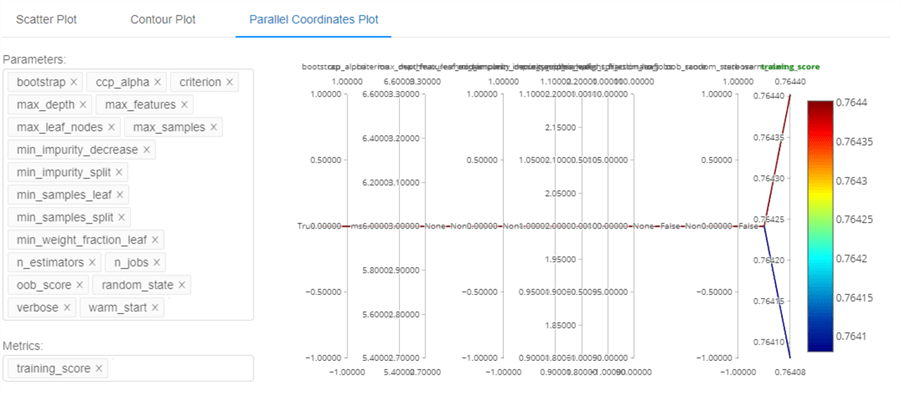
Additionally, I can visualize the comparisons through either a scatter, contour, or parallel coordinates plot.
Auto Logging
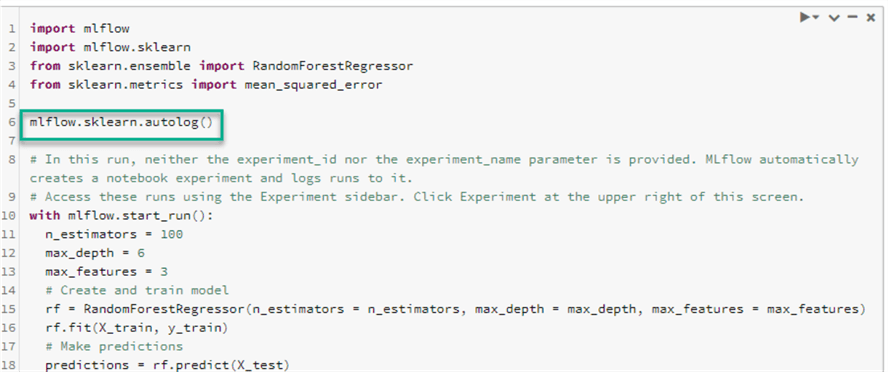
Now that we have tested the defined logging option, lets also test auto logging with the following variation of the code, which basically replaces all of the defined metrics, parameters etc. with mlflow.sklearn.autolog().
import mlflow
import mlflow.sklearn
from sklearn.ensemble import RandomForestRegressor
from sklearn.metrics import mean_squared_error

mlflow.sklearn.autolog()

# In this run, neither the experiment_id nor the experiment_name parameter is provided. MLflow automatically creates a notebook experiment and logs runs to it.
# Access these runs using the Experiment sidebar. Click Experiment at the upper right of this screen.
with mlflow.start_run():
  n_estimators = 100
  max_depth = 6
  max_features = 3
  # Create and train model
  rf = RandomForestRegressor(n_estimators = n_estimators, max_depth = max_depth, max_features = max_features)
  rf.fit(X_train, y_train)
  # Make predictions
  predictions = rf.predict(X_test)
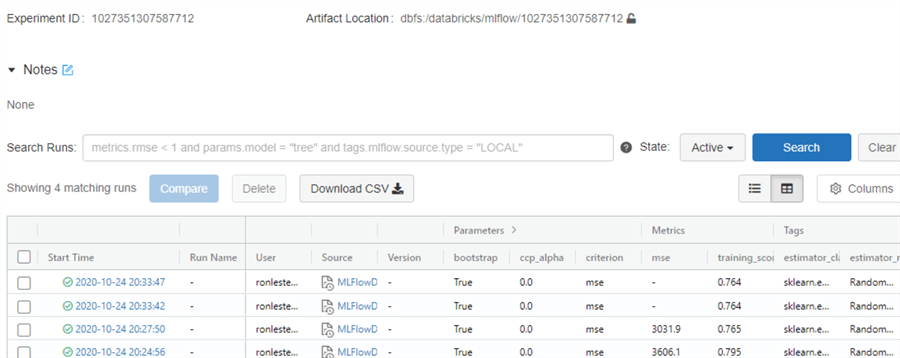
After I ran this new model twice and navigated back to the MLflow experiment, we can see the new runs logged in the Experiment UI and this time there are a few differences in the metrics captured, as expected.
Register a Model
Now that we have created, logged, and compared models, we may be at the point where we are interested in registering the model. We can do this by clicking on the desired logged model and scrolling down to the artifacts in the run details.
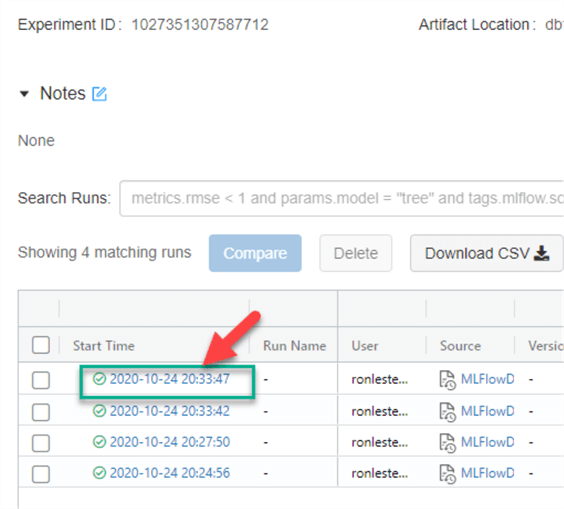
Select the model and click Register Model.

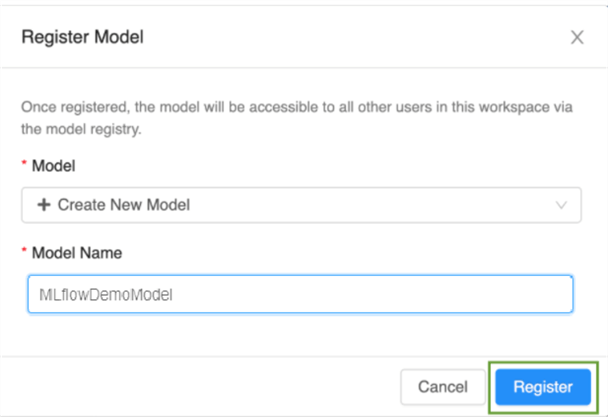
Within the Register Model UI, create a new model, name it, and register the model as a portion of the workflow.
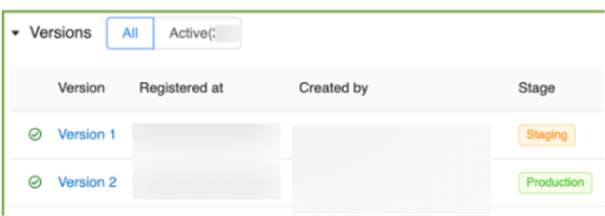
Once registered, the details tab will contain all details related to the versions, registered timestamps, who created the model and the stages.

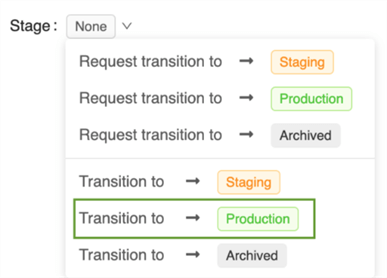
Stages can be transitioned from staging to production to archived.
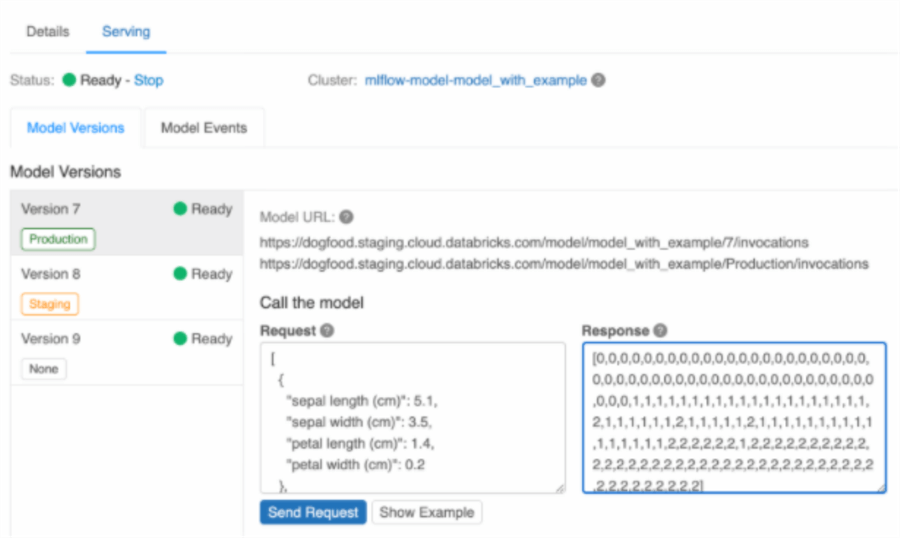
Next, let's explore the Serving tab, which is a new feature and currently in Public Preview.
MLflow Model Serving allows hosting registered ML models as REST endpoints that are updated automatically based on the availability of model versions and their stages.
When model serving is enabled, Databricks automatically creates a unique single-node cluster for the model and deploys all non-archived versions of the model on that cluster.


A sample Serving page may look as follows.
Finally, when a model has been registered, it can be found by navigating to the Models tab in the Databricks UI.

Next Steps
- For more detail on model serving which is currently in public preview, see MLflow Model Serving on Databricks.
- Read more about MLflow and Python open source projects from PyPi.org.
- Read more about MLflow from Microsoft's Documentation on Azure Databricks MLFlow.
- For more details on the ML Library offerings for MLflow, see MLflow.org.
- Read more about Databricks Managed MLflow.
- Read more about MLflow documentation from Databricks.
- Read more about Hyperparameter Tuning with MLflow, Apache Spark MLlib and Hyperopt.
- Read more about Apache Spark MLlib and automated MLflow tracking.
- For more detail on MLflow experiment permissions see, MLflow Experiment Permissions.
- Learn more about Building dashboards with the MLflow Search API.
About the author
 Ron L'Esteve is a trusted information technology thought leader and professional Author residing in Illinois. He brings over 20 years of IT experience and is well-known for his impactful books and article publications on Data & AI Architecture, Engineering, and Cloud Leadership. Ron completed his Masterís in Business Administration and Finance from Loyola University in Chicago. Ron brings deep tec
This author pledges the content of this article is based on professional experience and not AI generated.
View all my tips


