By: Ron L'Esteve | Comments (2) | Related: > Azure Databricks
Problem
The process of packaging, sharing and distributing Python code across teams and developers within an organization can become a complex task. There are a few methods of packaging and distributing python code including eggs, jars, wheels and more. What is a good method of creating a python wheel file to package and distribute custom code?
Solution
A Python .whl file is a type of built distribution that tells installers what Python versions and platforms the wheel will support. The wheel comes in a ready-to-install format which allows users to bypass the build stage required with source distributions.
There are many benefits to packaging python code in wheel files including their smaller size than source distributions therefore they can move across networks faster. Additionally, installing wheel files directly avoids the step of having to build packages from the source distribution and do not require the need for a compiler. Wheels provide consistency by eliminating many of the variables involved in installing a package. In this article, we will explore how to create a python wheel file using Visual Studio Code, load it to a Databricks Cluster Library, and finally call a function within the package in a Databricks Notebook.
Install Application Software
The following section lists a few pre-requisites that would need to be completed for creating a Python Package using Visual Studio Code.
Install Visual Studio Code
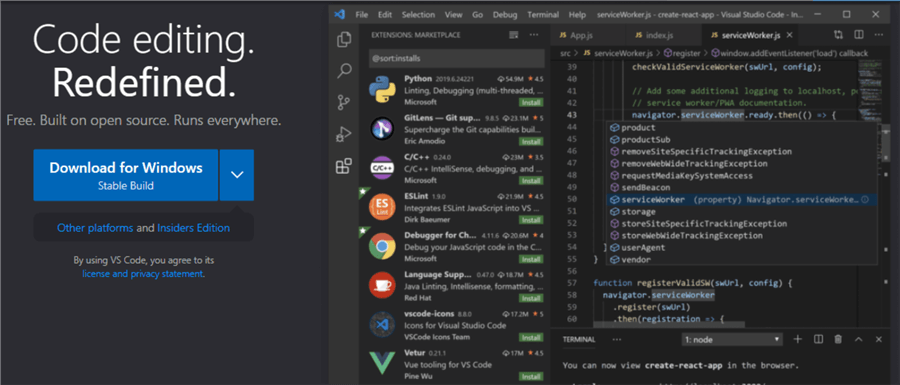
Firstly, we will need to install Visual Studio code, which can be found here.
Install Python Extension for Visual Studio Code
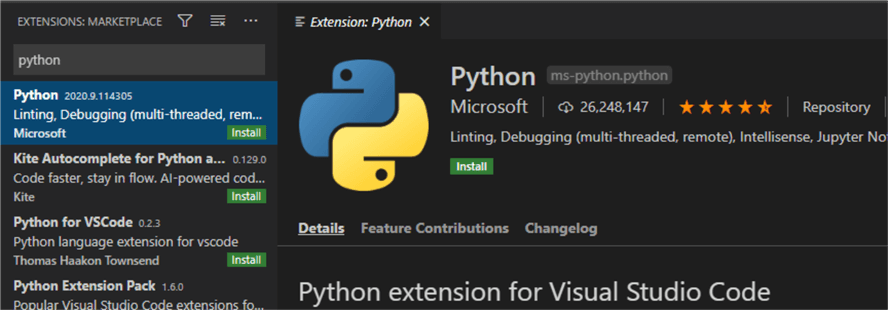
Once Visual Studio Code is installed, we will need the Python Extension for Visual Studio Code, which can be found here and also by searching for it in the Extensions Marketplace in VS Code.
Install Python 3.9.0
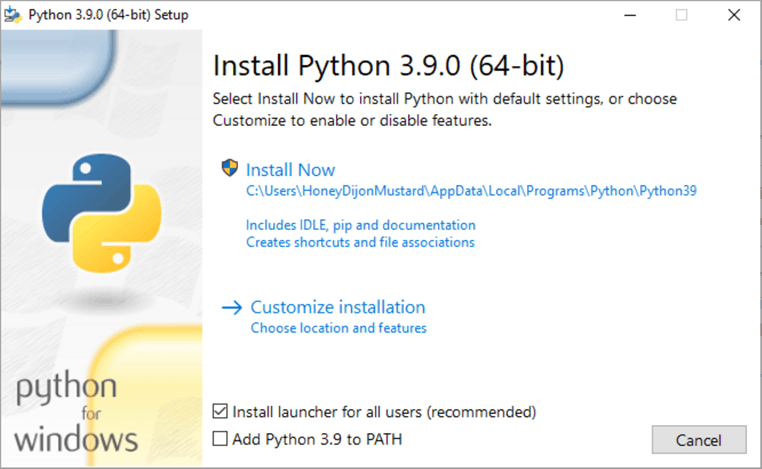
We will also need a stable release of Python. For this demo, I have used Python 3.9, which can be found here.
Configure Python Interpreter Path for Visual Studio Code.
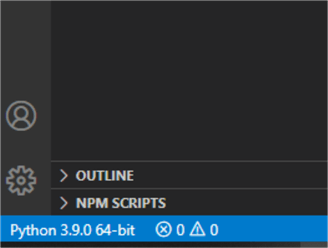
Once Python is installed along with the VS Code extension for python, we will need to set the Interpreter path to the Python Version we just installed

Typically, this can be located in the bottom left-hand section of the VS Code application.
Verify Python Version in Visual Studio Code Terminal
Next, open a new Python terminal in VS Code and run the following command to verify the version of Python and confirm that it matches the version we just installed and set.
py -3 --version

Setup Wheel Directory Folders and Files
Now its time to begin creating the python wheel file. We can start by running the following commands to create a directory for the PythonWheelDemo.
mkdir PythonWheelDemo
cd PythonWheelDemo
code .
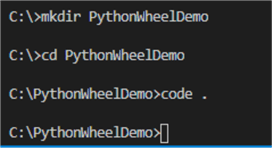
After the directory is created, let's open it in VS Code. Additionally, we will need to add the following folders and files by clicking the icons outlined below.
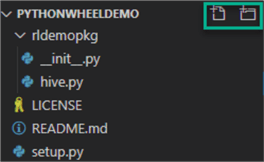
Create Setup File
The first file that we will need to create is the setup.py file. This file will contain all your package metadata information.
import setuptools

with open("README.md", "r") as fh:
    long_description = fh.read()

setuptools.setup(
    name="hive",
    version="0.0.1",
    author="Ron LEsteve",
    author_email="[email protected]",
    description="Package to create Hive",
    long_description=long_description,
    long_description_content_type="text/markdown",
    packages=setuptools.find_packages(),
    classifiers=[
        "Programming Language :: Python :: 3",
        "License :: OSI Approved :: MIT License",
        "Operating System :: OS Independent",
    ],
    python_requires='>=3.7',
)
Create Readme File
The next file will be the README.md file.
# Example Package

This is a simple example package. You can use
[Github-flavored Markdown](https://guides.github.com/features/mastering-markdown/)
to write your content.
Create License File
Let's also create a License file, which will contain verbiage as follows and can be customized through ChooseALicense.com. It's important for every package uploaded to the Python Package Index to include a license. This tells users who install your package the terms under which they can use your package.
Copyright (c) 2018 The Python Packaging Authority

Permission is hereby granted, free of charge, to any person obtaining a copy
of this software and associated documentation files (the "Software"), to deal
in the Software without restriction, including without limitation the rights
to use, copy, modify, merge, publish, distribute, sublicense, and/or sell
copies of the Software, and to permit persons to whom the Software is
furnished to do so, subject to the following conditions:

The above copyright notice and this permission notice shall be included in all
copies or substantial portions of the Software.

THE SOFTWARE IS PROVIDED "AS IS", WITHOUT WARRANTY OF ANY KIND, EXPRESS OR
IMPLIED, INCLUDING BUT NOT LIMITED TO THE WARRANTIES OF MERCHANTABILITY,
FITNESS FOR A PARTICULAR PURPOSE AND NONINFRINGEMENT. IN NO EVENT SHALL THE
AUTHORS OR COPYRIGHT HOLDERS BE LIABLE FOR ANY CLAIM, DAMAGES OR OTHER
LIABILITY, WHETHER IN AN ACTION OF CONTRACT, TORT OR OTHERWISE, ARISING FROM,
OUT OF OR IN CONNECTION WITH THE SOFTWARE OR THE USE OR OTHER DEALINGS IN THE
SOFTWARE.
Create Init File
We will also need an __init__.py file. This file provides a mechanism for you to group separate python scripts into a single importable module. For more details on how to properly create an __init__.py file that best suits your needs, read How to create a Python Package with __init__.py and What's __init__ for me?
from .hive import registerHive
Create Package Function File
Finally, we will need a python package function file which will contain the python code that will need to be converted to a function. In this demo, we are simply creating a function for a create table statement that can be run in Synapse or Databricks. It will accept the database, table. Spark will be used to simply define the spark.sql code section.
def registerHive(spark, database, table, location):
   cmd = f"CREATE TABLE IF NOT EXISTS {database}.{table} USING PARQUET LOCATION '{location}'"
   spark.sql(cmd)
   print(f"Executed: {cmd}")
Install Python Wheel Packages
Now that we have all the necessary files in our directory, we'll need to install a few wheel packages.
Install Wheel Package
Within the terminal run the following command to install the Wheel Package
pip install wheel

Also run this command to update the pip.
python -m pip install --upgrade pip

Install Check Wheel Package
Let's also install a package to check the Wheel contents by running the following command. Check wheel contents will fail and notify you if any of several common errors & mistakes are detected. More details on check wheel contents can be found here.
pip install check-wheel-contents

Create & Verify Wheel File
We are now ready to create the Wheel file.
Create Wheel File
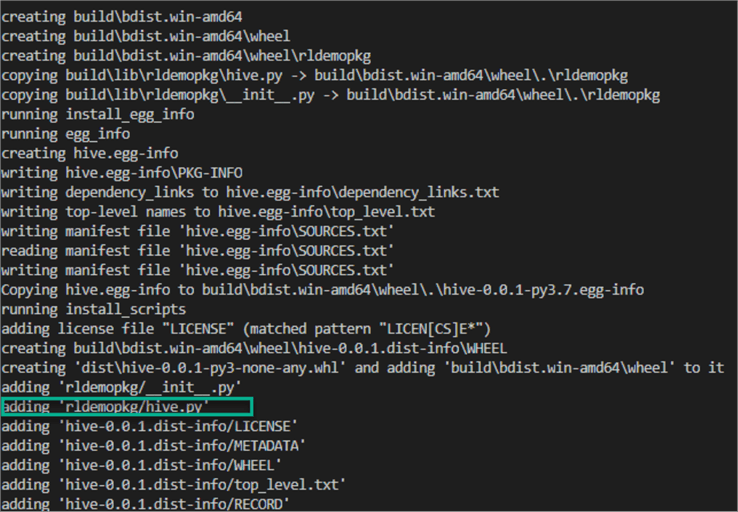
To create the wheel file, let's run the following command in a python terminal.
python setup.py bdist_wheel
Once the command completes running, we can see that it has created the Wheel file and also added hive.py to it.
Check Wheel Contents
Let's run the check wheel contents to verify that that we receive an OK status.
check-wheel-contents C:\PythonWheelDemo\dist

Verify Wheel File
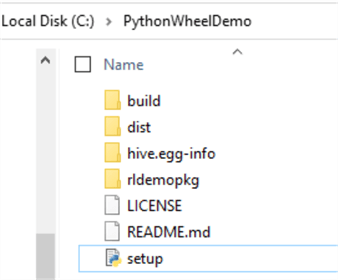
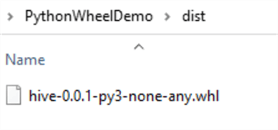
Additionally, we can navigate to the directory folders in VS Code and files to verify that the wheel file exists.
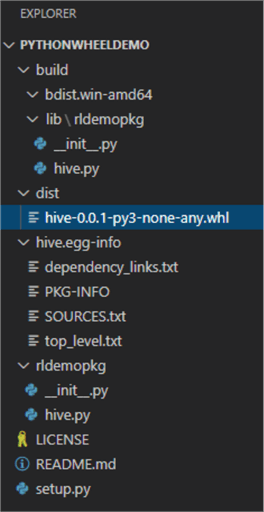
We can also navigate to the local folder to confirm the path of the wheel file as we will need this path to upload the wheel file in Databricks.
Configure Databricks Environment
Now that we have our wheel file, we can head over to Databricks and create a new cluster and install the wheel file.
Install Wheel to Databricks Library
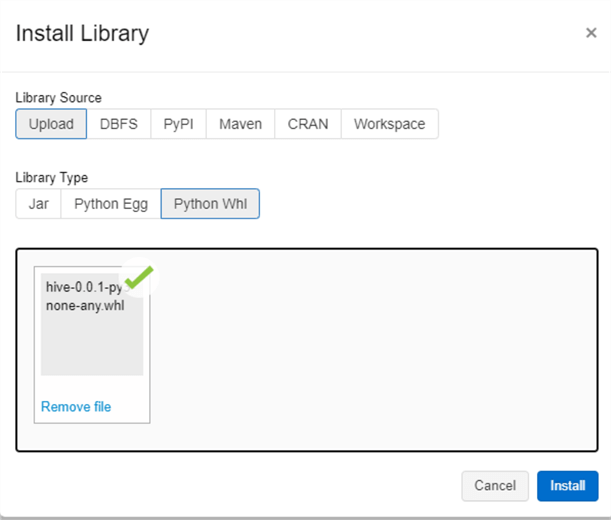
After the cluster is created, lets install the wheel file that we just created to the cluster by uploading it. More information on uploading wheel files and managing libraries for Apache Spark in Azure Synapse Analytics can be found here. However, for this demo, will be exclusively using Databricks.
Create Databricks Notebook
Now that we have installed the Wheel File to the cluster, lets create a new Databricks notebook and attach the cluster containing the wheel library to it.
Mount Data Lake Folder
We will need to first mount our Azure Data Lake Storage Gen2 container and folder which contains the AdventureWorksLT2019 database and files in parquet format.
We can mount the location using a few methods, but for the purpose of this demo we will use a simple approach by running the following code. For more information on reading and writing data in ADLSgen2 with Databricks, see this tip.
spark.conf.set(
  "fs.azure.account.key.adls2001rl.dfs.core.windows.net",
  "ENTER-ACCESS-KEY”
)

Next, let's run the following code to specify the location path containing my AdventureWorksLT2019 database.
dbutils.fs.ls("abfss://[email protected]/raw/AdventureWorksLT2019/SalesLT")

Create Spark Database
Now that we have mounted our data lake folder, lets create a new AdventureWorksLT2019 Spark database by running the following code, which will generate an OK message once the database is created.
%sql
CREATE DATABASE adventureworkslt2019

Create Spark Table
Now that we have a Spark Database, lets run the following code to manually create a table to demonstrate how the create table script works. Our Wheel package contains a registerHive() function which will do exactly this.
spark.sql(f"CREATE TABLE IF NOT EXISTS AdventureWorksLT2019.Address USING PARQUET LOCATION 'abfss://[email protected]/raw/AdventureWorksLT2019/SalesLT/Customer'")

Show Spark Table
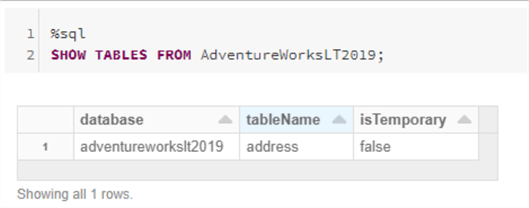
Now that we have created a new table, let's run the following show tables command to verify that the table exists.
%sql
SHOW TABLES FROM AdventureWorksLT2019;
Verify Wheel Package
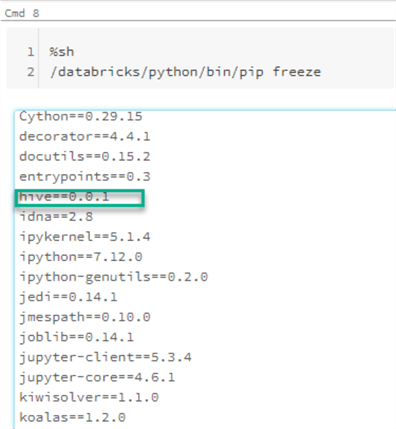
Let's also run the following script to verify that the Wheel package was installed.
%sh
/databricks/python/bin/pip freeze
Import Wheel Package
Next, we can import the wheel package by running the following command. If we recall from the VS Code project, rldemopkg was the root directory that contained the scripts and files.
import rldemopkg

Create Function Parameters
Next, let's define registerHive() function's parameters so that we can pass it to the function.
database = "AdventureWorksLT2019"
table = "Customer"
location = f"abfss://[email protected]/raw/AdventureWorksLT2019/SalesLT/Customer"

Run Wheel Package Function
We can now run the function from the wheel package. From the printed execution results, we can verify that the function accurately ran and created the Create table statement script.
rldemopkg.registerHive(spark,database,table,location)

Show Spark Tables
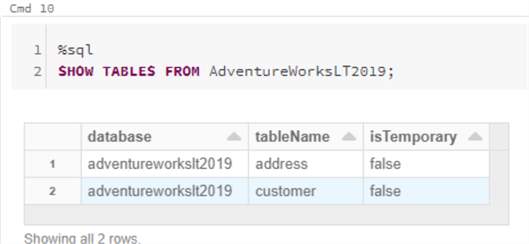
Finally, we can run the show tables code again to verify that the registerHive() function did indeed create the new Customer table.
%sql
SHOW TABLES FROM AdventureWorksLT2019;
Next Steps
- For more information on getting started with Python in Visual Studio Code, click here.
- For more information on creating a wheel file, see: Build your first pip package.
- Read more about Packaging Python Projects.
- Read more about What Are Python Wheels and Why Should You Care?
- Read more about What are Wheels?
About the author
 Ron L'Esteve is a trusted information technology thought leader and professional Author residing in Illinois. He brings over 20 years of IT experience and is well-known for his impactful books and article publications on Data & AI Architecture, Engineering, and Cloud Leadership. Ron completed his Masterís in Business Administration and Finance from Loyola University in Chicago. Ron brings deep tec
This author pledges the content of this article is based on professional experience and not AI generated.
View all my tips


