Problem
Deploying resources through Amazon Web Portal (AWS) can be cumbersome if you frequently need to deploy similar resources. For example, if you regularly get requirements to create RDS instances, you do not want to have to go through each step of the RDS wizard.
Is there any way to deploy resources in AWS using scripts? Let’s check it out.
Solution
The AWS CLI, or Command Line Interface, provides a command-line shell to interact with different AWS services. With minimal configuration, you can start running commands that provide functionality equivalent to the AWS Management Console, making it an excellent option for automating tasks or working with AWS resources in a headless environment. You can use it for both Windows and Linux terminal programs, as mentioned below:
- Windows: Run CLI scripts on Command-prompt (CMD) or Windows PowerShell
- Linux: Use bash, zsh, or tcsh shell programs
- Remotely: You can use terminal programs such as PuTTY or SSH to run commands on Amazon EC2 instances.
This tip configures the AWS Command Line Interface (CLI) utility on Ubuntu.
I recommend reading the following tips before continuing with this article:
- Introduction to AWS RDS SQL Server Features
- Steps to Quickly Configure an AWS RDS SQL Server instance
Prerequisites
Visit the AWS Console and create an AWS free-tier account to explore AWS resources without spending any money.
Install AWS Command Line Interface (CLI)
In this tip, we will install the latest AWS CLI version 2. You should always use the latest CLI version, as some of the commands used in this article might not work in CLI version 1.
Launch Ubuntu VM and install the CURL utility that transfers data to and from a Linux server. To install the CURL utility, run the following command in the terminal:
$ sudo apt install curl
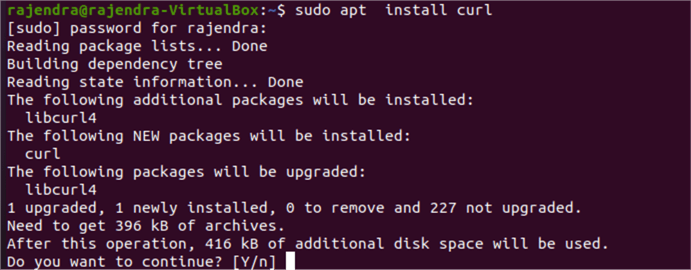
Enter Y to continue downloading the required packages and their dependencies.

Download the installation file using the curl utility with the following command:
$ curl "https://awscli.amazonaws.com/awscli-exe-linux-x86_64.zip" -o "awscliv2.zip"
The command uses the following:
- Download from the AWS URL: The command uses the URL https://awscli.amazonaws.com/awscli-exe-linux-x86_64.zip to download the installer.
- -o option specifies the file name. For example, the command downloads the zip file awscli-exe-linux-x86_64.zip and saves the compressed folder as awscliv2.zip in the current directory.

We need to unzip the downloaded AWS CLI setup. The following command uses unzip command to unzip the package and create a directory named aws under the current directory.

Install the AWS CLI using the file named – install in the unzipped aws directory. The script installs the files in the /usr/local/aws-cli and creates a symbolic link in the /usr/local/bin.

Run the command below to verify the AWS CLI installation. It returns the CLI version along with Python.
$ aws –version

You can also type aws in the terminal for CLI command-related help.

AWS CLI Configuration
Once you install the AWS CLI tool on your system, you must configure it using the IAM user secret and access key.
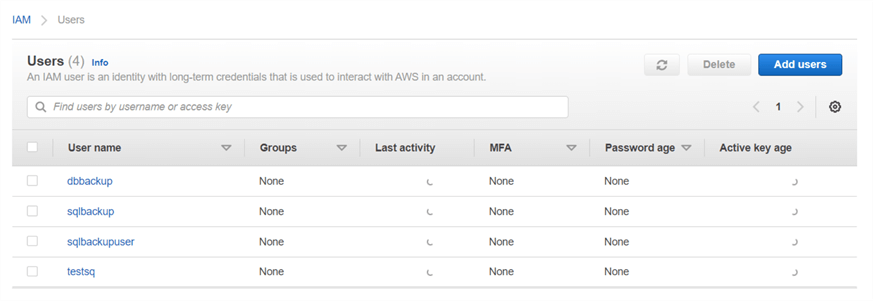
To generate the IAM access and secret key, search for IAM (Identity Access Management) in the AWS web portal and go to users.
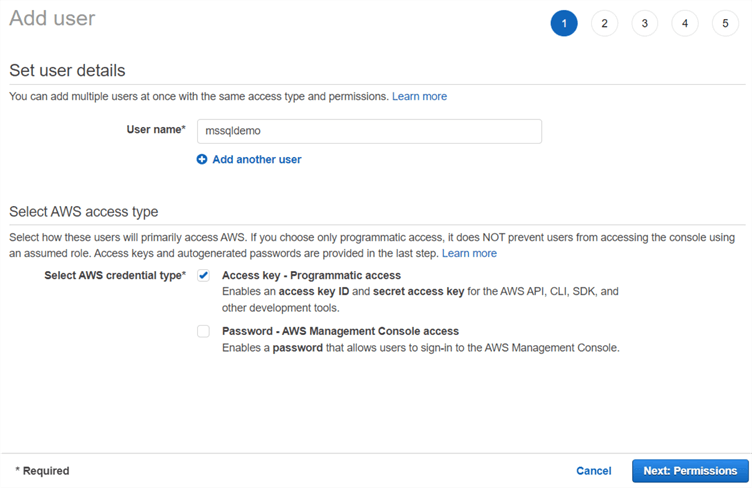
Click on Add users and provide a unique user name for your AWS account. In the Select AWS access type, there are two options:
- Access Key – Programmatic access: This option provides you the access key ID and secret access key for use with the AWS CLI tool.
- Password – AWS Management Console access: This option provides a password for login into the AWS web portal.
Select the option – Access key Programmatic access and click on Next: Permissions.
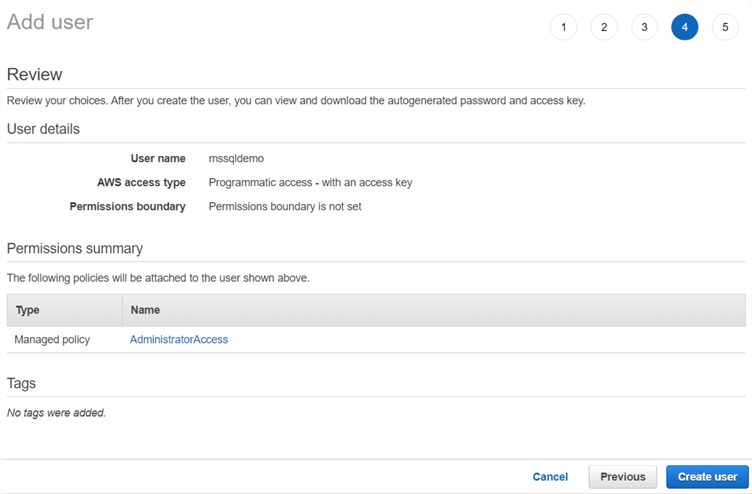
In the next step, assign the appropriate permissions for users to perform an activity in the AWS account. For this tip, I give the administrator access; however, you must set limited access for the user to perform the required action.

Review the user, access type, and permissions. After review, click Create User. After the user creation, you can view the summary below.

After the IAM user creation, you get an option to download the CSV containing Access Key ID and Secret access key. Else, you can copy the keys from the page shown below.
You must note down or save the access key and secret access key for the IAM user after it is created. AWS does not give any option to retrieve keys once you move out from the page.
Note: Your AWS account’s security is of utmost importance, and keeping your access keys confidential is a critical part of this. Do not share the keys under any circumstances.

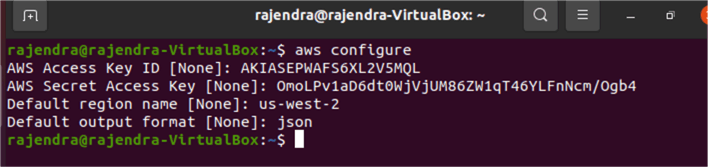
Launch the terminal or command prompt and run the command below to configure the AWS CLI with the IAM access keys.
$ aws configure
It asks for the following inputs:
- AWS Access Key ID: Enter the access key id we noted above.
- AWS Secret Access Key: Enter the secret access key for the IAM user
- Default region name: Enter the AWS region as a default region for deploying your AWS resources.
- Default output name: AWS CLI supports various output file formats.
- JSON
- YAML
- YAML-STREAM
- Text
- Table
Let’s enter the output format as JSON for the tip.
By default, AWS stores information in a default profile. If you want to use a CLI-named profile, specify the profile name with the keyword –profile. For example, the below command creates a profile named myawsprofile.
$ aws configure –profile myawsprofile
AWS CLI Commands Structure
AWS CLI commands adhere to the following structure.
$ aws <command> <subcommand> [options and parameters]
- The
awskeyword calls the AWS CLI utility. <command>is referred to as a top-level command. It refers to the AWS service with which we want to work. For example, type ec2 for Amazon Elastic Compute Cloud.- The
<subcommand>refers to the operation for the AWS service specified in the<command>section. For example, to create the EC2 instance, we use the subcommand run-instances. - The last section refers to the required options and parameters. For example, it can be EC2 instance name or configuration parameters.
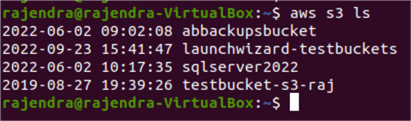
Let’s run a basic AWS CLI command. Suppose we want to list all the s3 buckets from my AWS account. For this requirement, run the following script.
$ aws s3 ls
The script uses the command s3 and subcommand ls.
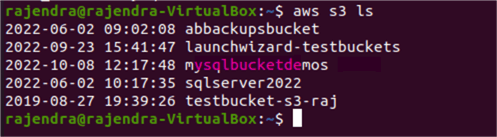
To create the new AWS S3 bucket, we need to use the mb subcommand as shown below.
aws s3 mb s3://mysqlbucketdemos
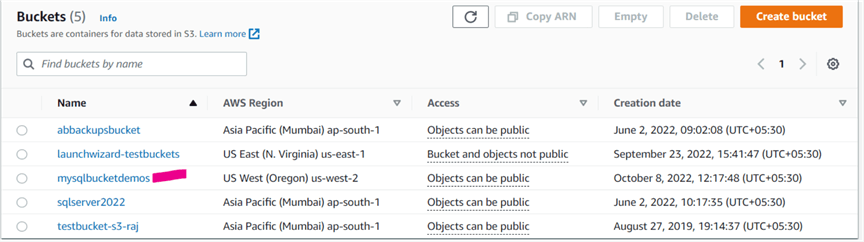
It creates the bucket named – mysqlbucketdemos in the default AWS region configured in the AWS CLI.
Let’s validate the s3 buckets using AWS CLI and web portal.
Next Steps
- Read the AWS CLI documentation for more details.
- Check out existing tips about AWS on MSSQLTips.

Hi! I am Rajendra Gupta, Database Specialist and Architect, helping organizations implement Microsoft SQL Server, Azure, Couchbase, AWS solutions fast and efficiently, fix related issues, and Performance Tuning with over 14 years of experience.
I am the author of the book “DP-300 Administering Relational Database on Microsoft Azure.” I can be reached at: Rajendra.gupta16@gmail.com for any consulting help.
- MSSQLTips Awards:
- Author of the Year – 2022 | Author Contender – 2021/2023/2024 | Champion Award (100+ tips) – 2020