By: Pablo Echeverria | Updated: 2022-10-25 | Comments | Related: > Tools
Problem
It's a common task for database administrators to install software that ships with the database and interacts directly with it. One is the software used to perform Extract Transform Load (ETL). How are they installed in SQL Server and Oracle for Windows, and what are the differences when installing them?
Solution
In SQL Server, the ETL tool is named SQL Server Integration Services (SSIS); in Oracle, the ETL tool is named Oracle Data Integrator (ODI). This tip will show how to install them from the command line and log in for the first time to the tool. Note: In Oracle, it is recommended to separate the application server from the database server; however, in this example, they will be co-installed for simplicity. In SQL Server, it's not possible to install the database separately.
Oracle
Most of the information in this tip is based on this article from Tim Hall. However, it has been adapted to a Windows environment and complemented to make it fully silent; it can also be used to perform a full silent installation in Linux. The steps to perform the installation are below.
Step 1
Download the required software from the links below and save them in your host C:\temp folder, which is shared with the container. Note: Since the only Web Logic Server downloadable is version 12.2.1.2, you must download the same version for ODI, as it doesn't allow you to install a higher version. Also, the installers only work in Java 8, not in any other version.
- Web Logic Server: fmw_12.2.1.2.0_infrastructure_Disk1_1of1.zip (1.45GB)
- Oracle Data Integrator 12cR2 (12.2.1.2.6): V837102-01_1of2.zip (1.76GB) and V837102-01_2of2.zip (352MB)
- Java SE Development Kit 8u341: jdk-8u341-windows-x64.exe (173MB)
Step 2
Create a new container as described in the links below. However, you must expose ports 7001, 8001, and 5556 when creating the docker container, as well as port 1521.
- Install SQL Server and Oracle using PowerShell and Windows Containers
- SQL Server vs Oracle Database Creation Similarities and Differences
docker run -it --name ServerA -v C:\temp:C:\setup -p 1521:1521 -p 7001:7001 -p 8001:8001 -p 5556:5556 mcr.microsoft.com/windows/servercore:ltsc2019 powershell
Step 3
Install Java with the PowerShell command below. Note: /L specifies the log location so you can check when it has finished.
& C:\setup\jdk-8u341-windows-x64.exe INSTALL_SILENT=Enable INSTALLDIR=C:\java\jre /L C:\setup\jre.log
Step 4
Unzip and install the Web Logic Server with the PowerShell commands below. It will create the Java EE Application Server to run ODI. Note: The first parameter passed to Java is the memory allocation pool size of 1 GB.
Expand-Archive C:\setup\fmw_12.2.1.2.0_infrastructure_Disk1_1of1.zip C:\app -force
& C:\java\jre\bin\java -Xmx1024m -jar C:\app\fmw_12.2.1.2.0_infrastructure.jar -silent ORACLE_HOME=C:\app\oracle INSTALL_TYPE="Fusion Middleware Infrastructure"
Step 5
Unzip and install ODI with the PowerShell commands below. Note: ODI requires a response file. We will create one with the minimum required variables, and everything else will be the default.
Expand-Archive C:\setup\V837102-01_1of2.zip C:\app
Expand-Archive C:\setup\V837102-01_2of2.zip C:\app
$content=@"
ORACLE_HOME=C:\app\oracle
INSTALL_TYPE=Enterprise Installation
"@
Clear-Content C:\app\odi.rsp
Add-Content C:\app\odi.rsp $content
& C:\java\jre\bin\java -jar C:\app\fmw_12.2.1.2.6_odi.jar -silent -responseFile C:\app\odi.rsp
Step 6
Create a database listener to allow remote connections and start it with the PowerShell commands below.
$content=@"
SSL_CLIENT_AUTHENTICATION = FALSE
SECURE_PROTOCOL_LISTENER = (IPC)
LISTENER =
  (DESCRIPTION_LIST =
    (DESCRIPTION =
      (ADDRESS = (PROTOCOL = IPC)(KEY = EXTPROC1))
      (ADDRESS = (PROTOCOL = TCP)(HOST = 0.0.0.0)(PORT = 1521))))
"@
Clear-Content C:\app\Oracle19c\network\admin\listener.ora
Add-Content C:\app\Oracle19c\network\admin\listener.ora $content
lsnrctl start
Step 7
Modify the database init configuration file and restart the database with the PowerShell commands below; this will allow automatic registration with the listener, set a higher memory reservation, and increase the default open cursors from 50 to 100 to avoid an error when creating the repository.
$content=@"
db_name=ORCL
local_listener='(ADDRESS = (PROTOCOL = IPC)(KEY = EXTPROC1))'
java_pool_size=256M
shared_pool_size=512M
open_cursors=100
"@
Clear-Content C:\app\Oracle19c\database\INITORCL.ORA
Add-Content C:\app\Oracle19c\database\INITORCL.ORA $content
"shutdown immediate" | sqlplus / as sysdba
"startup" | sqlplus / as sysdba
Step 8
Create a database password file replacing the password with your own to allow connecting remotely using the SYS user as SYSDBA.
orapwd FILE=C:\app\Oracle19c\database\PWDORCL.ora ENTRIES=1 PASSWORD=YourSYSPassword
You can test connecting from your host computer to the container as follows replacing the password with your own and the host with the container hostname:
& "C:\Program Files\instantclient_19_14\sqlplus.exe" SYS/YourSYSPassword@'(DESCRIPTION=(ADDRESS=(PROTOCOL=TCP)(HOST=483e369a307b)(PORT=1521))(CONNECT_DATA=(SERVER=DEDICATED)(SERVICE_NAME=ORCL)))' AS SYSDBA
Step 9
Create the ODI repository with the PowerShell commands below.
The first value is the SYS password which must contain a number, a special character, and not the username. The second value is the password to be assigned to all ODI database users: ODI_REPO, IAU, IAU_APPEND, IAU_VIEWER, OPSS, and STB. The third value is the password to be assigned to the SUPERVISOR user in ODI (not in the database). The fourth value is D for Development or E for Execution of the work repository. The fifth value is the name of the work repository. The sixth value is the password of the work repository. The seventh parameter is the encryption algorithm.
Then we set three environment variables to select the log location, log name (not to include the timestamp), and log level. When the repository creation utility (RCU) program is called, the previous parameters are passed to it and note the connection string indicates the host, port, and database name. We also pass the database username, the database user role, the prefix to be used will be "ODIDEV", and then the list of components to install.
$params=@"
YourSYSPassword
OdiSchemaPassword
SupervisePwd
D
WORKREP
WorkRepoPw
AES-128
"@
$env:RCU_LOG_LOCATION="C:\app\oracle"
$env:RCU_TIMESTAMP_LOG_DIR="false"
$env:RCU_LOG_LEVEL="TRACE"
$params | & C:\app\oracle\oracle_common\bin\rcu.bat -silent -createRepository -connectString localhost:1521:ORCL -dbUser SYS -dbRole SYSDBA -useSamePasswordForAllSchemaUsers true -schemaPrefix ODIDEV -component ODI -component IAU -component IAU_APPEND -component IAU_VIEWER -component OPSS
Once complete, you will note the following users in the database:
ODIDEV_ODI_REPO
ODIDEV_IAU
ODIDEV_IAU_APPEND
ODIDEV_IAU_VIEWER
ODIDEV_OPSS
ODIDEV_STB
And the following data files:
C:\APP\ORACLE19C\DATABASE\ODIDEV_ODI_USER.DBF
C:\APP\ORACLE19C\DATABASE\ODIDEV_IAU.DBF
C:\APP\ORACLE19C\DATABASE\ODIDEV_IAS_OPSS.DBF
C:\APP\ORACLE19C\DATABASE\ODIDEV_SVCTBL.DBF
Step 10
Configure the ODI domain with the PowerShell commands below.
Note: In line 6 is the Web Logic password to be used when starting the services, which must be at least eight alphanumeric characters with at least one number or special character. Replace it with your own.
In line 12 is the connection string. It must contain the server name, port, and database name. Line 13 is the db_user. It is the schema prefix, "ODIDEV", defined earlier, and the username "STB". Line 14 is the password defined earlier for all database user schemas. Line 18 is the supervisor password defined earlier.
$content=@"
#!/usr/bin/python
print('Set variables.')
host_name = '$env:computername'
admin_user = 'weblogic'
admin_password = '<YourWebLogicPassword>'
admin_port = '7001'
mw_home = 'C:\\app\\oracle'
domain_name = 'odiDomain'
domain_home = mw_home + '\\user_projects\\domains\\' + domain_name + ''
wl_home = mw_home + '\\wlserver'
db_url = 'jdbc:oracle:thin:@localhost:1521/ORCL'
db_user = 'ODIDEV_STB'
db_password = 'OdiSchemaPassword'
db_driver = 'oracle.jdbc.OracleDriver'
odi_port = '8001'
supervisor_user = 'SUPERVISOR'
supervisor_password = 'SupervisorPassword'
nm_name = 'LocalODIMachine'
nm_port = 5556
print('Create domain (' + domain_name + ').')
print('Load templates.')
selectTemplate('Basic WebLogic Server Domain')
selectTemplate('Oracle Enterprise Manager Plugin for ODI')
selectTemplate('Oracle Data Integrator - Agent')
selectTemplate('Oracle Data Integrator - Console')
selectTemplate('Oracle Data Integrator - JRF Async Web Services')
loadTemplates()
print('AdminServer settings.')
cd('/Security/base_domain/User/' + admin_user)
cmo.setPassword(admin_password)
cd('/Server/AdminServer')
cmo.setName('AdminServer')
cmo.setListenPort(int(admin_port))
cmo.setListenAddress(host_name)
print('Create supervisor credential.')
cd('/SecurityConfiguration/base_domain')
cmo.setUseKSSForDemo(false)
cd('/Credential/TargetStore/oracle.odi.credmap/TargetKey/SUPERVISOR')
create('c','Credential')
cd('Credential')
cmo.setUsername(supervisor_user)
cmo.setPassword(supervisor_password)
print('Create data source.')
cd('/JDBCSystemResource/LocalSvcTblDataSource/JdbcResource/LocalSvcTblDataSource/JDBCDriverParams/NO_NAME_0')
cmo.setPasswordEncrypted(db_password)
cmo.setUrl(db_url)
cmo.setDriverName(db_driver)
cd('Properties/NO_NAME_0/Property/user')
cmo.setValue(db_user)
print('Create node manager.')
cd('/')
machine = create(nm_name, 'Machine')
cd('Machines/' + nm_name)
create(nm_name, 'NodeManager')
cd('NodeManager/' + nm_name)
set('ListenAddress', host_name)
set('ListenPort', int(nm_port))
print('Associate Node Manager with servers.')
cd('/Servers/AdminServer')
cmo.setMachine(machine)
cd('/Servers/ODI_server1')
cmo.setMachine(machine)
print('ODI_server1 settings')
cd('/Servers/ODI_server1')
cmo.setListenAddress(host_name)
cmo.setListenPort(int(odi_port))
getDatabaseDefaults()
print('Run in production mode.')
setOption('ServerStartMode','prod')
print('Write the domain and close the template.')
setOption('OverwriteDomain', 'true')
writeDomain(domain_home)
closeTemplate()
exit()
"@
Clear-Content C:\app\create_odi_domain.py
Add-Content C:\app\create_odi_domain.py $content
& C:\app\oracle\oracle_common\common\bin\wlst.cmd C:\app\create_odi_domain.py
Step 11
Configure ODI agent with the PowerShell commands below. Specify the weblogic password, ODIDEV_STB password, database connection string, and supervisor password again.
$content=@"
#!/usr/bin/python
host_name = '$env:computername'
mw_home="C:/app/oracle"; # Middleware Home of your environment
odi_oracle_home= mw_home + "/odi"; # odi folder location under middleware home
wls_domain_dir=mw_home+"/user_projects/domains"; # WLS domain directory. Update as appropriate
wls_domain_name="odiAgent"; # Domain name for the ODI Agent
wls_user="weblogic"; # Weblogic admin user name
wls_pass="<YourWeblogicPassword>"; # Weblogic admin user's password
service_db_user="ODIDEV_STB"; # The STB schema username created through RCU. Ends with _STB, ODI Master and Work repository and Opss database connections are fetched from this schema
service_db_pass="OdiSchemaPassword"; # STB users password
service_db_url='jdbc:oracle:thin:@localhost:1521/ORCL'; # JDBC URL to the STB database
service_db_driver='oracle.jdbc.OracleDriver'; # JDBC driver to be used for the STB Database connection
odi_supervisor='SUPERVISOR'; # ODI supervisor user
odi_supervisor_pass='SupervisorPassword'; # ODI Supervisor user's password
odi_instance='OracleDIAgent'; # ODI agent name for the agent
odi_listen_address = 'localhost'; # Listen Address
odi_port = "8001"; # ODI Port
odi_protocol = "http"; # ODI Protocol
agent_machine="LocalODIMachine"; # Agent Machine Name from template
odi_work_repository_name='WORKREP'; # Work repository name
master_db_datasource = "odiMasterRepository"; # Master Repository datasource name
work_db_datasource = "odiWorkRepository"; # Work Repository datasource name
if not os.path.isdir(mw_home):
  sys.exit("Error: fusion middleware home directory '" + mw_home + "' does not exist.")
wls_domain_creation_template_path = mw_home+"/wlserver/common/templates/wls/wls.jar"
domain_path = wls_domain_dir + '/' + wls_domain_name
odi_cam_template_jar = '/common/templates/wls/odi_cam_managed_template.jar'
#reads the template jar for domain creation
readTemplate(wls_domain_creation_template_path, 'Compact')
print 'Creating WLS user'
cd(r'/Security/base_domain/User/'+wls_user)
cmo.setPassword(wls_pass)
cd(r'/Server/AdminServer')
cmo.setName('AdminServer')
cd(r'/SecurityConfiguration/base_domain/')
cmo.setNodeManagerUsername(wls_user);
cmo.setNodeManagerPasswordEncrypted(wls_pass);
print 'Done'
addTemplate(odi_oracle_home + odi_cam_template_jar)
cd('/SecurityConfiguration/base_domain') # domain is base_domain until saved as otherwise
cmo.setUseKSSForDemo(false)
print 'Creating data source'
print 'Setting JDBCSystemResource with name '+'LocalSvcTblDataSource'
cd('/');
existing=true;
try:
  cd('/JDBCSystemResource/'+'LocalSvcTblDataSource'+'/JdbcResource/'+'LocalSvcTblDataSource')
except :
  existing=false;
if ( not(existing) ) :
  create('LocalSvcTblDataSource', 'JDBCSystemResource');
cd('/JDBCSystemResource/'+'LocalSvcTblDataSource'+'/JdbcResource/'+'LocalSvcTblDataSource')
if ( not(existing) ) :
  create('NO_NAME_0', 'JDBCDriverParams')
cd('JDBCDriverParams/NO_NAME_0')
cmo.setPasswordEncrypted(service_db_pass)
cmo.setUrl(service_db_url)
cmo.setDriverName(service_db_driver)
if ( not(existing) ) :
  create('NO_NAME_0', 'Properties')
cd('Properties/NO_NAME_0');
if ( not(existing) ) :
  create('user', 'Property')
cd('Property/user')
cmo.setValue(service_db_user)
print 'Done'
print 'Creating ODI instance'
cd('/');
existing=true;
try:
  cd('/SystemComponent/'+odi_instance);
except :
  existing=false;
if( not(existing) ) :
  create(odi_instance, "SystemComponent");
cd('/SystemComponent/'+odi_instance);
set('ComponentType', 'ODI');
set('Machine', agent_machine);
cd('/SystemCompConfig/OdiConfig/OdiInstance/'+odi_instance);
print '/SystemCompConfig/OdiConfig/OdiInstance/'+odi_instance
set("ListenAddress", odi_listen_address);
cmo.setListenPort(odi_port);
set('SupervisorUsername', odi_supervisor);
set('PasswordEncrypted', odi_supervisor_pass);
set('PreferredDataSource', master_db_datasource);
print 'Done'
cd('/')
cd('/Machine/'+agent_machine)
create(agent_machine, 'NodeManager')
cd('NodeManager/'+agent_machine)
cmo.setListenAddress(host_name)
cd('/')
servers = cmo.getServers()
for server in servers:
  sName = server.getName()
  cd('/Servers/' + sName)
  listenAddress = cmo.getListenAddress()
  if ( listenAddress == None or listenAddress == 'All Local Addresses') :
    cmo.setListenAddress(None)
getDatabaseDefaults(); # service_db, master_db, work_db (and opss) definitions from service_db
print "domain_path "+domain_path;
writeDomain(domain_path)
closeTemplate()
print 'Done creating ODI Agent domain, Master repository, Supervisor user and Nodemanager'
exit()
"@
Clear-Content C:\app\create_odi_agent.py
Add-Content C:\app\create_odi_agent.py $content
& C:\app\oracle\oracle_common\common\bin\wlst.cmd C:\app\create_odi_agent.py
Now that everything is set up, we can start the services with the PowerShell commands below. The last two will prompt you for a username and password, and you need to enter "weblogic" and its password. Run each of them in their own console. You can open new consoles with the command "docker exec -it ServerA powershell":
& C:\app\oracle\user_projects\domains\odiDomain\bin\startNodeManager.cmd
& C:\app\oracle\user_projects\domains\odiDomain\bin\startWebLogic.cmd
& C:\app\oracle\user_projects\domains\odiDomain\bin\startManagedWebLogic.cmd ODI_server1
And we can access the service URLs from the host machine outside of the container because the ports were exposed when creating the container:
http://localhost:7001/console
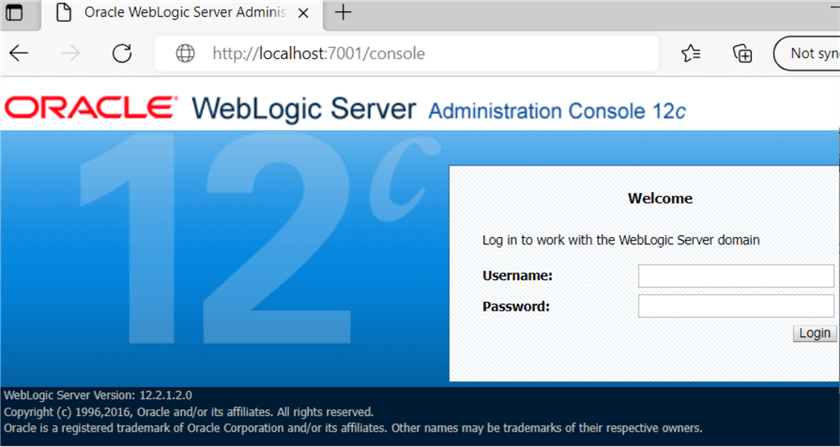
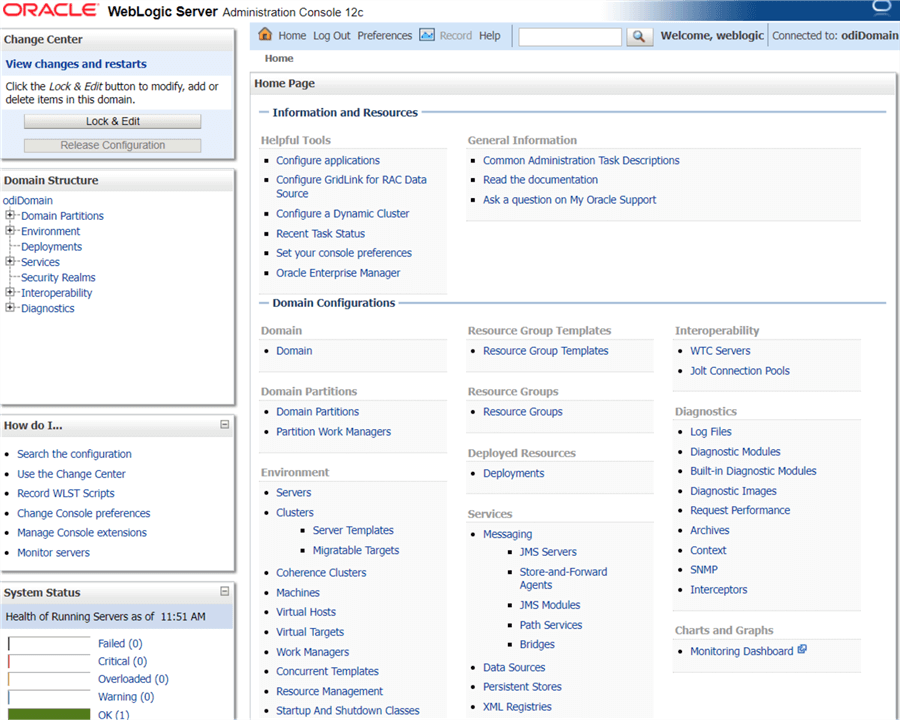
In this console you can manage entities in the domain:
- Browse servers, clusters, deployments, applications, etc.
- Display information about entities
- Configuration
- Monitoring
- Logs
- Start and stop the server
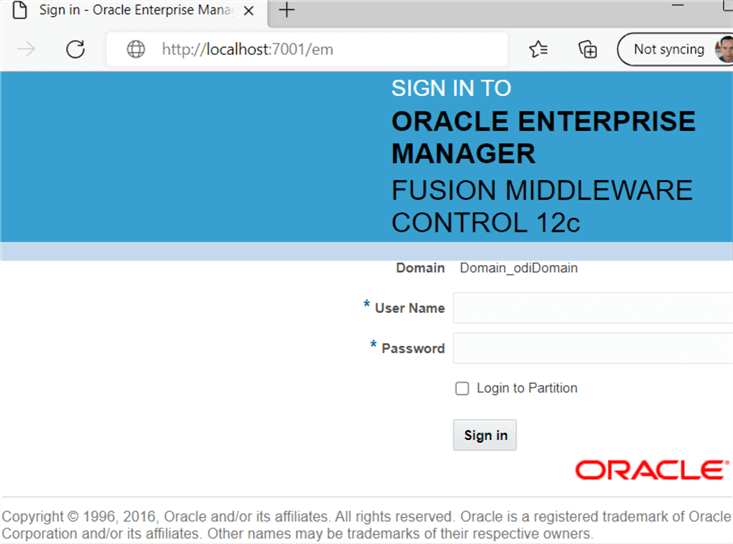
http://localhost:7001/em
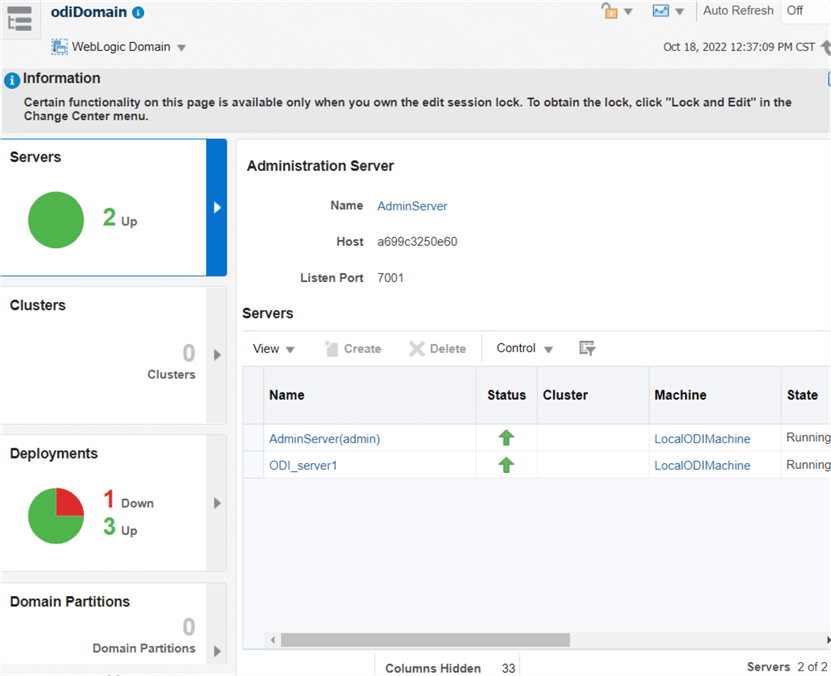
On this page you can monitor and administer the collection of components:
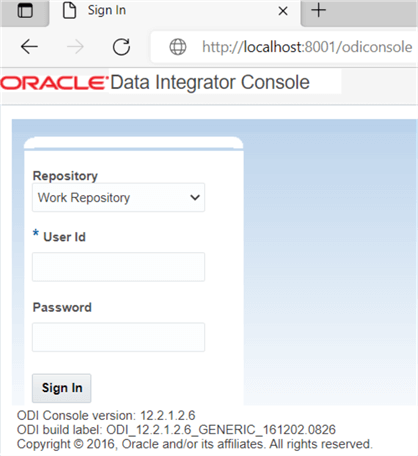
http://localhost:8001/odiconsole
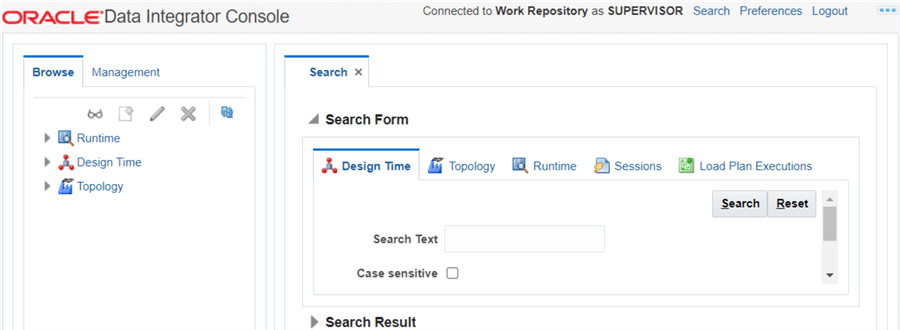
This is the place where you can do the ETL work:
SQL Server
The only steps required to perform the installation are below. Remember to replace the SA password with your own, and note that it requires the database to be installed alongside:
& "c:\setup\setup.exe" /Q /Action=Install /IAcceptSQLServerLicenseTerms /IndicateProgress /Features=SQLEngine,Conn,IS /InstanceName=MSSQLSERVER /TcpEnabled=1 /SecurityMode=SQL /SaPwd=@Sq1T3st /SqlSysAdminAccounts="ContainerAdministrator"
If you want to create a scale-out group, you can specify installing the master and/or worker Integration Services. Once installed, with PowerShell you can enable CLR (thanks to Rob Sewell for this article):
# Enable "clr enabled" configuration option
$srv = New-Object Microsoft.SQLServer.Management.SMO.Server .
$config = $srv.Configuration
$CLR = $srv.Configuration.IsSqlClrEnabled
$CLR.ConfigValue = 1
$Config.Alter()
And with PowerShell, you can create the SSISDB, which is the catalog:
# Load the IntegrationServices Assembly
[Reflection.Assembly]::LoadWithPartialName("Microsoft.SqlServer.Management.IntegrationServices")
# Store the IntegrationServices Assembly namespace to avoid typing it every time
$ISNamespace = "Microsoft.SqlServer.Management.IntegrationServices"
Write-Host "Connecting to server ..."
# Create a connection to the server
$sqlConnectionString = "Data Source=localhost;Initial Catalog=master;Integrated Security=SSPI;"
$sqlConnection = New-Object System.Data.SqlClient.SqlConnection $sqlConnectionString
# Create the Integration Services object
$integrationServices = New-Object $ISNamespace".IntegrationServices" $sqlConnection
# Provision a new SSIS Catalog
$catalog = New-Object $ISNamespace".Catalog" ($integrationServices, "SSISDB", "P@assword1")
$catalog.Create()
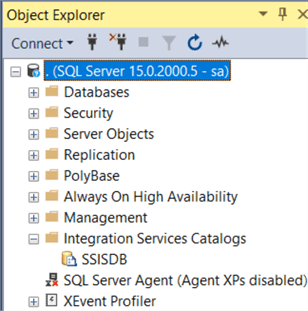
Now with Visual Studio, you can create your Integration Services projects. Once ready for production, you can point your Visual Studio to the server and deploy them.
Additional Information
Here is the official documentation about the SSIDB database, which is the catalog for Integration Services: SSIS Catalog.
Install SQL Server Integration Services in Visual Studio 2019 describes the process of installing Visual Studio with the Integration Services extension.
This article, SSIS Catalog Deployment to Support Dev, QA and Production, describes deploying a project in multiple environments.
Lastly, this article describes the process to deploy and schedule a project: Deploy and Schedule an SQL Server Integration Services SSIS Package Step by Step.
Next Steps
Here are several articles about SQL Server Integration Services:
- What is SSIS?
- Installing SQL Server Integration Services
- SQL Server Integration Services SSIS 2016 Tutorial
- SQL Server Integration Services Development Tips
- SQL Server Integration Services Configuration Options Tips
- Install SQL Server Integration Services in Visual Studio 2019
- Connecting to Integration Services Access is Denied in SQL Server 2016 or 2017
- SQL Server Integration Services SSIS Versions and Tools
- What is an SSIS Package?
- SQL Server Management Studio Connection to Integration Services Error Class Not Registered
About the author
 Pablo Echeverria is a talented database administrator and C#.Net software developer since 2006. Pablo wrote the book "Hands-on data virtualization with Polybase". He is also talented at tuning long-running queries in Oracle and SQL Server, reducing the execution time to milliseconds and the resource usage up to 10%. He loves learning and connecting new technologies providing expert-level insight as well as being proficient with scripting languages like PowerShell and bash. You can find several Oracle-related tips in his LinkedIn profile.
This author pledges the content of this article is based on professional experience and not AI generated.
View all my tips
Article Last Updated: 2022-10-25


