Problem
As many companies are beginning to move their data to the cloud, Microsoft Azure is playing a pivotal role in ensuring this is possible and seamless with its mass storage packages. Azure Data Lake Storage Gen2 is Microsoft's cloud-based ample data storage. Organizations can store large amounts of organized, semi-structured, and unstructured data in their original file formats in Azure Data Lake Storage. These data can be in text files, CSV files, JSON files, XML files, images, and videos, among other formats.
However, if we cannot make business decisions from this data, our efforts will be for nothing. To produce insight and enhance business operations, analysts must consider how to connect business intelligence tools like Microsoft Power BI to mass storage solutions like Azure Data Lake Gen 2.
Solution
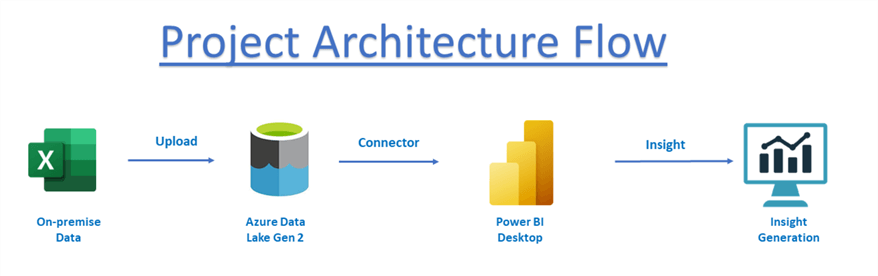
To efficiently get insight from our storage using Business Intelligence tools like Power BI, we will first create an Azure Data Lake Gen 2 storage system in Azure Portal before uploading data from on-premises in our local machine to Azure Data Lake.
Then we will use the Power BI Data Lake Gen 2 to connect to Azure with all the appropriate credentials. Below is a flow to the project to better explain the entire process.
Creating Azure Data Lake Gen 2
Before creating an Azure Data Lake Gen 2 storage system, we first need to create a resource group.
Azure Resource Group
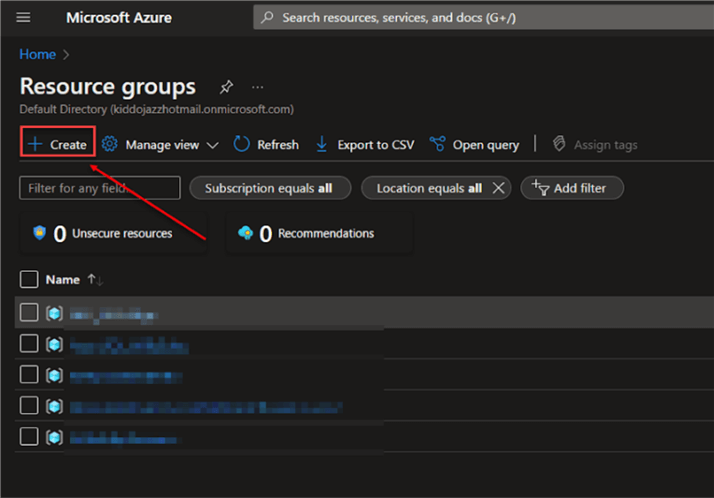
An Azure resource group is a container used to hold linked resources. In the Azure Portal, search for the resource group, then click on +Create to create a new group. This will prompt a new opening where you are expected to fill in some necessary information.
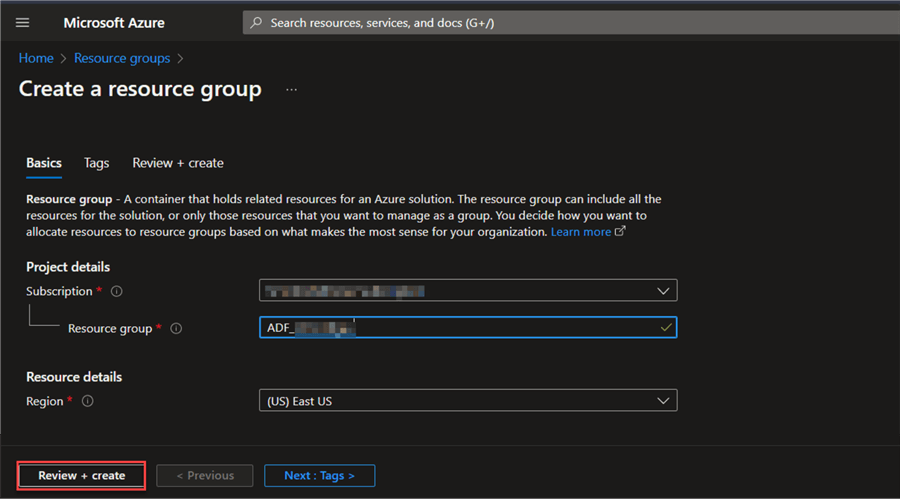
In the Project details, select the type of Subscription from the drop-down menu and add a name for the Resource group. Also, under Resource details, select the location of the data source from the drop-down menu.
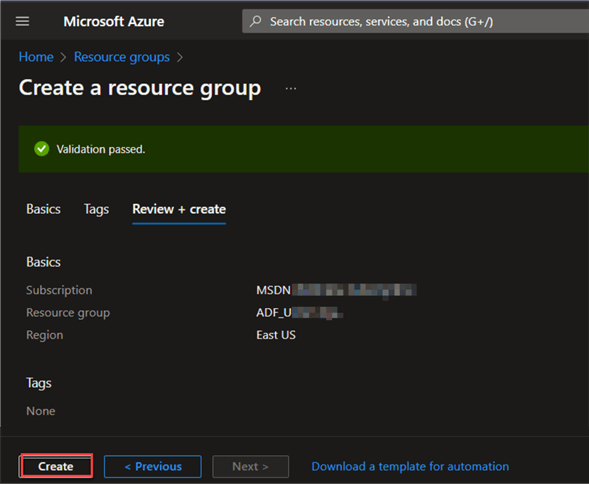
If resources are properly set up, you should be welcome with a message saying "Validation Passed".
Create Azure Storage
Now that we have successfully created the resource group, we need to create the Azure storage account. Mind you the Azure storage account is the same as the Gen 2 account.
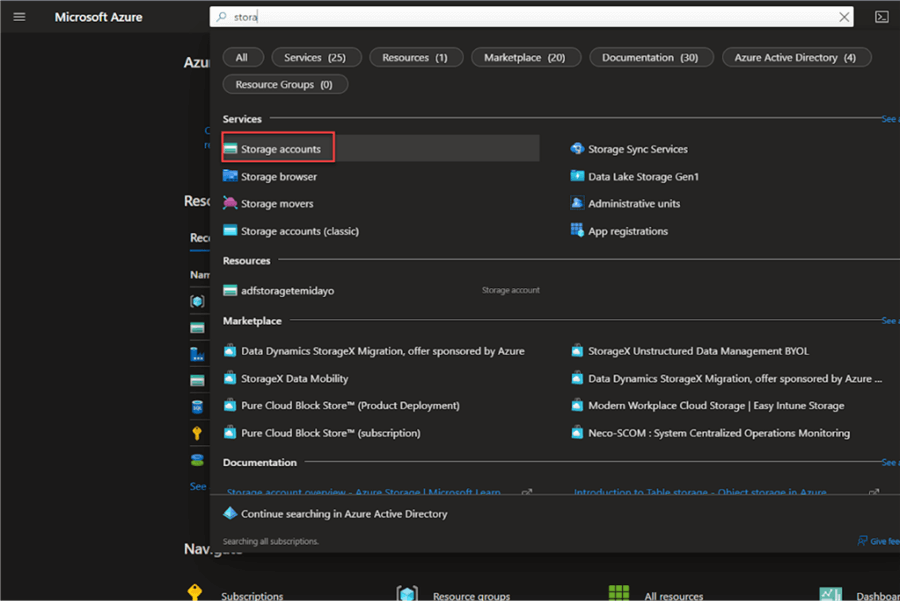
Step 1: Search for Storage and Create a Storage Account
In the Azure Portal under Services, click Storage accounts. Click +Create.

Step 2: Basics Setup
In the Basics settings, you are required to choose a storage account name, this should be unique and non-existent.
You can select between these two types of accounts standard or premium. For this blog, we will be using the "Standard" performance.
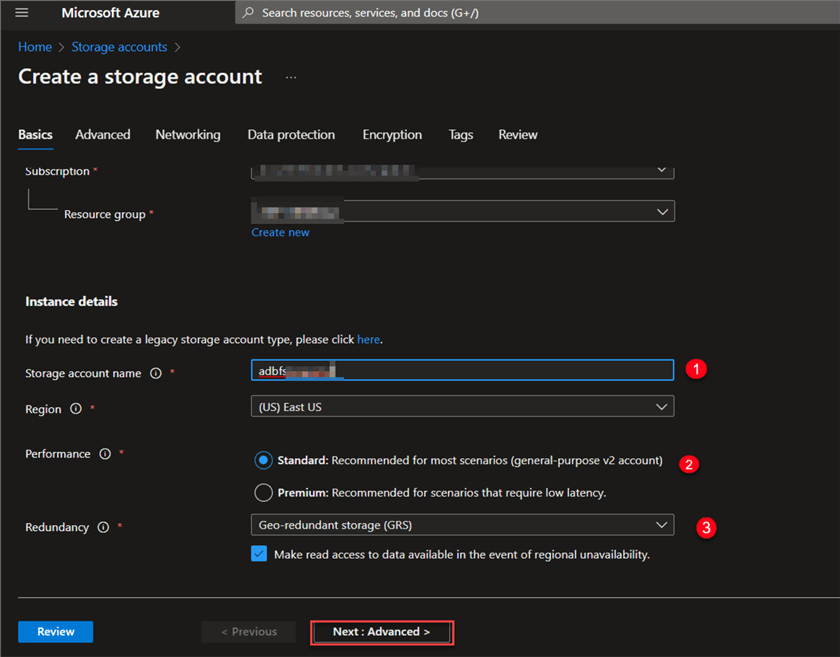
Instance details:
- Storage account name: The storage account name is set.
- Region: Indicates where the data source is coming from, "East US" is the default choice under "Region".
- Performance: Standard is usually recommended, due to cost and general purpose. But for low latency, you can always go for Premium.
- Redundancy: The Geo-Redundant Storage (GRS) was selected, you can click on the dropdown and select other options.
Step 3: Advanced Setup
In your Advance tab, scroll down to "Data Lake Gen2" and enable the Hierarchical Namespace. This will help set up the Data Lake Storage Gen2.

Enabling the Hierarchical Namespace allows you to skip other steps since they are default. Click on "Review" and then create. This may take a couple of minutes, depending on the internet speed. When it is complete, you should see a successful deployment.
Data Upload from On-Premises Source
Now having successfully created the Storage account, we next need to create a new container and upload data from our local machine to the Azure storage account.
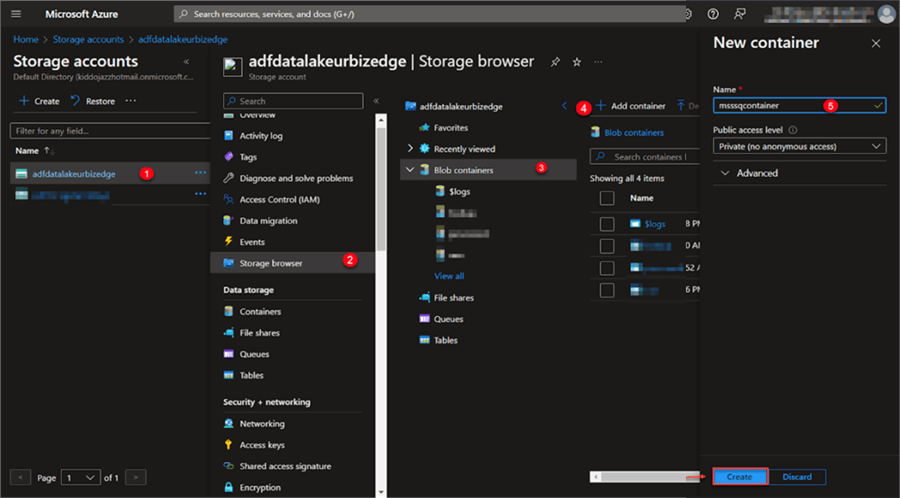
Add Container
A container enables customers to store massive amounts of unstructured data. From the image below navigate to "Blob Container" and click on "Add Container".
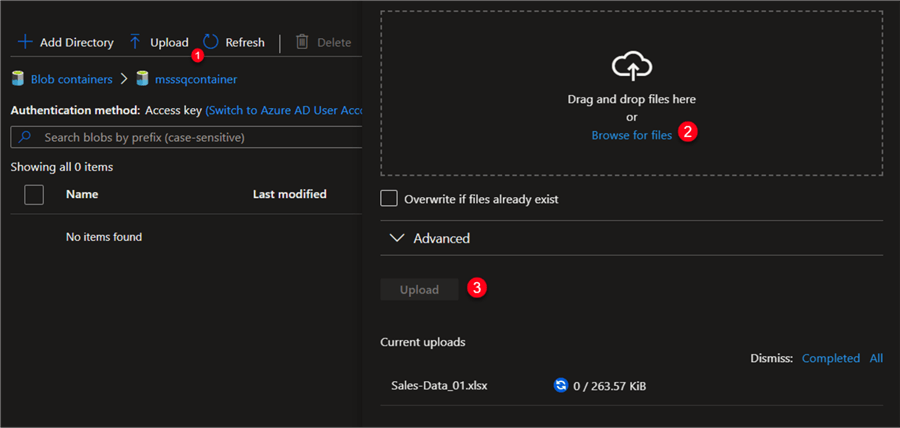
Upload Data to Storage Account
At this point, we will manually upload the document in the msssqcontainer we just created. In the container, click on the upload icon, then navigate to the file directory you want to upload. When you selected the file to use, click on Upload.
Connect Power BI Desktop to Azure Data Lake Gen2
Microsoft Power BI is fast becoming the number-one go-to tool for most data professionals all around the world. Power BI is a group of software services, applications, and connectors that combine to transform your unrelated data sources into coherent, engaging visuals, and interactive insights.
A private endpoint's primary advantage is that it makes it possible for on-premises and Azure services to connect to the data lake utilizing the Microsoft backbone network.
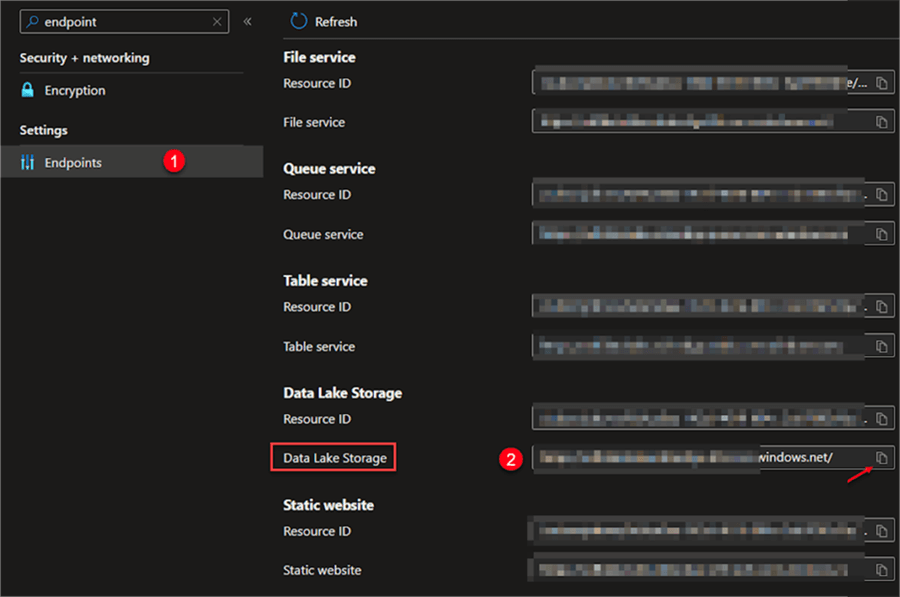
Step 1: Get Endpoints
In the Data Lake Storage Gen2 you created earlier, go to the search bar, and type "endpoint".

Step 2:
Search for Data Lake Storage in the Endpoint and copy the URL link. The URL link will be used in Power BI Desktop.
Now, that you got the URL link from the Azure Data Lake Storage Gen2 endpoint, we need to create a connection from Power BI Desktop to Azure.
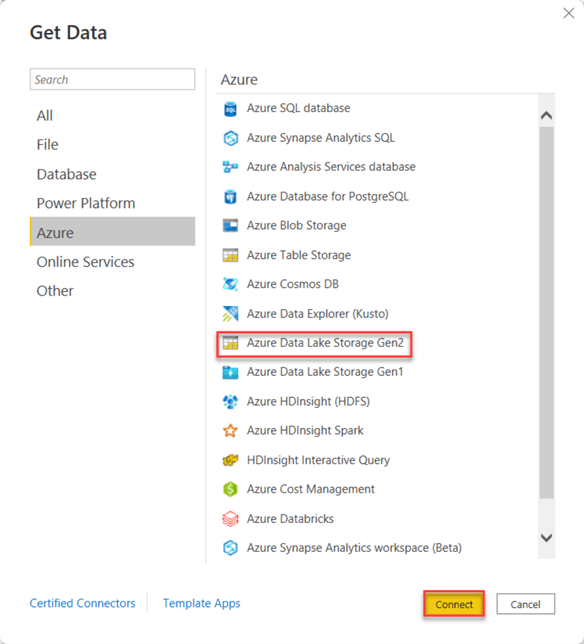
Step 3: Get Data
In your Power BI Desktop software, click on "Get Data", then select "Azure Data Lake Storage Gen2".
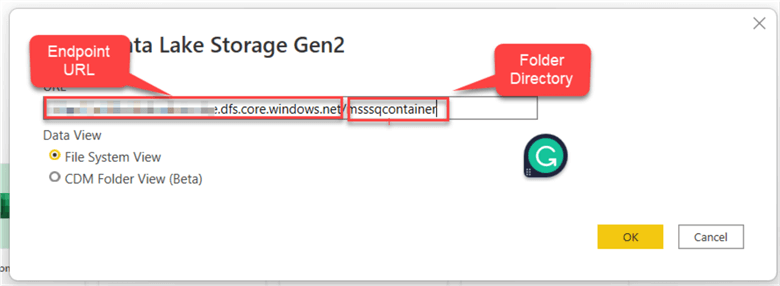
Step 4:
Paste the Endpoint URL link you got from Azure Storage. The Data view provides you with two options.
- File System View.
- CDM Folder View (Beta).
For this tutorial we will be using the "File System View", paste the Endpoint URL you copied from Azure Storage and add "/msssqcontainer" directory, then click "OK".
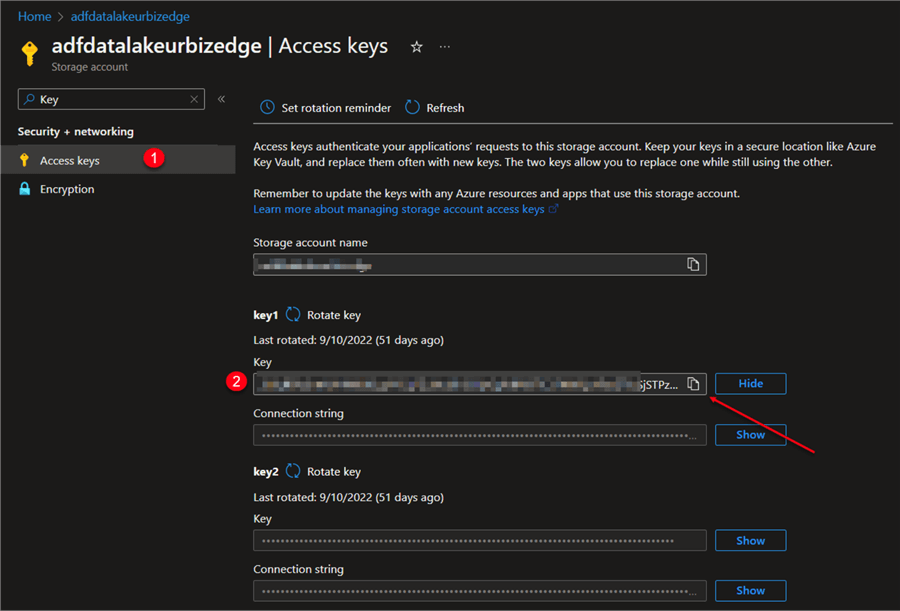
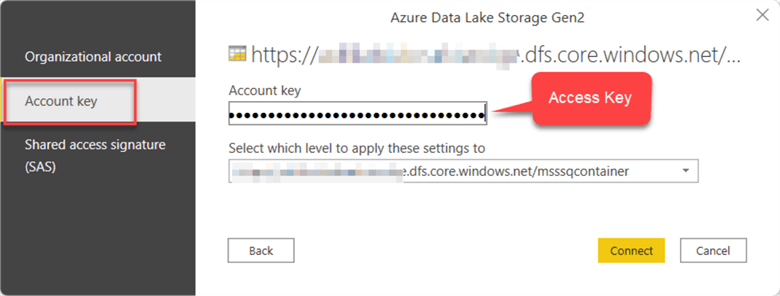
Step 5: Access Key
At this point we need to go back to the storage account we created and search for "Access Keys".
In the Key tab click on the show tab and copy the "Key". Note: The keys are usually confidential and only you as the user should have access to it, depending on your level of security.
Step 6:
Now, go back to Power BI Desktop, change from "Organizational Account" to "Account Key", and paste in the Secret key you just copied from the step above and click connect. This should open PowerQuery Navigator.
Build Sample Power BI Report
This is the process of changing the format, structure, and data values for analytic purposes. In the Power BI Query Editor, this is where data transformation processes occur.
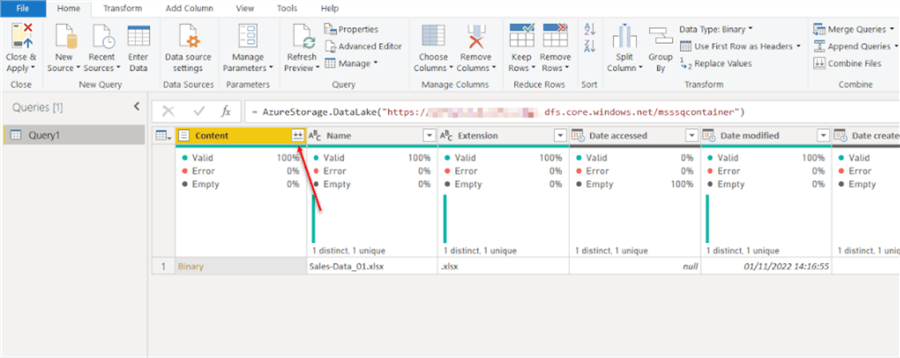
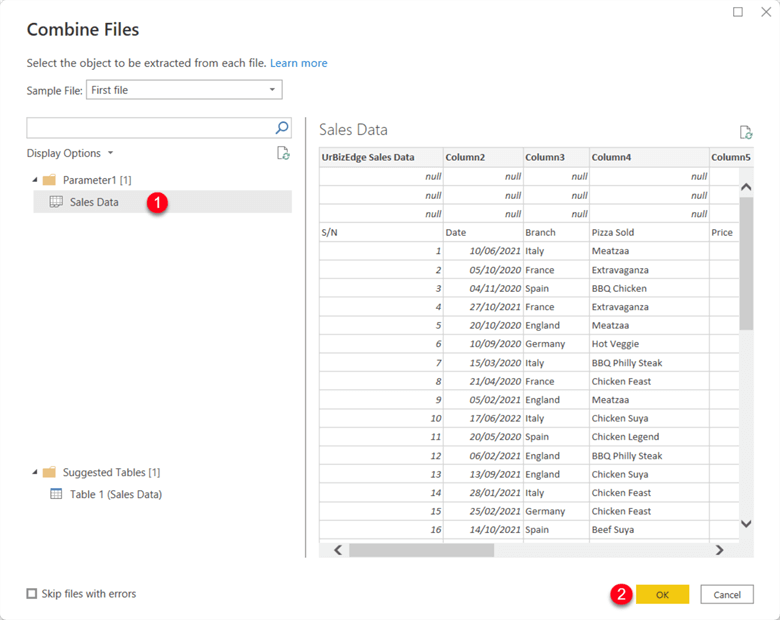
Step 1: Expand the Data
To expand the data, click on the combine file icon in the content column, this should open a preview of the data we want to work with.
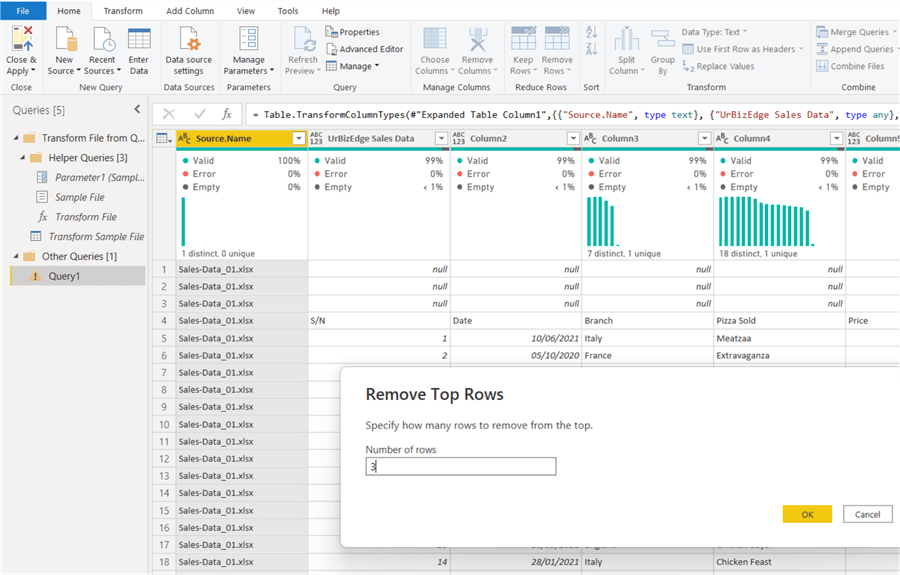
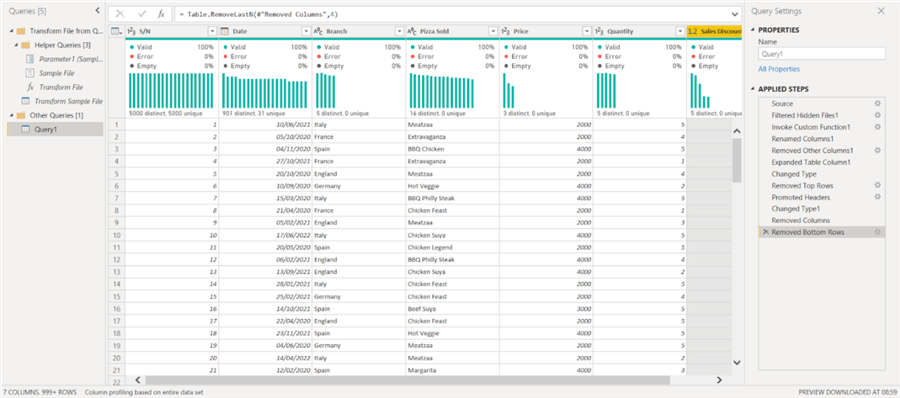
Step 2: Remove the Top Rows
Remove the top 3 rows and use the first row as the header.
Step 3: Remove All Unwanted Columns
Remove all columns that are not wanted for the analysis.
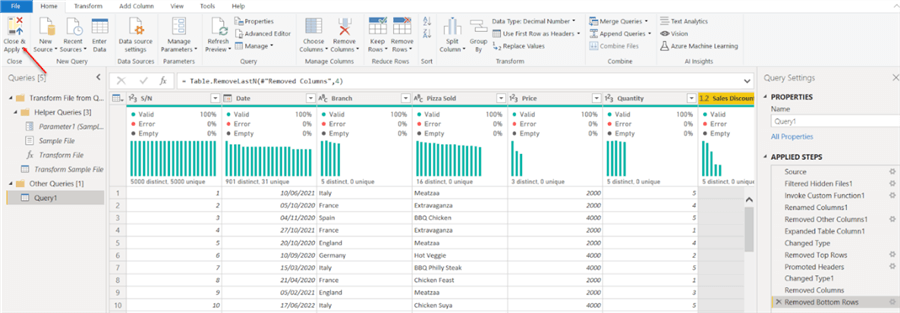
Step 4: Close and Apply
When you are satisfied with the transformation, click on the "Close & Apply" icon at the top left corner, this action applies the changes and closes the PowerQuery editor.
Final Report
At the end of your design, you should be able to develop a Power BI report better than the one below.

Conclusion
This article taught us how to create Azure Data Lake Storage Gen2, upload data from an on-premises source, and connect the storage account from Power BI to get business insight.
Microsoft Azure storage has many mass storage applications hence why it is a number one source for most data engineers for storing structured, semi, and unstructured data. This article is just a simple use case of the many possibilities of using Power BI with Azure storage. Try it out and explore it for yourself.
Next Steps
- Try creating an Azure SQL Database: SQL Azure Create Database Tutorial
- Migrate Data from on-premises data to Azure SQL using Azure Data Factory: SQL Server Azure Data Factory Tips.
- Connect your Power BI Desktop to Azure SQL: Create Power BI Connection to Azure SQL Database.
- Try creating a Report when you connected your Power BI to Azure SQL.
- Check out these related articles:

Temidayo Omoniyi is a Microsoft Certified Data Analyst, Microsoft Certified Trainer, Power Platform Developer, Azure Data Engineer, Content Creator, and Technical writer with over three years of experience.
Currently, he works as a data and business intelligence analyst for a training and consulting company in Lagos, Nigeria.
Temidayo enjoys creating educative content on YouTube, LinkedIn, Twitter, and other online platforms. He loves sharing his knowledge and writing about systems, applications, tools, and processes.
Apart from training, writing, and coding, you will find him watching and reading Anime. He is a big fan of DC Comics.
- MSSQLTips Awards: Trendsetter (25+ tips) – 2025 | Author of the Year – 2023, 2024


Hello Charles,
DBFS fully supports the hierarchical namespace structure of ADLS Gen2, enabling navigation through folders and subfolders like a traditional file system. This is essential for working with organized data hierarchies and complex file structures while Blob Endpoint can access ADLS Gen2 data, it treats the storage as flat, making it challenging to manage data organized in folders and subfolders.
But both approaches are fine depending on what you want,.
Hi, Why are you using the DFS Endpoint and not the BLOB Endpoint of that container? What is the reason? Regards