Overview
To get started with Snowflake, you need to set-up an account through the Snowflake website. As mentioned, in the overview, using Snowflake is not through the Azure portal.
Explanation
Follow the steps below to register and signup for a trial Snowflake account.
Register for a Trial Account
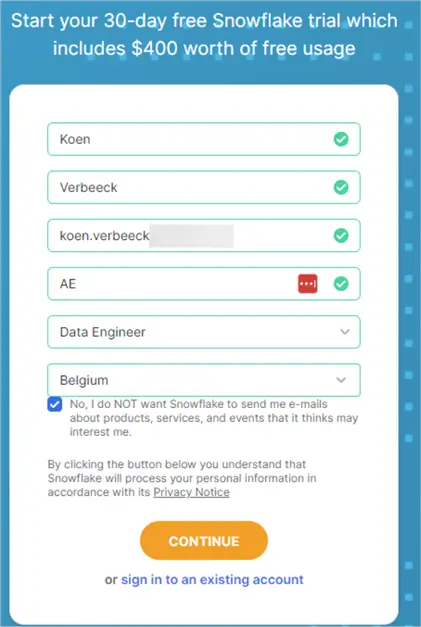
Simply click on the “Start for Free” button on the home page. In the form, fill out your information:
In the account configuration, choose an edition to use. The documentation has more information about the differences between editions. In short, the higher the edition, the more support and security you get (and the more you pay). For the tutorial, the Standard edition suffices.
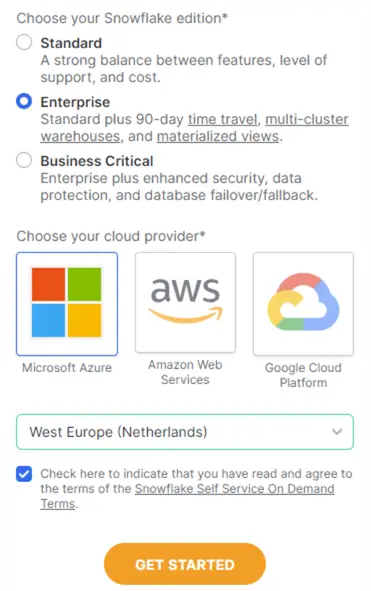
On the same screen, choose the cloud provider you want to use. Although there should be no major differences, some features might not be available in all cloud providers. For the tutorial, choose Microsoft Azure. From the dropdown, choose a region close to where your data is:
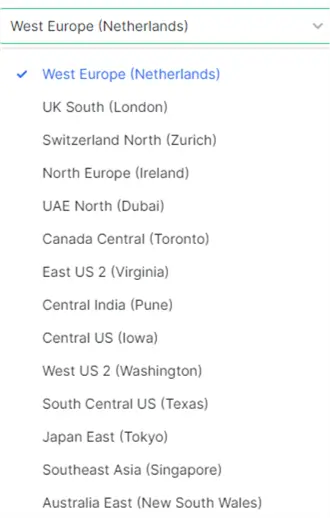
As you can see from the screenshot, Snowflake is not available in every possible Azure region. It’s possible you might get a small survey asking you why you want to try out Snowflake, but there’s an option to skip it.
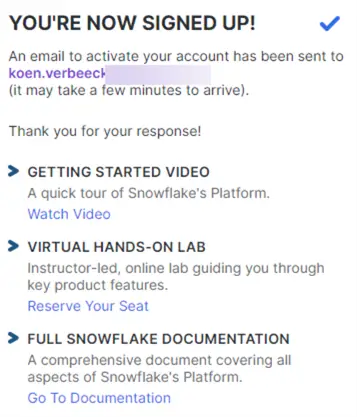
And that’s it!
Activation Email and Getting Started with Snowflake
Behind the scenes, Snowflake is setting up your account in the cloud provider of your choice. After a couple of minutes, you get an activation e-mail:
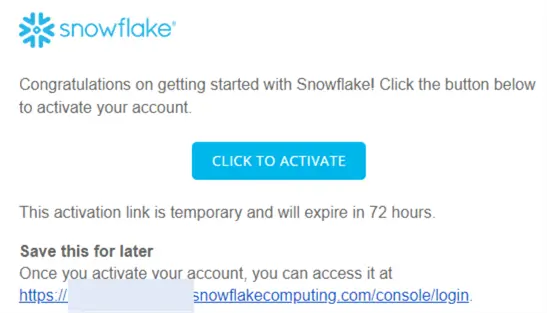
After clicking the activation link, you need to choose a username and a password:
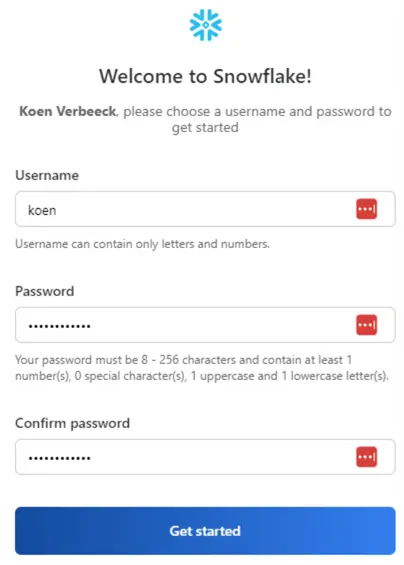
Click Get Started to get to your personal workspace:
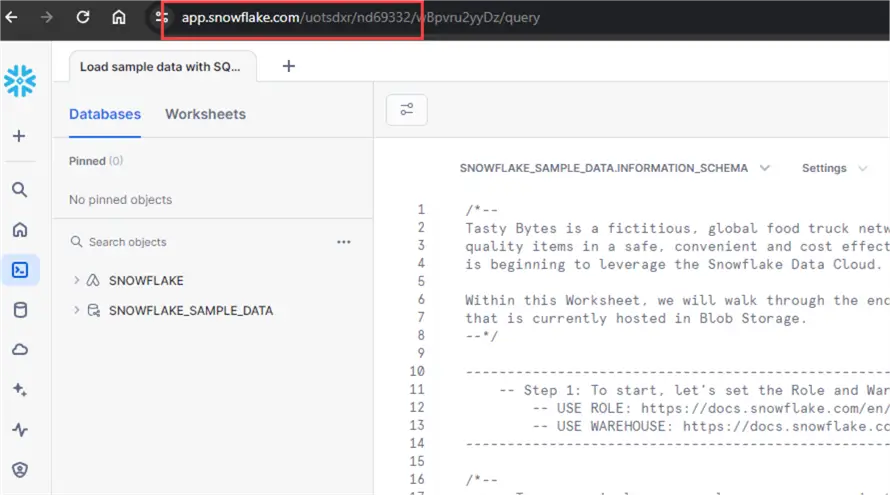
You’ll have a unique URL with your account name in it to access your Snowflake environment:
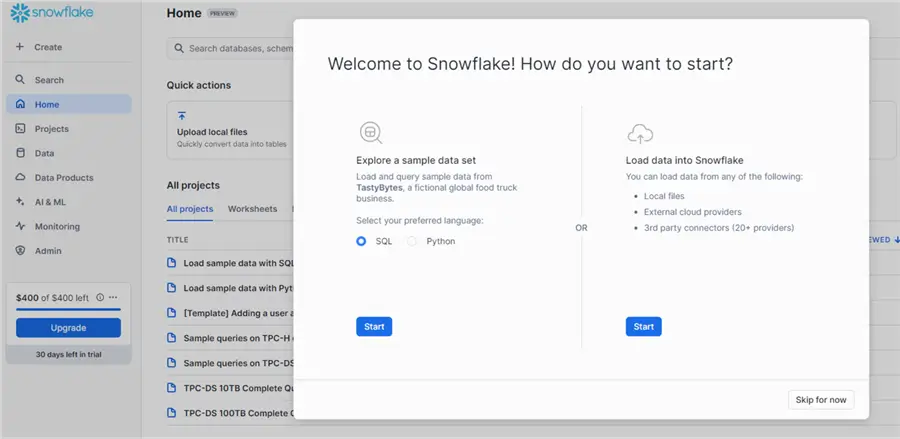
During the account set-up, some (sample) databases were provided as well:
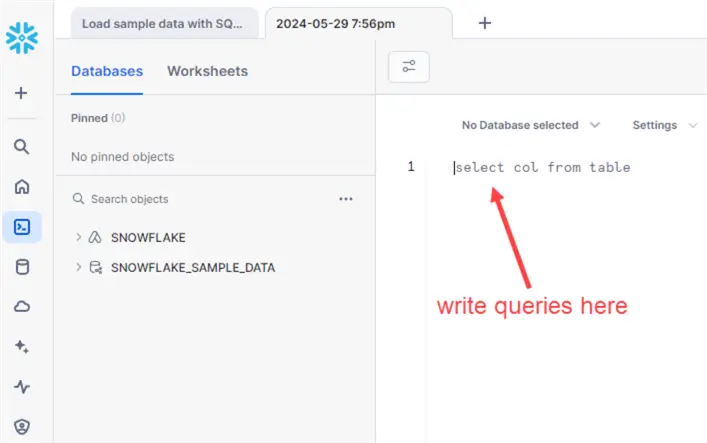
To start writing SQL, you need to create a worksheet:

View Snowflake Account Information
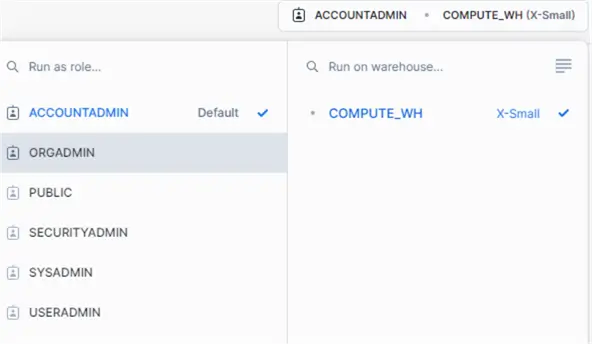
By default, you’re logged in using the ACCOUNTADMIN role which is the super admin role and needed to view and change account information.
This will give you access to certain menus in the admin section:
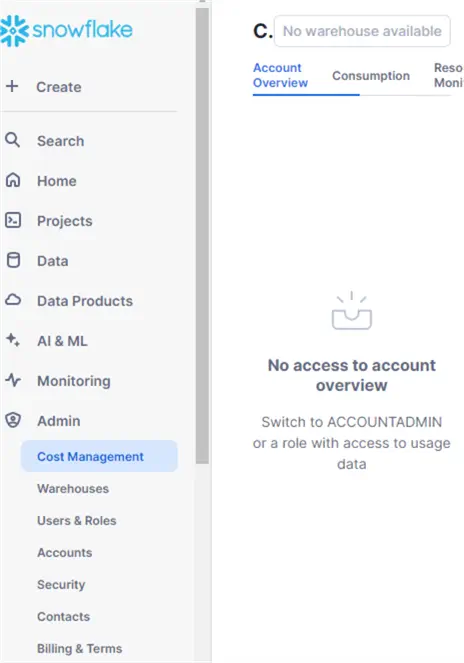
There you can view your consumption, create extra security roles, or manage resource monitors.

Additional Information
- For more information about trial accounts and how to convert them to a paid account, check out this page.

Koen Verbeeck is a seasoned business intelligence consultant with over a decade of experience with the Microsoft Data Platform. He holds several certifications, including Azure Data Engineer. He’s a prolific writer, with over 375 articles on technologies such as Microsoft Fabric, SSIS, ADF, SSAS, SSRS, MDS, Power BI, Snowflake and Azure services. He has spoken at various events such as PASS, SQLBits, dataMinds Connect and many others. He frequently delivers educational webinars on MSSQLTips.com. For his efforts, Koen has been awarded the Microsoft MVP data platform award for many years.
- MSSQLTips Awards:
- Leadership Award (200+ Tips) – 2021
- Author of the Year – 2014/2020/2022
- Author Contender – 2024/2025
Nice