Problem
At our company we’re using Azure Data Factory as the orchestrator for our data pipelines in Azure. We need to load flat files from various locations into an Azure SQL Database. The schema of the flat files can change per type of file and even the delimiter changes sometimes. Manually creating a dataset and a pipeline in ADF for each file is tedious and time consuming. Is there a better way to do this?
Solution
In Azure Data Factory, a dataset describes the schema and location of a data source, which are .csv files in this example. However, a dataset doesn’t need to be so precise; it doesn’t need to describe every column and its data type. You can also use it as just a placeholder for the .csv file type in general. For example, if you have two .csv files, the first with the comma as delimiter and the second one with the semicolon as delimiter, you can still use the same dataset. You only need to put a parameter on the definition of the delimiter.
Furthermore, using the For Each activity we can loop over metadata and load multiple files in parallel. When you combine both features, we can create a metadata-driven pipeline where we will load multiple types of flat file dynamically. In this tip, we will lay out the architecture for such a solution.
Test Set-up
We’re going to load 3 files stored in Azure Blob Storage into an Azure SQL DB. The files contain data about the top 250 movies. The first file contains the first 100 movies, using a semicolon:

The second file contains the next 200 movies, also with a semicolon:

The third file contains the last 50 movies. However, the file was created on a different system and there the comma was used as a delimiter:

The three files are stored inside an Azure Blob Container. The first two in a virtual folder called semicolon, the last file in a virtual folder named comma.

This is our source data. To be able to drive our data factory pipeline dynamically, we need metadata. This metadata is stored in a table using the key-value pair method. This allows us to story any type of metadata in the table. The table has the following schema:
CREATE TABLE dbo.Metadata_ADF(
    ID INT IDENTITY(1,1) NOT NULL,
    SourceType VARCHAR(50) NOT NULL,
    ObjectName VARCHAR(500) NOT NULL,
    ObjectValue VARCHAR(1000) NOT NULL
To load the files, we need the following metadata:
- The location in the container, aka the virtual folder.
- The delimiter used
- The destination table name
The following SQL scripts inserts the metadata into the table:
INSERT INTO dbo.[Metadata_ADF]
(
    [SourceType]
   ,[ObjectName]
   ,ObjectValue
)
VALUES  ('BlobContainer','semicolondata','semicolon')
        ,('BlobContainer','commadata','comma'

INSERT INTO dbo.[Metadata_ADF]
(
    [SourceType]
   ,[ObjectName]
   ,ObjectValue
)
VALUES  ('Delimiter','semicolondata',';')
        ,('Delimiter','commadata',','

INSERT INTO dbo.[Metadata_ADF]
(
    [SourceType]
   ,[ObjectName]
   ,ObjectValue
)
VALUES  ('SQLTable','semicolondata','topmovies_semicolon')
        ,('SQLTable','commadata','topmovies_comma'
The destination tables are created using the following DDL:
CREATE TABLE [dbo].[topmovies_semicolon](
   [Index] [BIGINT] NULL,
   [MovieTitle] varchar(500) NULL


CREATE TABLE [dbo].[topmovies_comma](
   [Index] [BIGINT] NULL,
   [MovieTitle] varchar(500) NULL
The ADF Pipeline
Step 1 – The Datasets
The first step is to add datasets to ADF. Instead of creating 4 datasets: 2 for blob storage and 2 for the SQL Server tables (each time one dataset for each format), we’re only going to create 2 datasets. One for blob storage and one for SQL Server. For each dataset, the relevant attributes will be updated dynamically at runtime by parameters. Let’s start with the blob dataset.
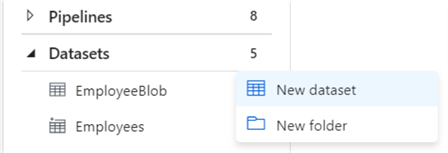
In the ADF editing environment, click on the ellipsis next to the datasets header to add a new dataset:
Choose Azure Blob Storage as the data store:

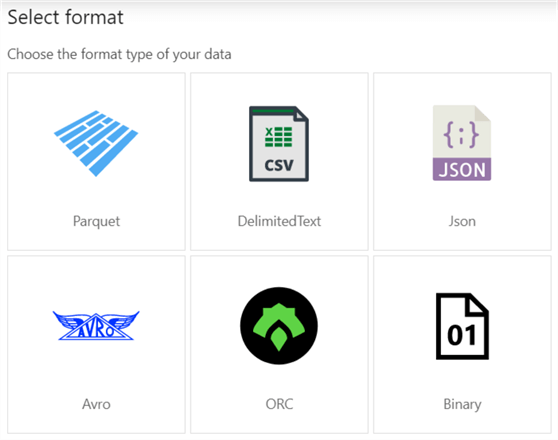
In the next screen, you need to choose the format of your data, which is DelimitedText in our example.
At the time of writing, this is new functionality. In older tips, such as Connect to On-premises Data in Azure Data Factory with the Self-hosted Integration Runtime – Part 2, you can see this step is not present when a dataset on blob storage is created.
Next, we need to specify a name and if the first row contains headers.

For the Linked service, you can either choose an existing service or create a new one (an example is given in this tip). In the next screen, click on Browse to choose the container.

Using the dialog, navigate to the correct container.

Once the dataset is created, go to the Schema tab.
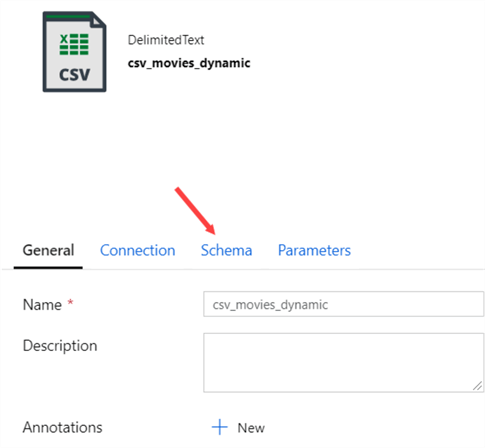
Here we can specify the metadata of the columns. It might be possible that ADF automatically picked up some metadata about the columns, if a file was present. Since we want a truly dynamic dataset, we’re going to clear all metadata.

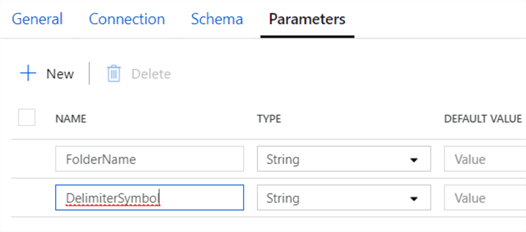
For this to work, the destination table needs to have the exact same columns as the source files. Next, we add some parameters to the dataset in the Parameters tab. We need a parameter for the folder and a parameter for the delimiter:
In the Connection tab, we can assign the parameters to specific fields of the configuration. When you click for example in the Directory field, a link will appear to add dynamic content.

When you click on this link, you can simply select the parameter from the list:

This will add an expression to the text box at the top:

Click Finish to go back to the connection tab. Similarly, we can add a parameter for the delimiter. But first we have to check the Edit checkbox, so the dropdown changes into a text box.

When both parameters are assigned, the connection tab should look like this (observe there’s no value specified for the file name):

We also need a dataset for our sink, which is SQL Server. Add a new dataset and choose Azure SQL Database as the data store:

Specify a name for the dataset, create a linked service or choose an existing one and do not import the schema. The table name can be left empty.

For this dataset, we need to create one parameter: the table name.

In the Connection tab, choose Edit beneath the table, specify dbo as the schema and add the parameter in the second box as the table name.

Conclusion
This concludes the first part of the tip. We have created a key-value pair table in SQL Server holding all of the metadata. This metadata will populate the parameters of the datasets we created. Stay tuned for the second part of this tip, where we will create the metadata-driven pipeline which will copy multiple blob files to a database at once.
Next Steps
- To get started with Azure Data Factory, check out the following tips:
- You can find more Azure tips in this overview.
- Download the files here from this tip.

Koen Verbeeck is a seasoned business intelligence consultant with over a decade of experience with the Microsoft Data Platform. He holds several certifications, including Azure Data Engineer. He’s a prolific writer, with over 375 articles on technologies such as Microsoft Fabric, SSIS, ADF, SSAS, SSRS, MDS, Power BI, Snowflake and Azure services. He has spoken at various events such as PASS, SQLBits, dataMinds Connect and many others. He frequently delivers educational webinars on MSSQLTips.com. For his efforts, Koen has been awarded the Microsoft MVP data platform award for many years.
- MSSQLTips Awards:
- Leadership Award (200+ Tips) – 2021
- Author of the Year – 2014/2020/2022
- Author Contender – 2024/2025